/ Knowledge base /
How to add custom products to your emailsHow to add custom products to your emails
Want to showcase specific products in your email campaigns? With theMarketer, you can easily add custom product selections to your emails, whether you're promoting certain brands or high-margin items.
Here’s how to do it:
1. Open the email editor
Whether you're creating a newsletter campaign or editing an email in an automated flow, the first step is to access the email editor.
On the right-hand side, you’ll find the ‘Content’ tab, which you can use to drag and drop elements into your email.
2. Add the ‘Custom product grid’ block
Scroll down in the ‘Content’ tab, then drag and drop the ‘Custom product grid’ block into your email wherever you'd like your products to appear.
3. Select and customize your products
A new window will open, allowing you to manually search, filter, and customize your product selection.
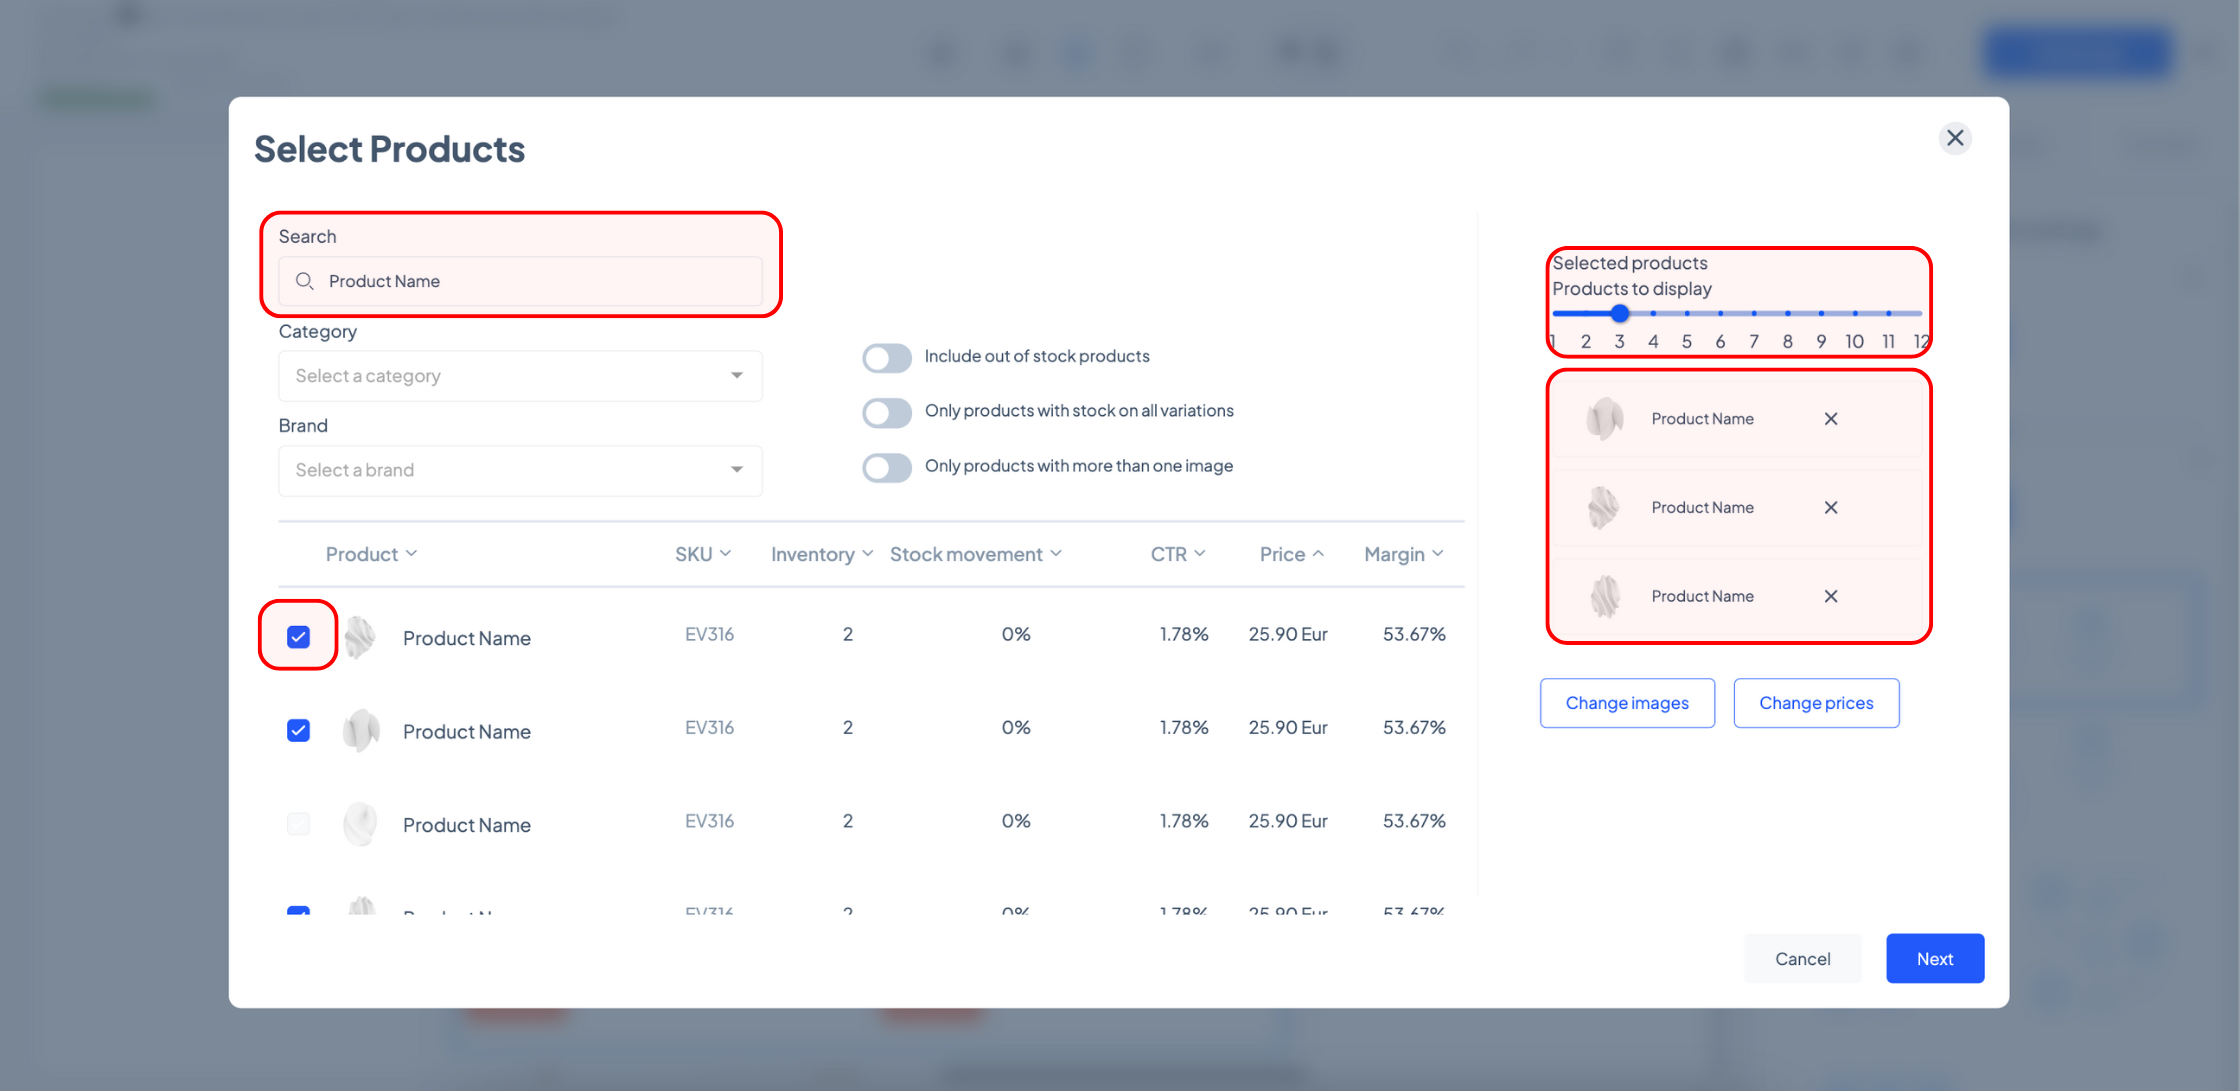
Use the ‘Search’ field to look up products by name, SKU, or product link. Your search results will appear in the table below. Click on a product to select it. Once you do this, it will be marked with a checkmark and added to the summary list on the right-hand side.
Above the summary list, you can determine how many custom products your block will have using the slider.
To remove a product, uncheck it in the table or click the ‘X’ in the summary list.
If you don’t have specific products in mind, use the drop-down menus to filter products based on category or brand, or click the toggles to enable additional filters and refine your selection.
You can also click the arrows next to any column heading (e.g., ‘Price’ or ‘Margin’) to sort the results based on those attributes.
For example, if you want to showcase best-margin dresses that are in stock, you need to select ‘Dresses’ in the ‘Category’ dropdown and enable the ‘Only products with stock on all variations’ toggle. Then click the ‘Margin’ column header twice to sort products in descending order. And lastly, select the top items from the table.
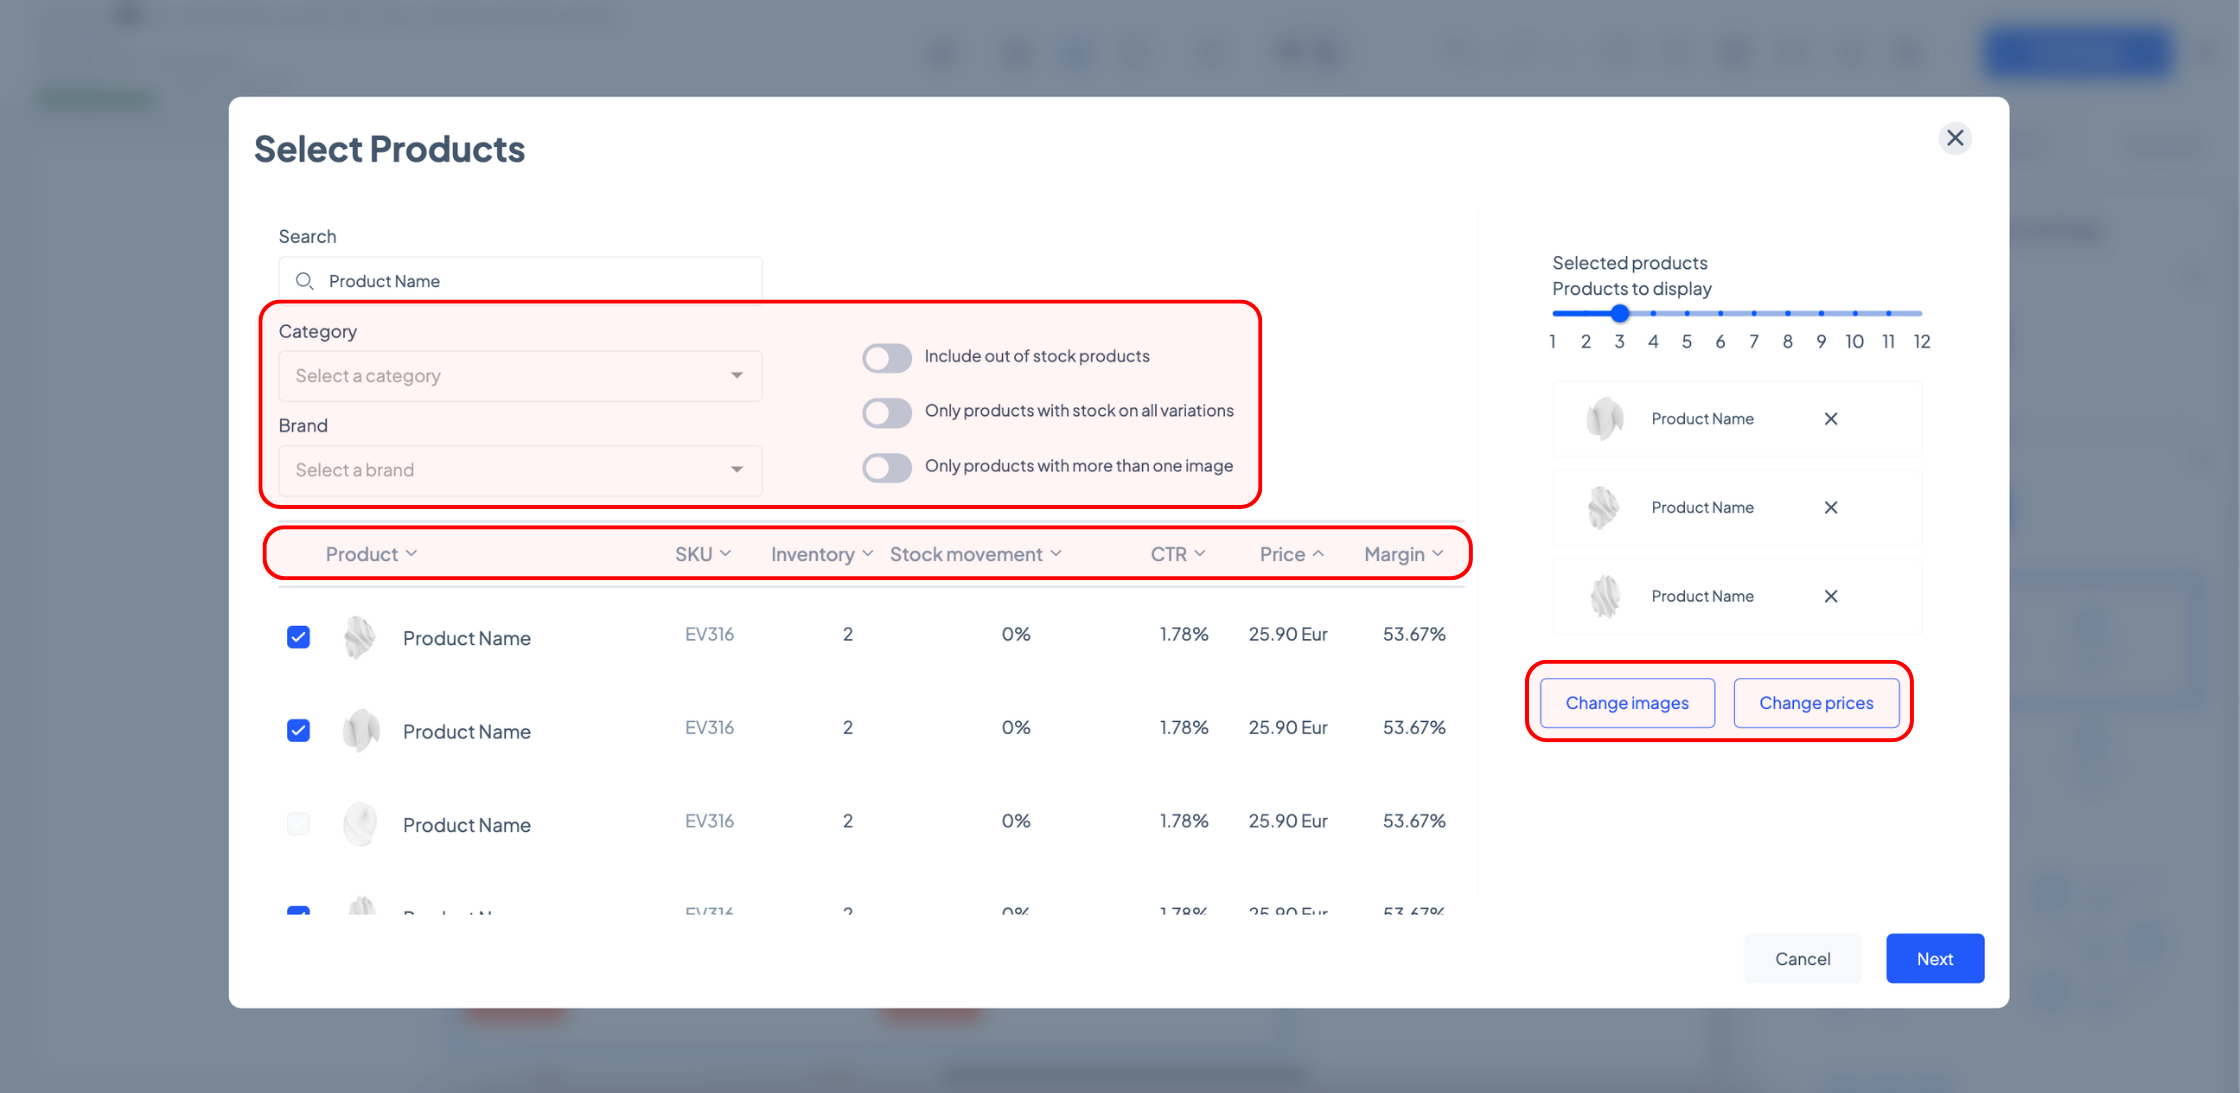
theMarketer also allows you to customize how your products appear in the email.
To change the product image, click the ‘Change images’ button.
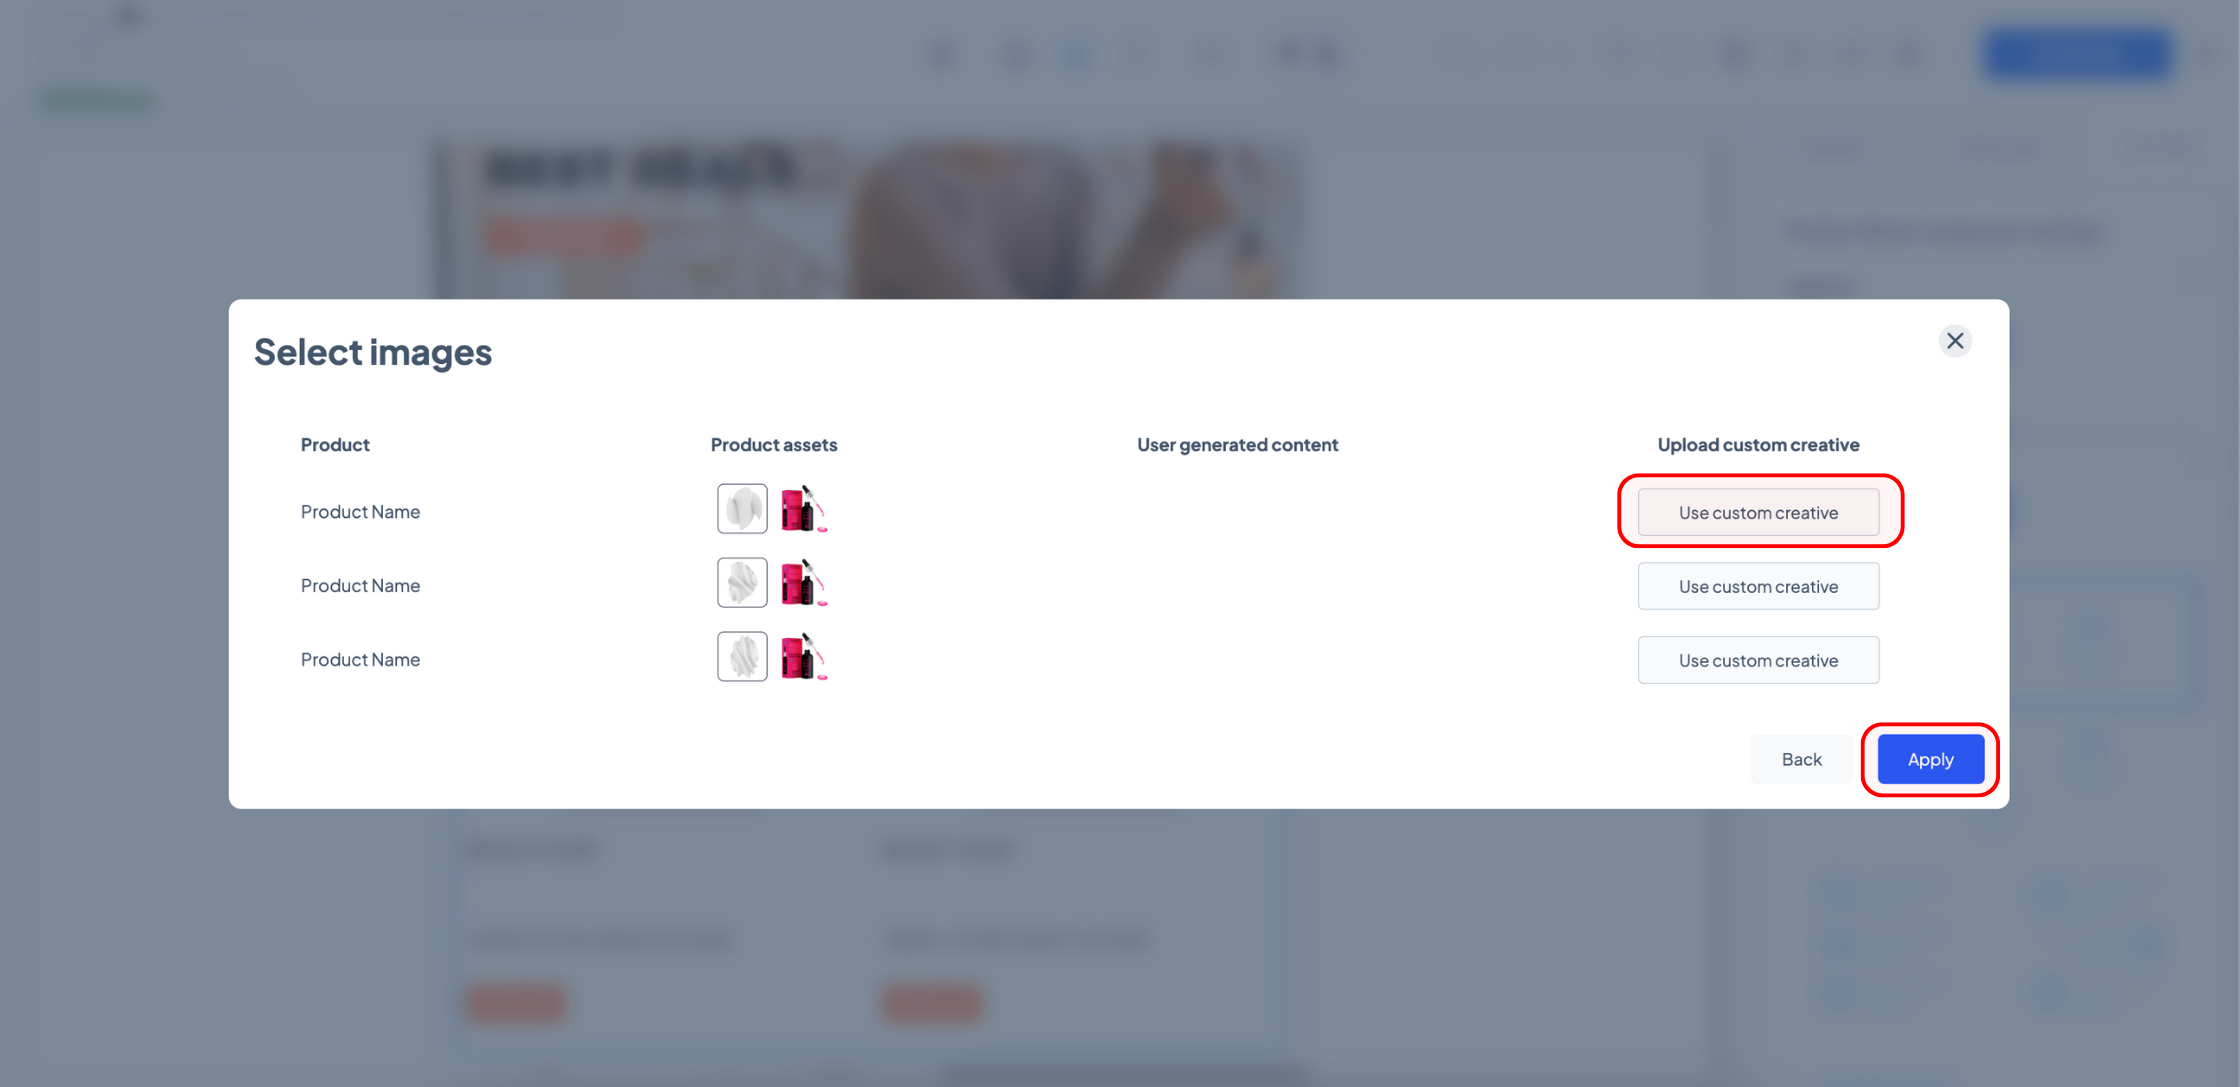
In the new window, you can select a new photo based on existing product images, user-generated content (images updated by customers), or you can upload another image by clicking the ‘Use custom creative’ button. Once you’re happy with your selection, click ‘Apply’.
Similarly, to change the product price displayed, click the ‘Change prices’ button.
In the new window, type the updated product prices and, once you’re done, click ‘Apply’.

Once you’re happy with your product selection, click ‘Next’.
4. Adjust product display & design
Your custom products will now be displayed in the body of your email.
You can move, duplicate, delete, or save your custom product block using the in-line options. Alternatively, you can further edit it using the options under the ‘Settings’ tab on the right-hand side.
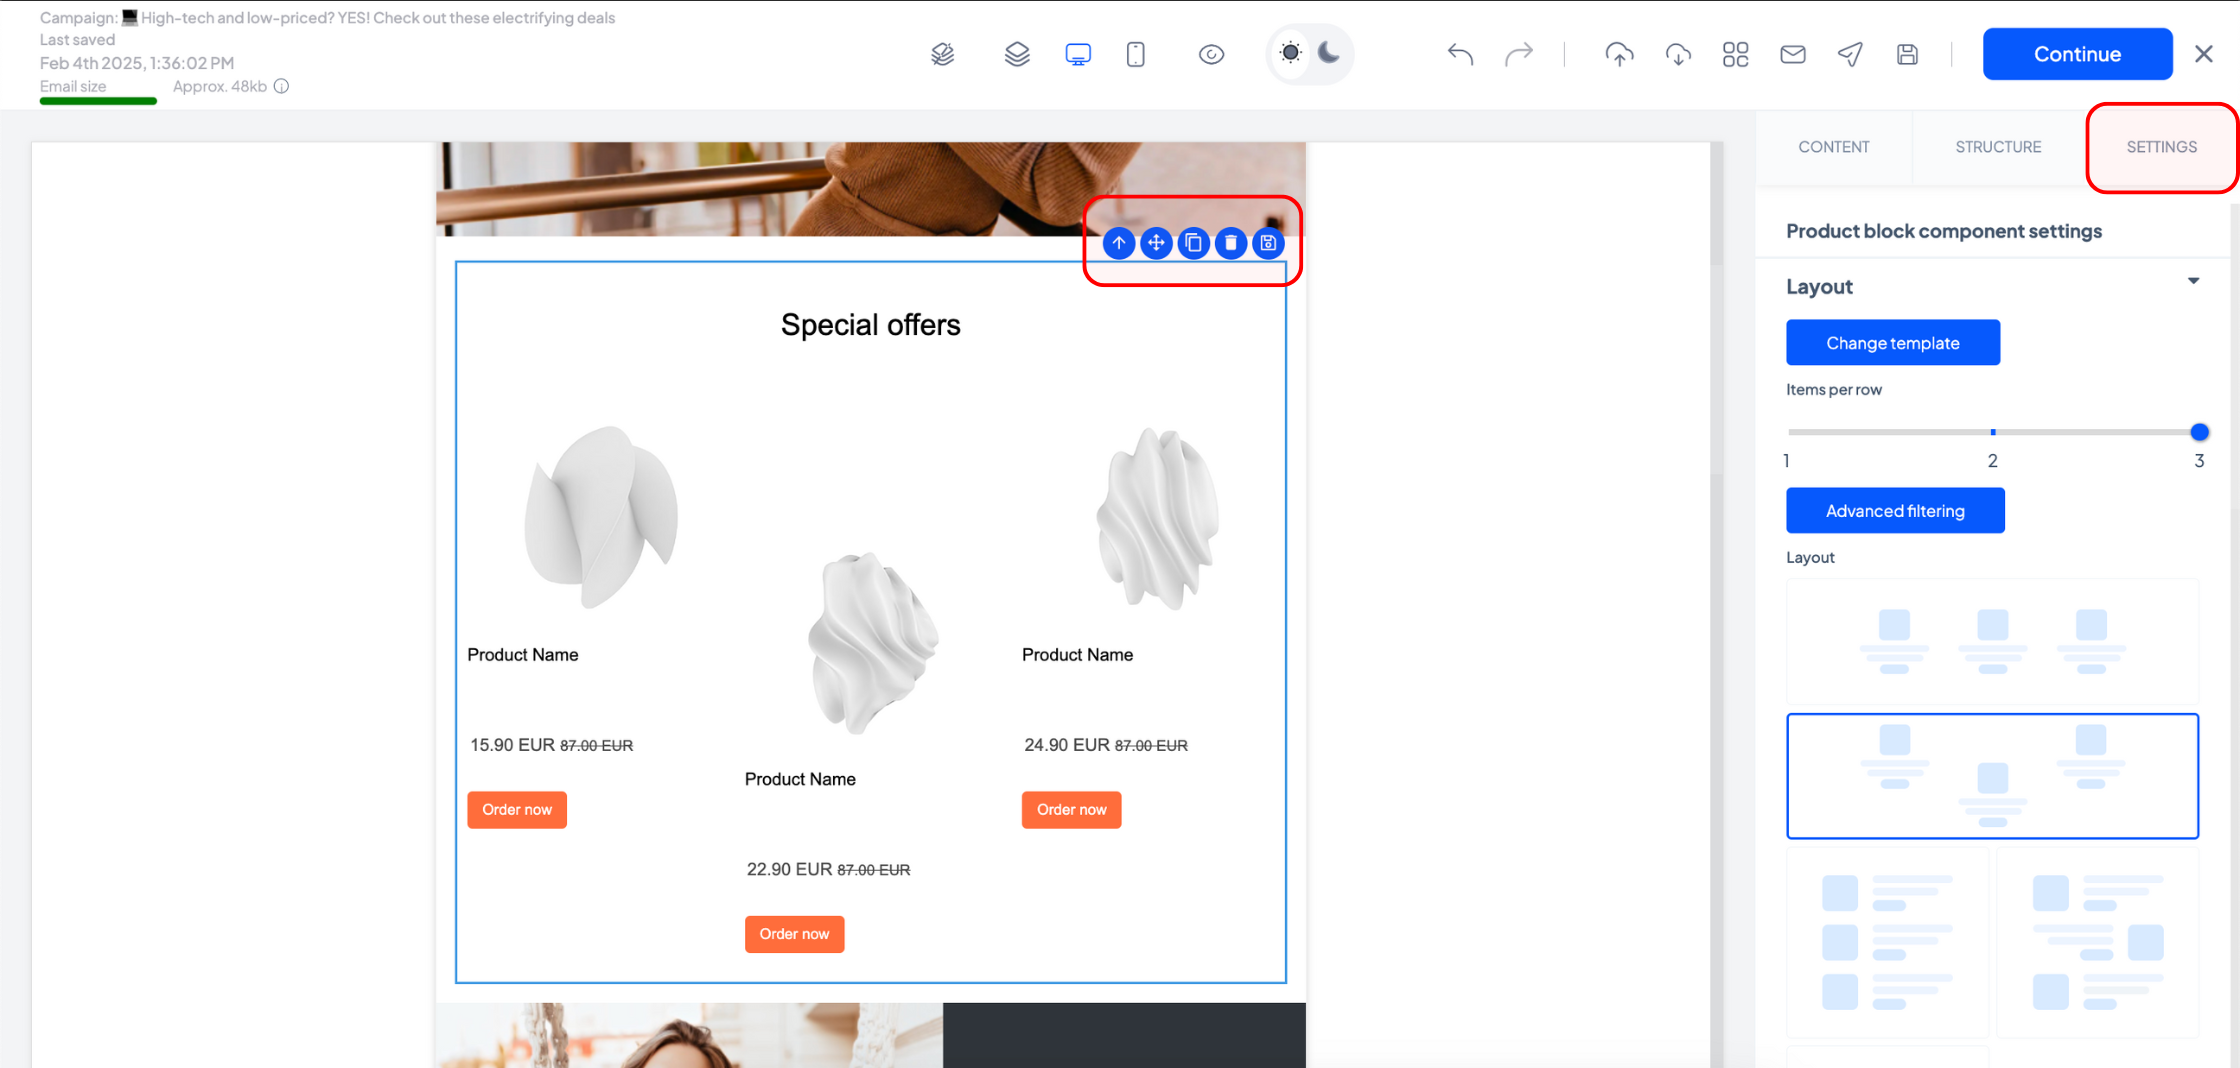
The editor block settings enable you to adjust, hide, or display numerous design elements, including the title of the product block, and the brand, name, rating, or discount of each product.
You can also hide the entire block on mobile or desktop if you wish to.
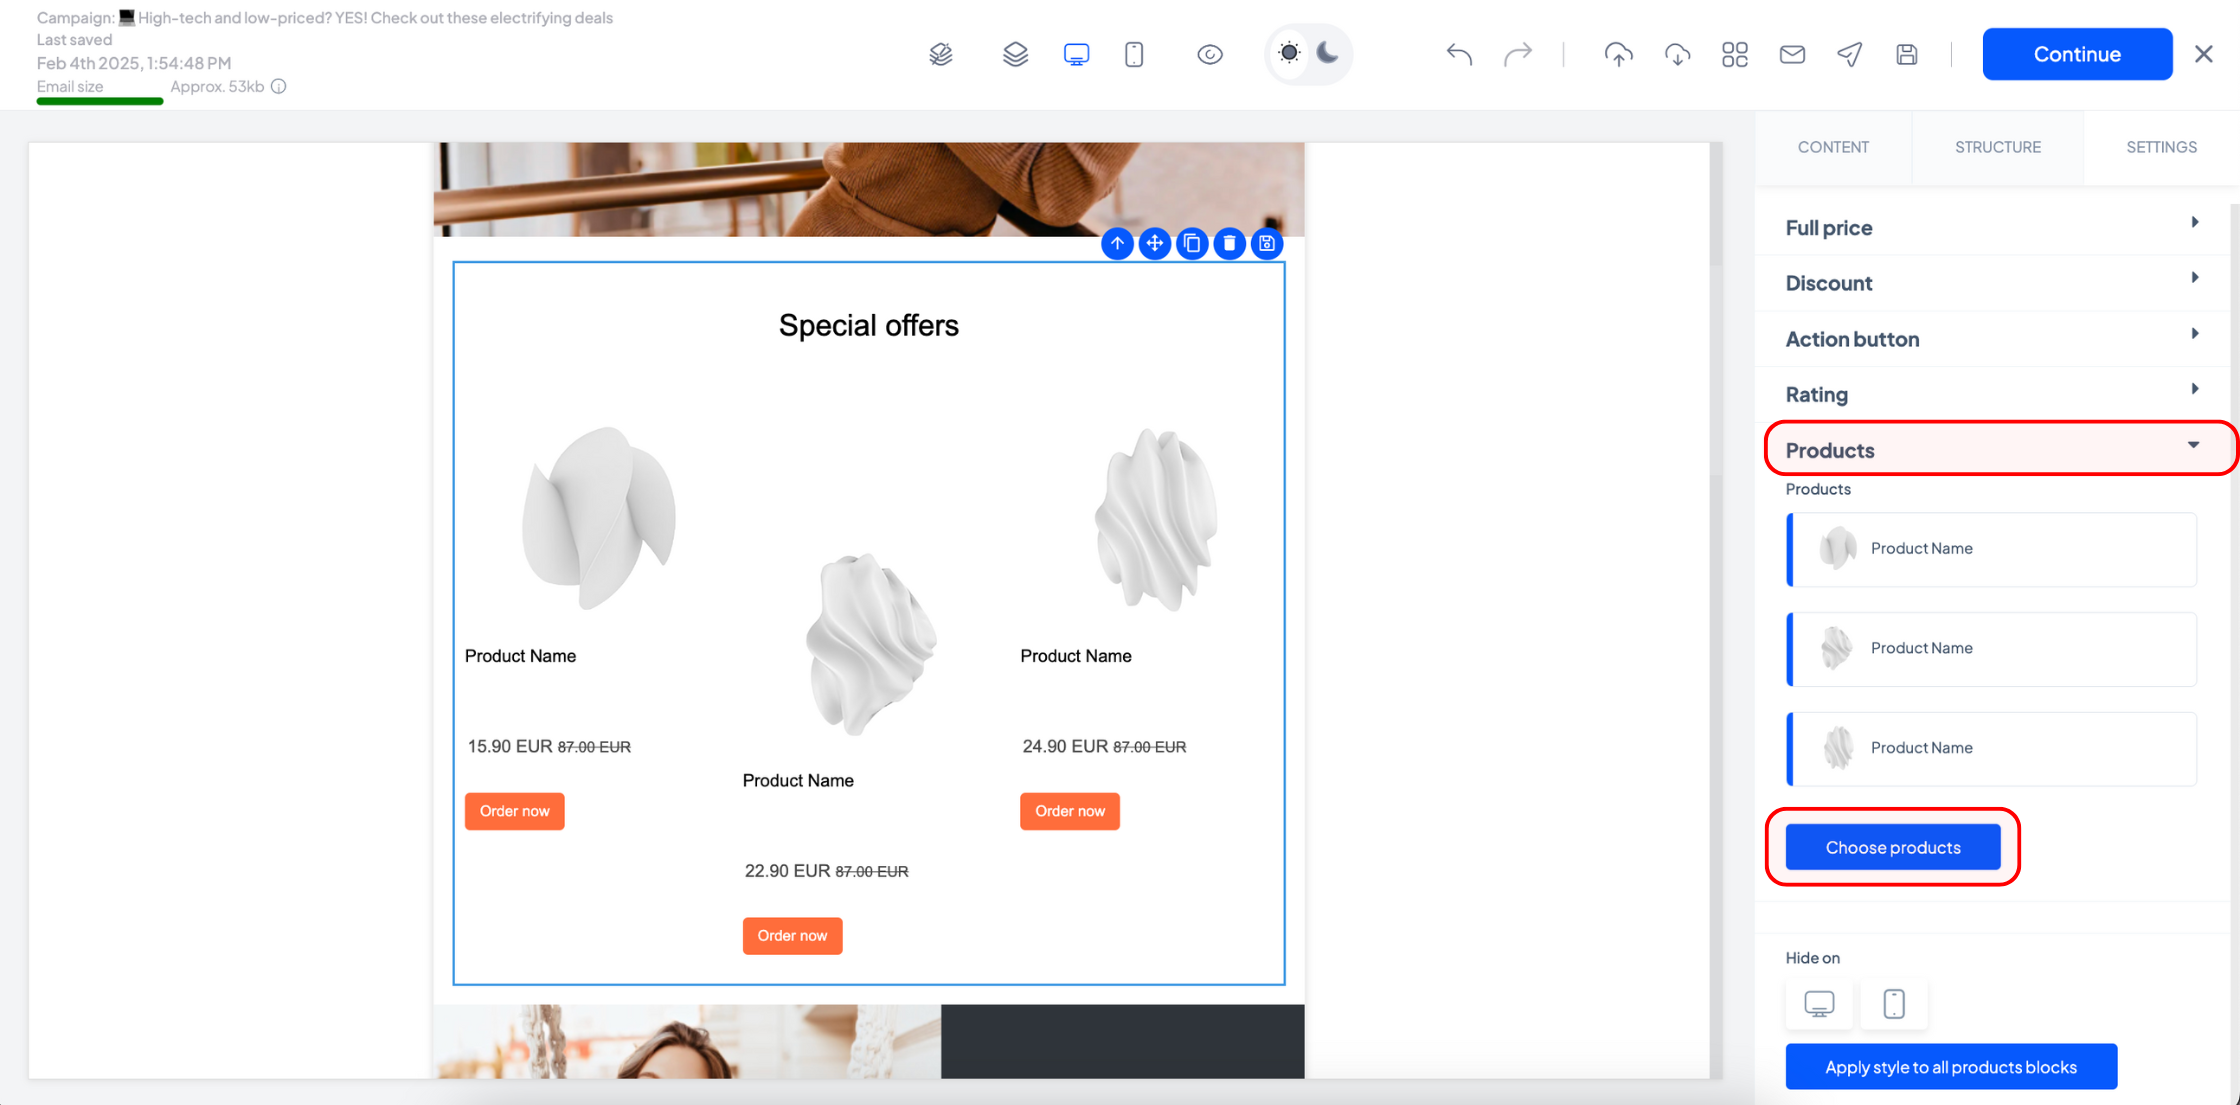
To replace your custom items, expand the ‘Products’ section and click the ‘Choose products’ button.
And that’s it! Just finalize the rest of your email content, test it on different devices, and send it out to boost conversions with personalized recommendations.
Related articles
STILL HAVE QUESTIONS?