/ Knowledge base /
How to add discount codes to your emailsHow to add discount codes to your emails
Adding discount codes to your emails is a great way to incentivize purchases and boost conversions. Whether you’re sending out a newsletter campaign or an automated email, theMarketer makes it easy to add discount blocks and customize them to fit your offer.
Here’s how:
1. Open the email editor
Whether you're creating a newsletter campaign or editing an email in an automated flow, the first step is to access the email editor.
On the right-hand side of the screen, you’ll find the ‘Content’ tab. This is where you can drag and drop elements into your email.
2. Add a Discount block
To insert a discount block, scroll down in the ‘Content’ tab, then drag and drop the ‘Discount’ block into your email.
3. Select a template
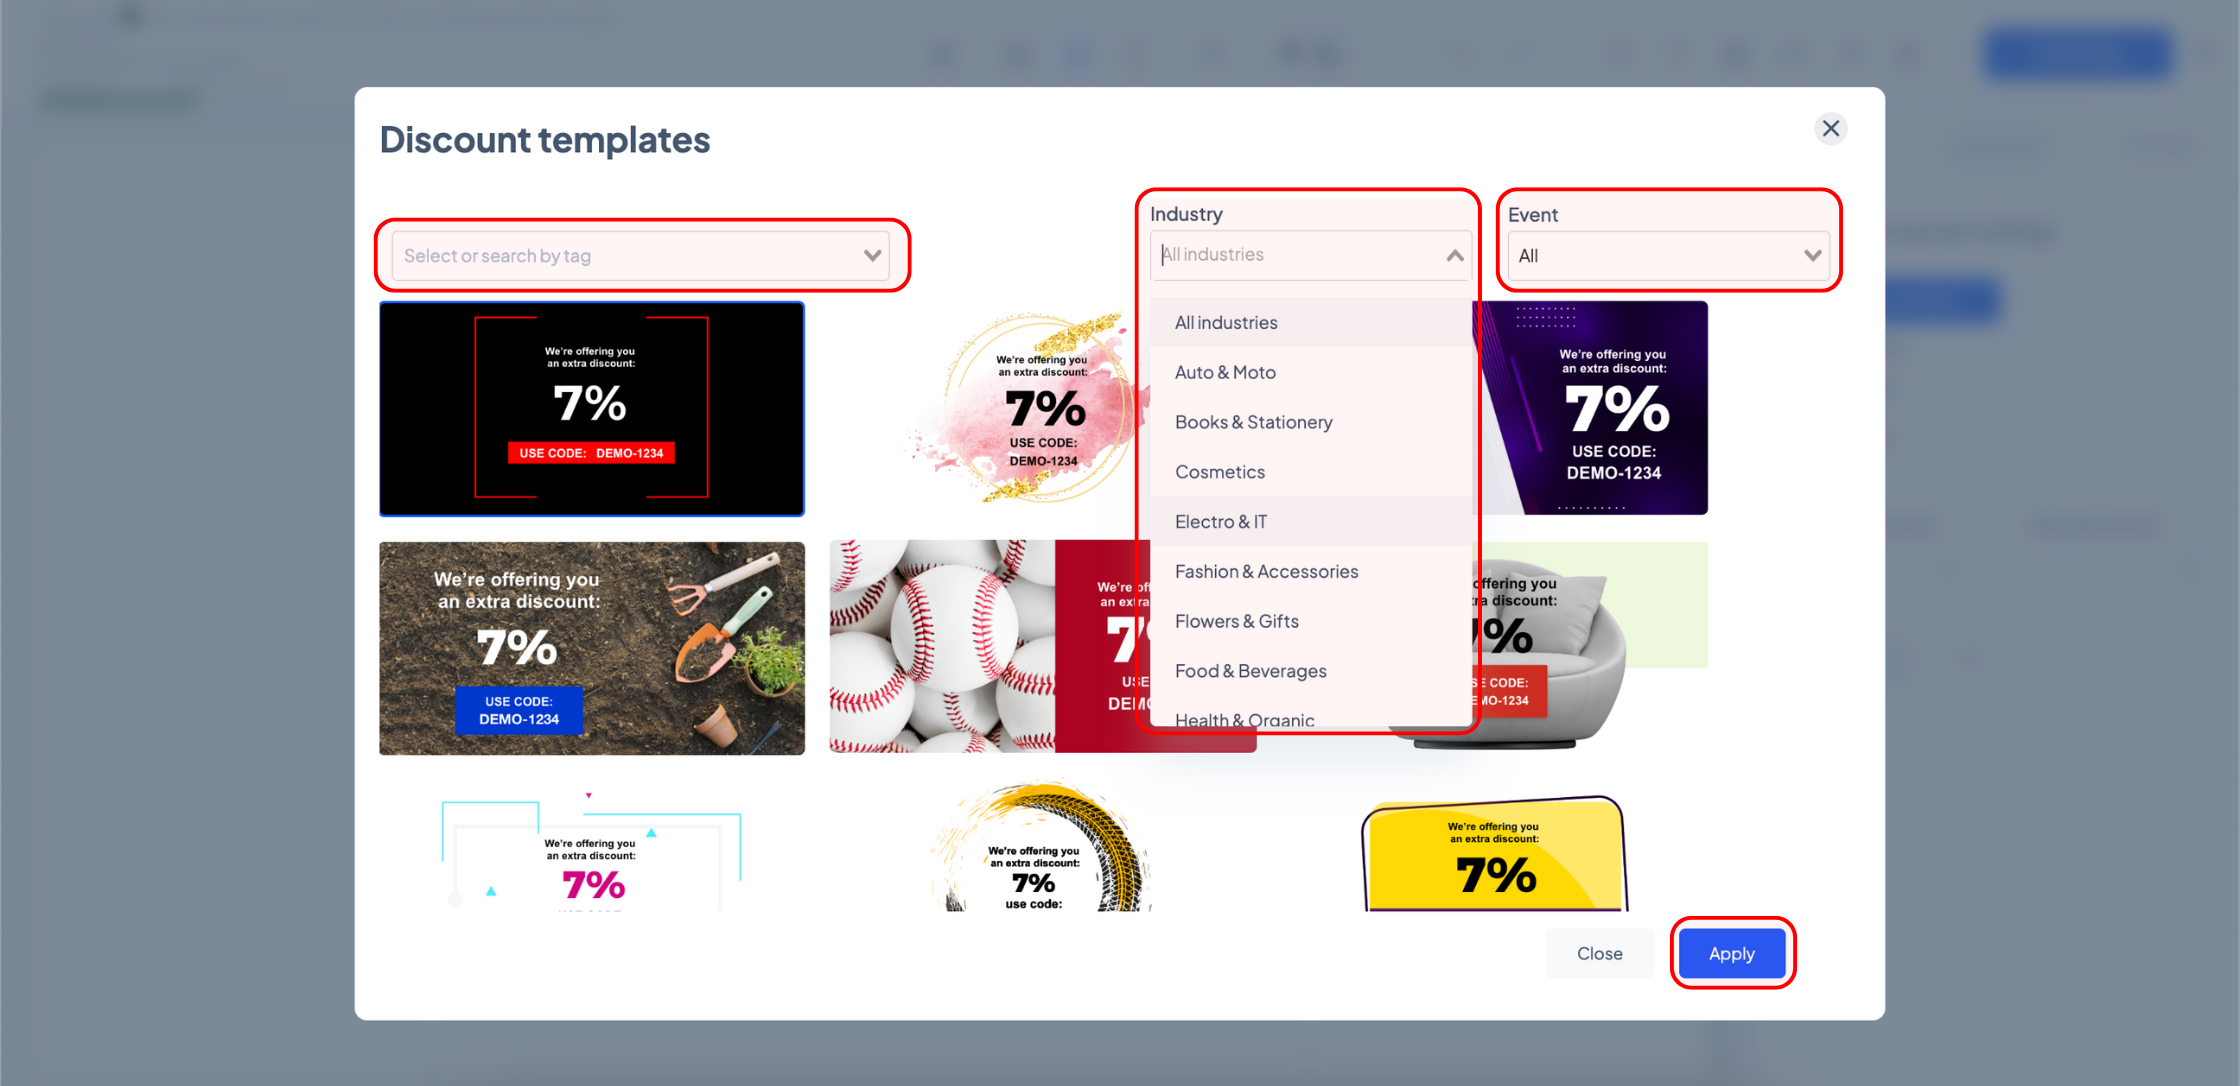
A new window will appear, allowing you to browse the template library for a suitable design.
Use the drop-down menus to filter templates based on tags, industry, or events to simplify your selection process. Once you’ve chosen a template, click ‘Apply’ and your discount block will be added to the email.
4. Edit your Discount block
Once your discount block is in place, you can move, duplicate, or delete it using the in-line options. For more advanced customization, use the ‘Settings’ tab on the right-hand side.
When using a discount block in newsletter campaigns, the discount code can be applied by multiple users at checkout. theMarketer refers to this as a multi-use code.
To add a multi-use discount code, you need to generate the code through your eCommerce platform first.
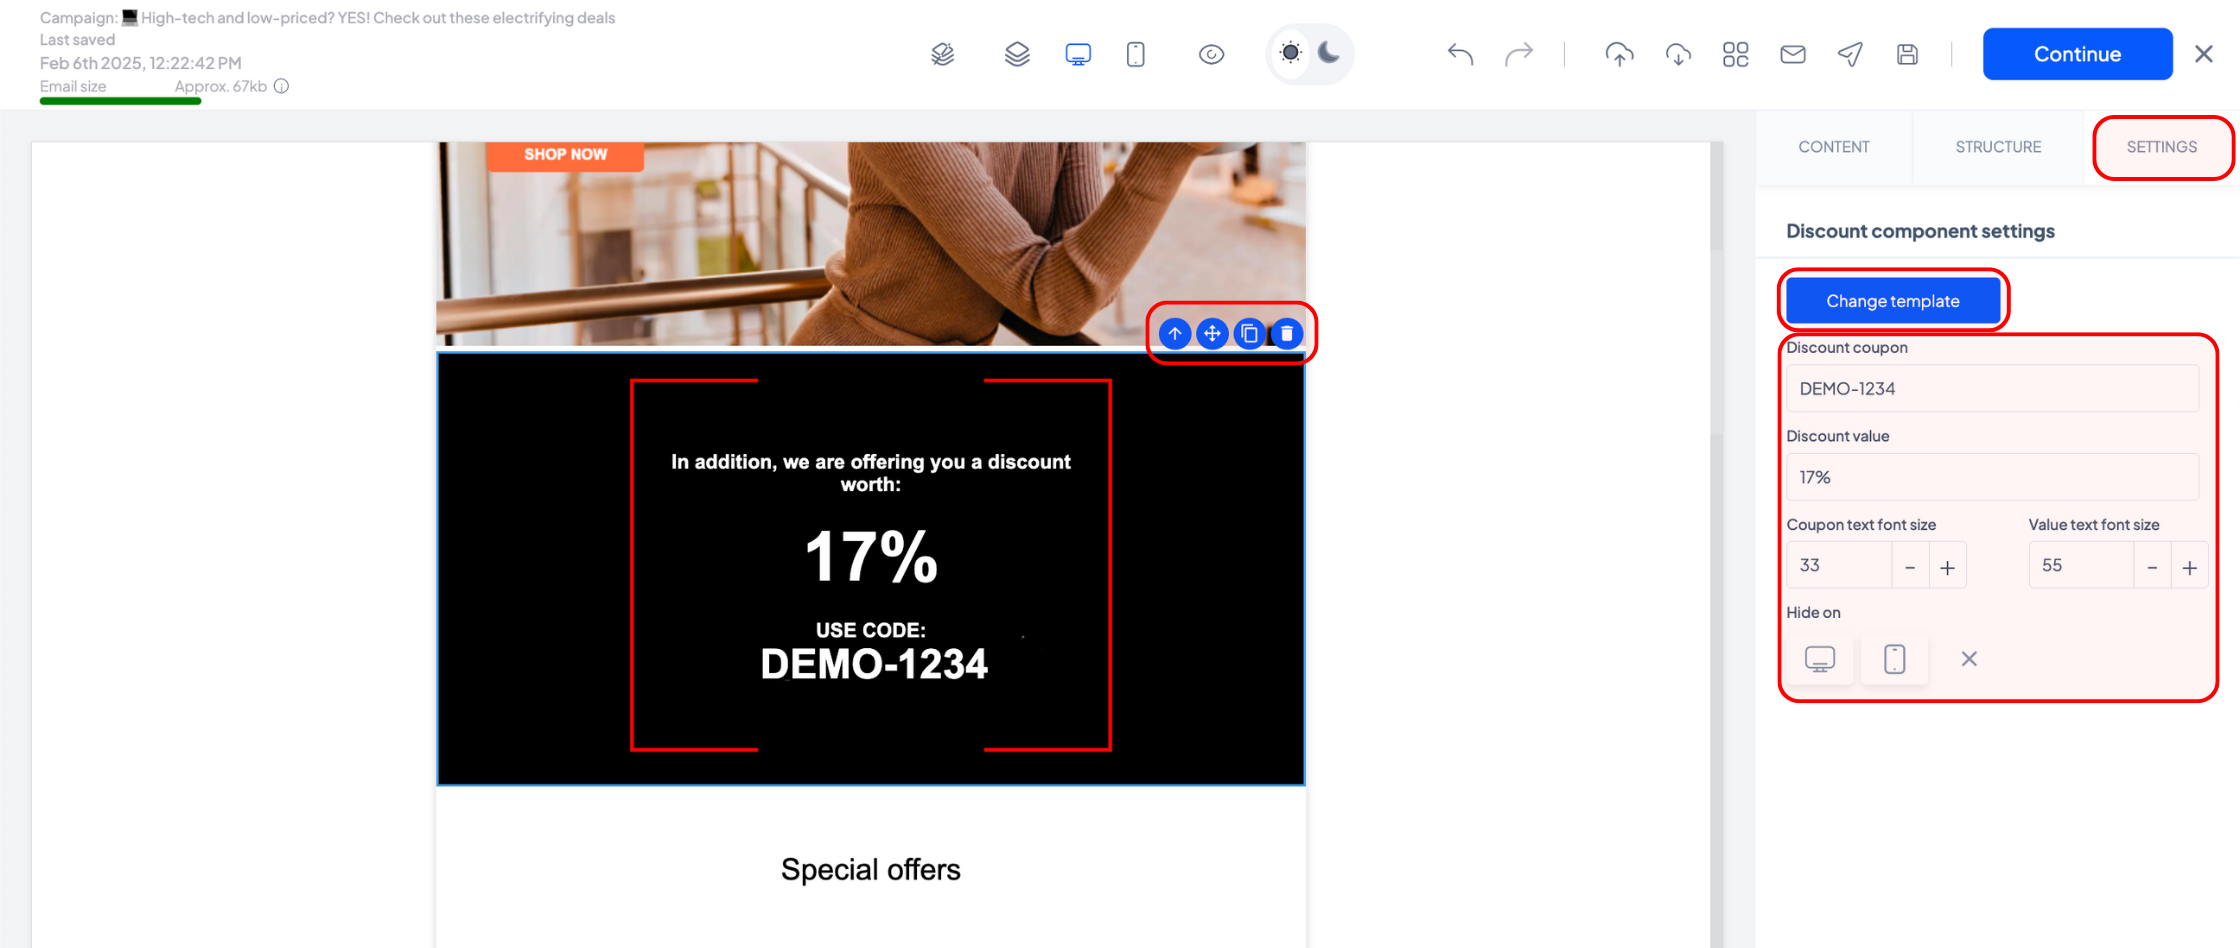
Once the code is ready, insert it into the ‘Discount coupon’ field under the ‘Discount component settings’ section. Then adjust the discount value in the ‘Discount value’ field to match the offer set in your eCommerce platform.
For example, if you generated a coupon offering 10% off with the code ‘TEST10’, enter ‘TEST10’ in the ‘Discount coupon’ field and ‘10%’ in the ‘Discount value’ field. If your discount is a fixed amount (e.g., 10 euro) or offers free shipping, type ‘10 euro’ or ‘free shipping’ in the ‘Discount value’ field instead.
Once the discount details are set, you can adjust the text size and control whether the discount block is visible on desktop and mobile devices using the other options in the ‘Settings’ section on the right-hand side.
If you want to change the design of your discount block, click ‘Change template’ to reopen the template library.
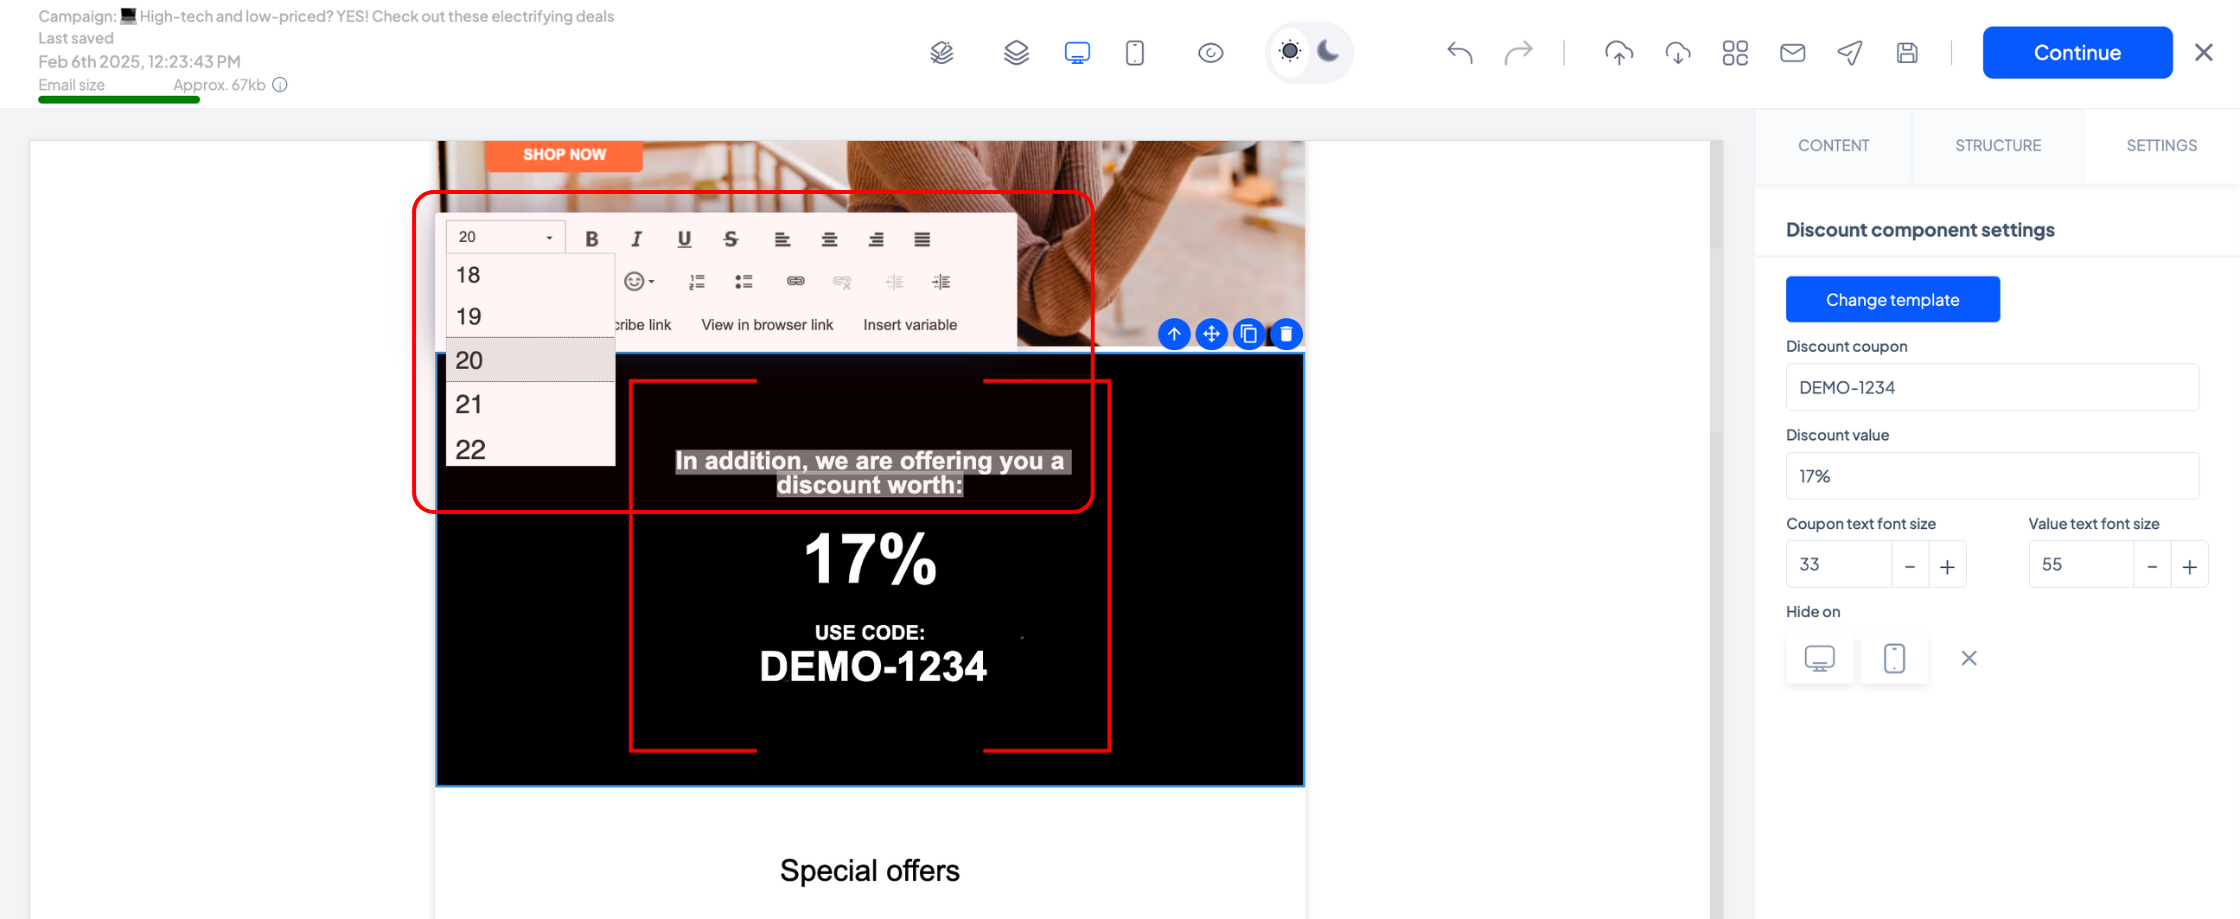
To edit any text besides the coupon code and its value, double-click the text in the email preview. The in-line text editor will appear, allowing you to make changes as needed.
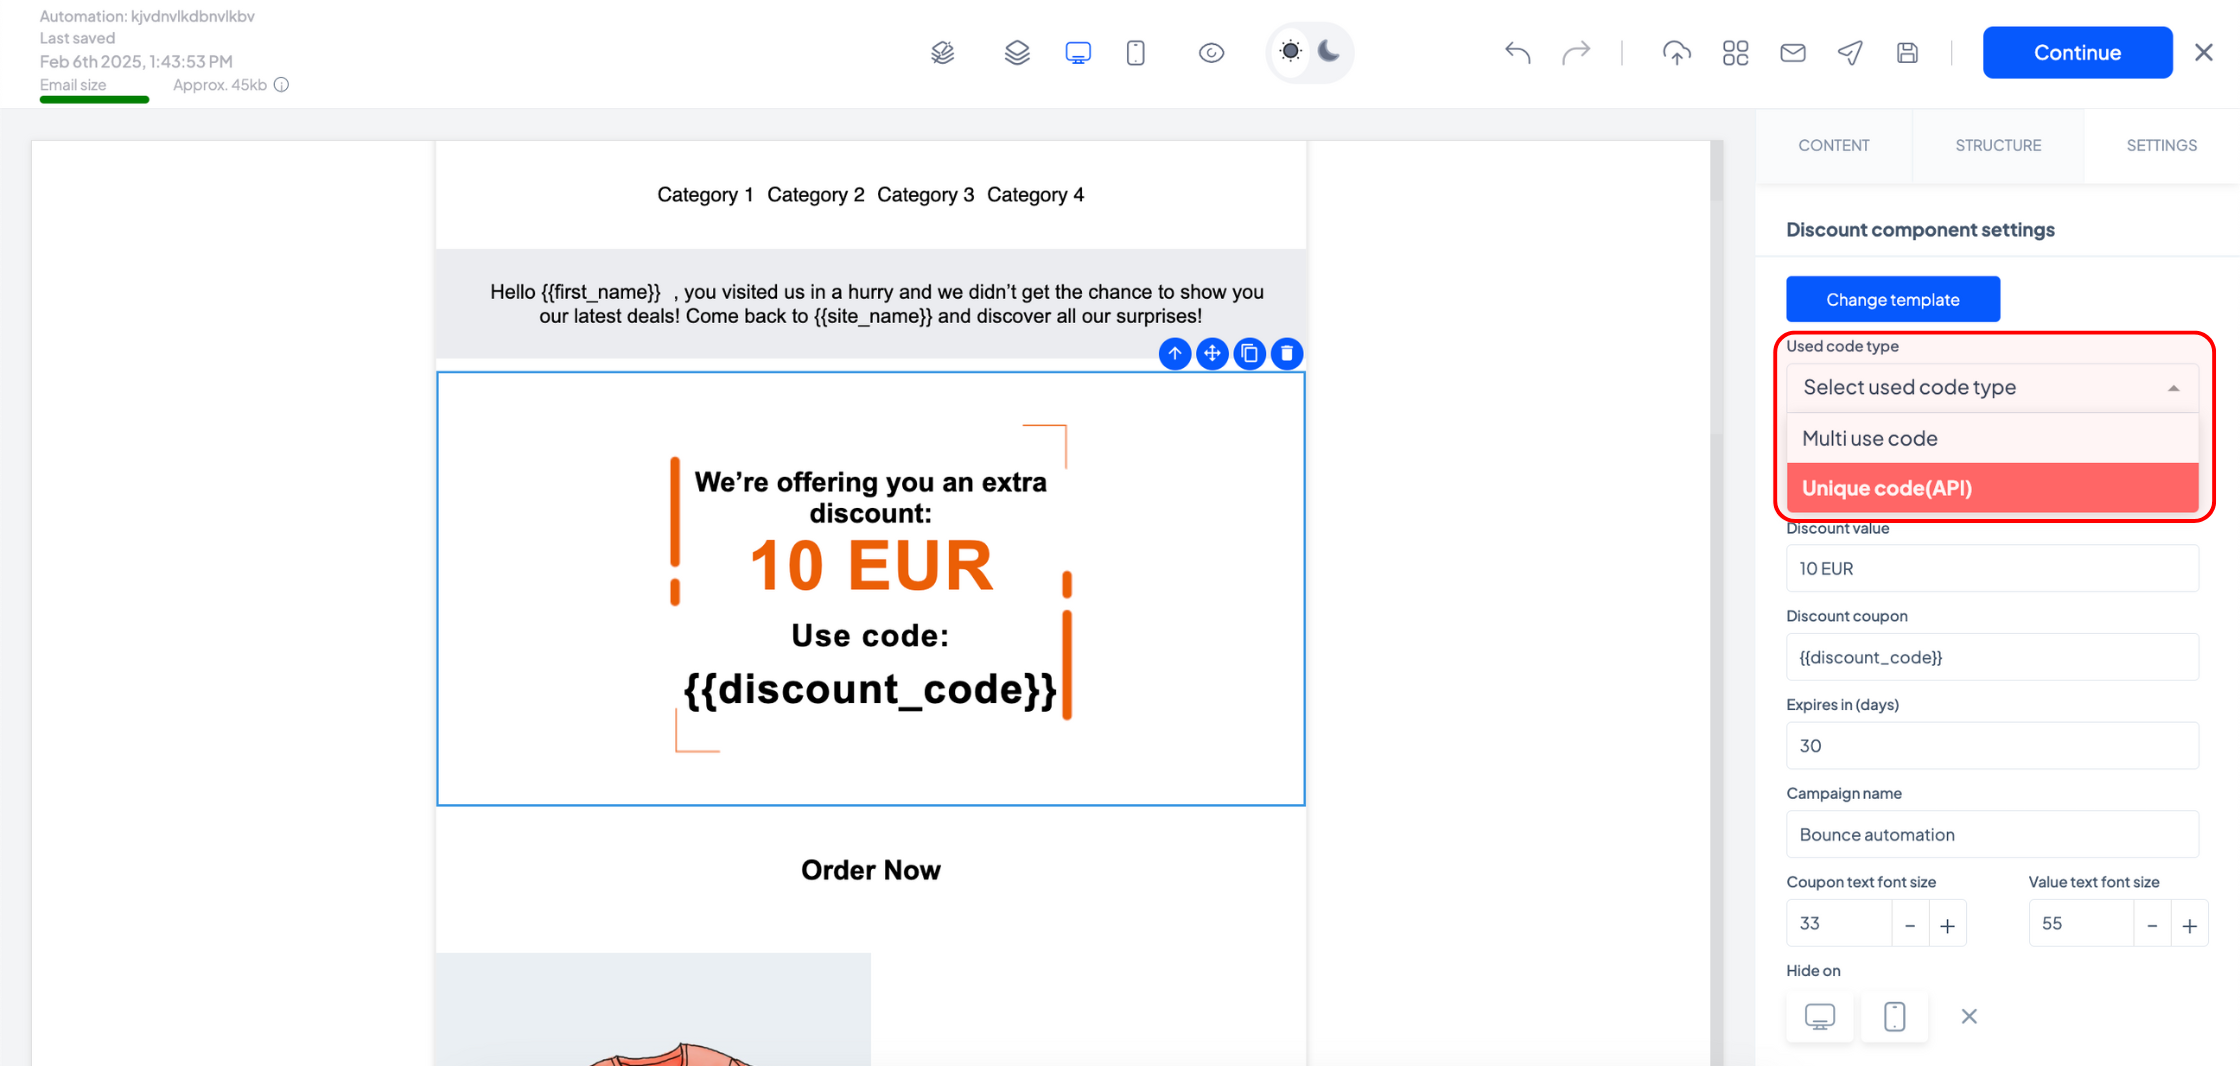
If you’re adding a discount block to an email that is part of an automation sequence, you can choose between:
- Multi-use codes – Generated through your eCommerce platform (same as newsletter campaigns)
- Unique codes – Generated dynamically by theMarketer, ensuring each recipient gets a different code that can only be used once at checkout.
To choose the code type, click the ‘Used code type’ drop-down menu.
If you select multi-use codes, follow the same process as for newsletter campaigns.
If you select unique codes, theMarketer will automatically generate unique discount codes for each recipient.
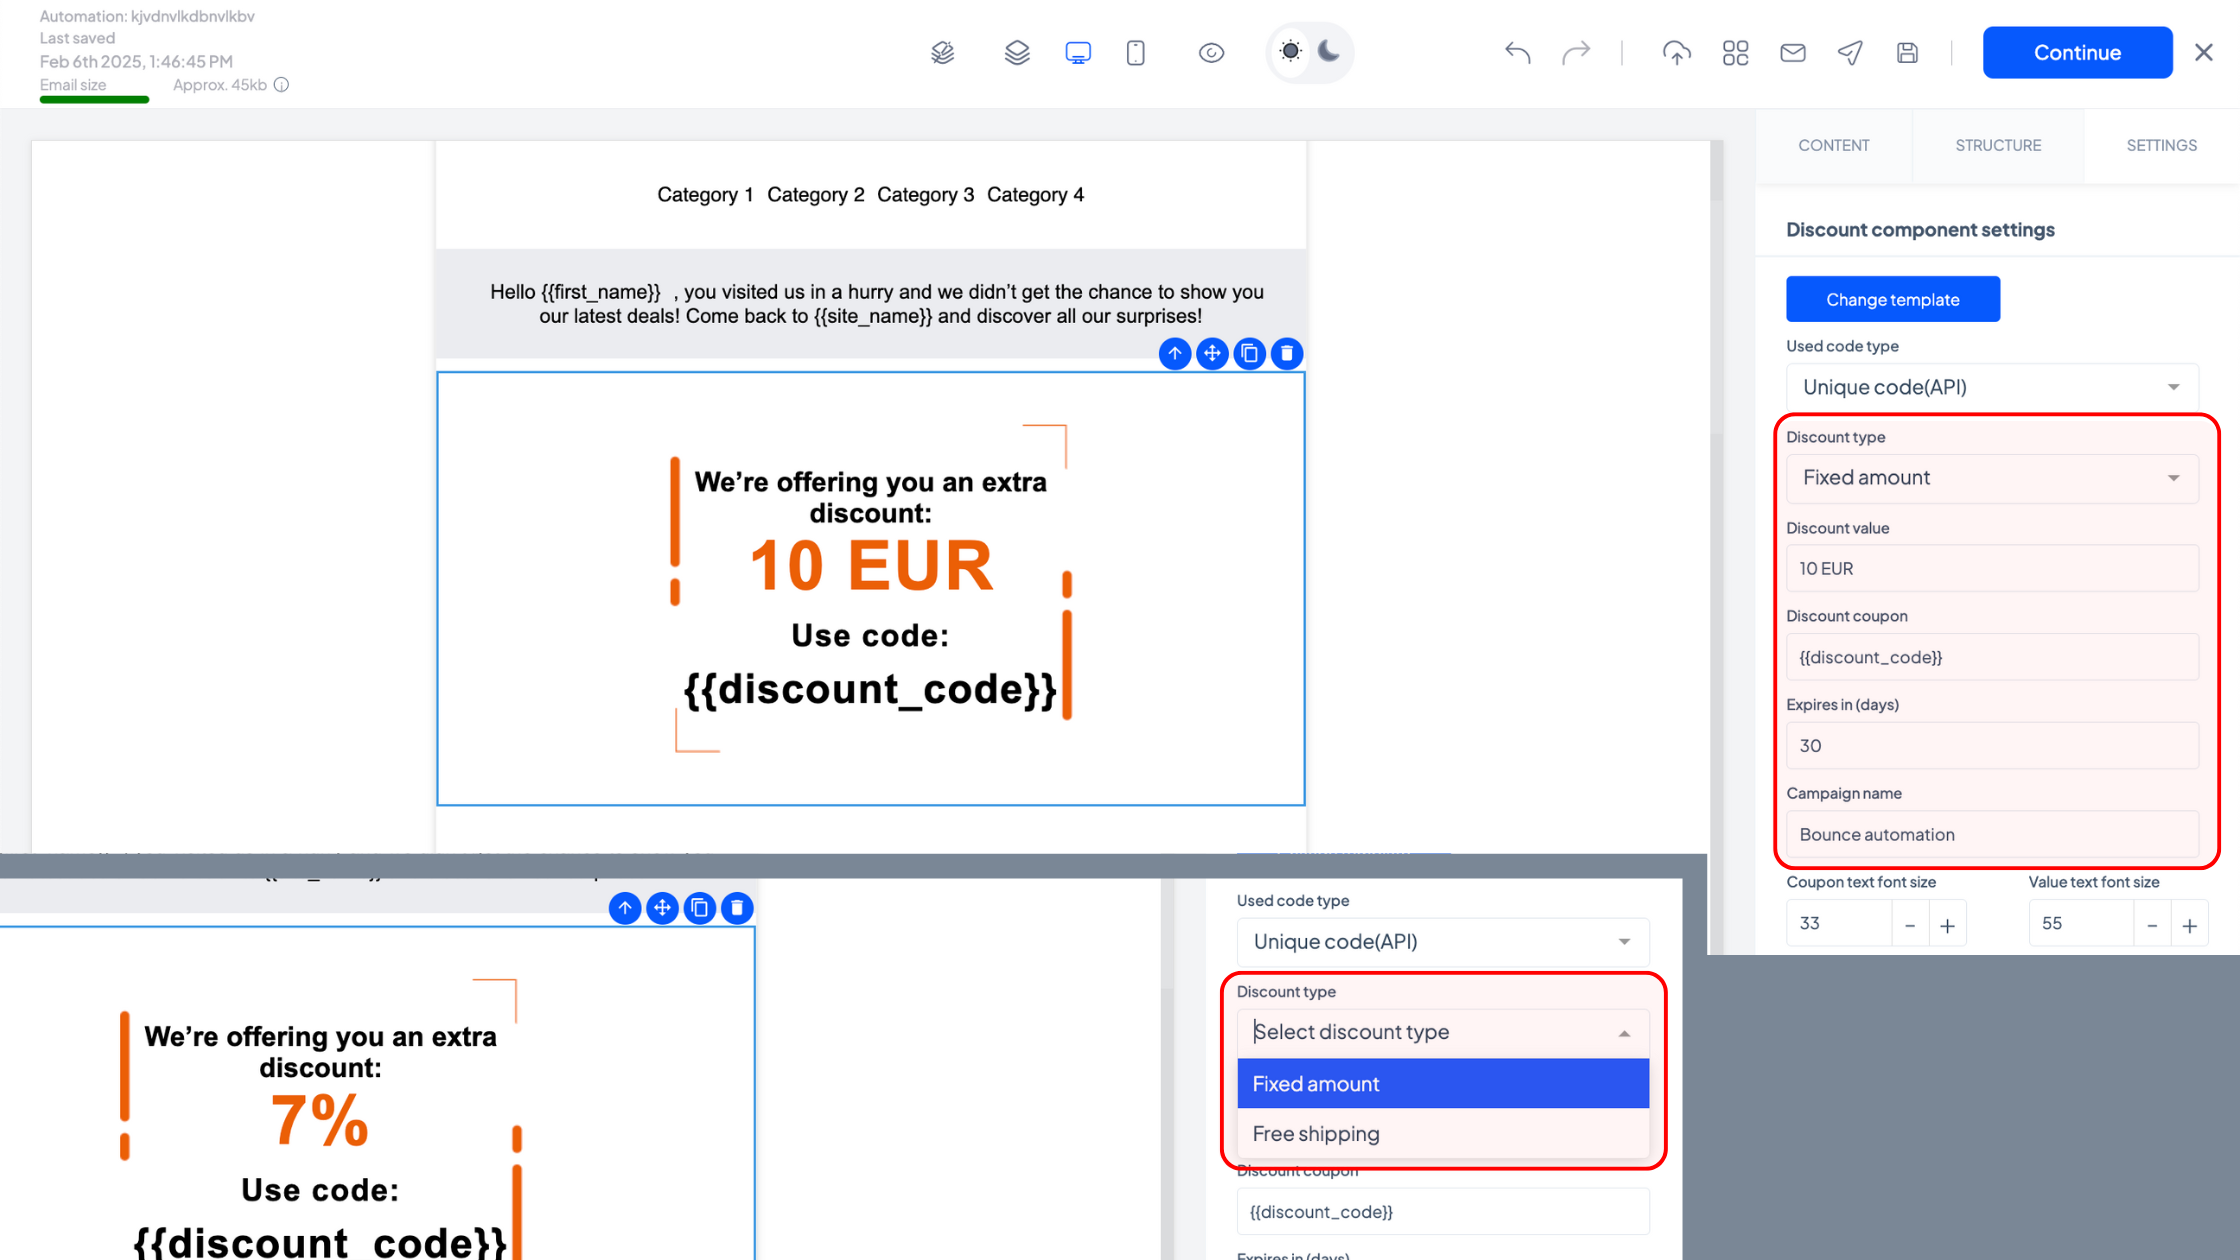
Use the ‘Discount type’ drop-down menu to select whether the coupon will offer free shipping, a fixed amount off, or a percentage discount.
In the ‘Discount value’ field, enter the corresponding value (e.g., ‘10%’ for percentage discounts or ‘7 euro’ for fixed amounts).
The ‘Discount coupon’ field will already contain a variable, so you don’t need to edit it.
To create urgency, you can set an expiration period for the discount codes. Enter the number of days in the ‘Expires in (days)’ field. We recommend communicating this timeframe to recipients to encourage quick action.
If you want to track the campaign easily, enter a name in the ‘Campaign name’ field.
Once all details are set, you can adjust the text size or control visibility on desktop and mobile using the options in the Settings tab.
And you’re done!
Make sure to test your emails before sending them or enabling the automated flows to ensure everything looks perfect.
Related articles
STILL HAVE QUESTIONS?