/ Knowledge base /
How to check if the API discount codes are working?How to check if the API discount codes are working?
Launching your loyalty and referral programs is a significant step. And it is natural to want everything to operate flawlessly. Whether you've come across a 'missing parameter', or you just want to double-check all settings before spreading the news, you're in the right place.
This guide will walk you through the steps of verifying that your API-generated discount codes are functioning as intended. Let's get started.
First, to dynamically generate a discount code, you will need a webhook or an endpoint on your site that theMarketer can call whenever needed.
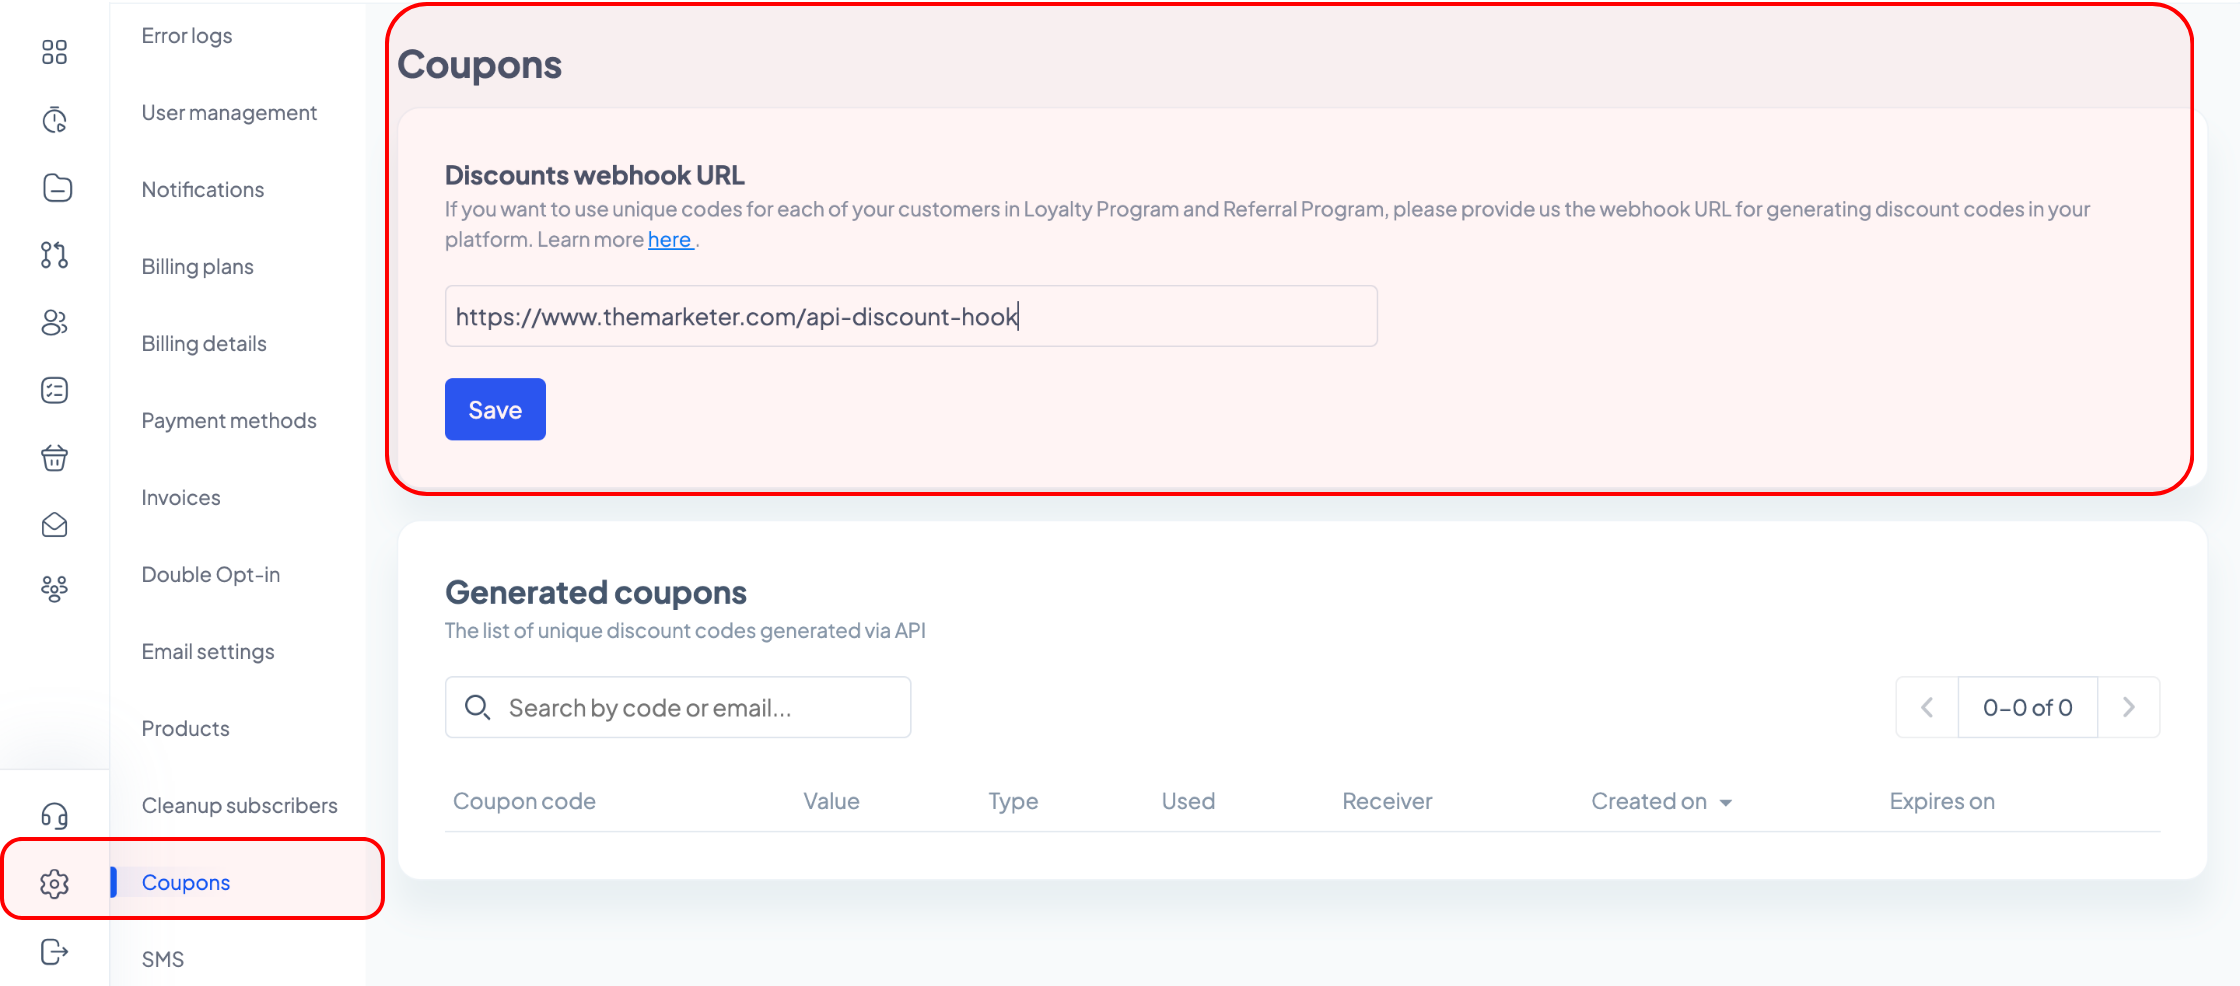
For those using eCommerce platforms integrated with theMarketer, our plugin automatically sets this up for you. But if you're running a custom website, you’ll have to implement this feature and then paste the webhook URL at 'Settings' > 'Coupons', right under the 'Discounts webhook URL' section.
Once you’ve done this, there are two ways you can assess the functionality of these codes using automations:
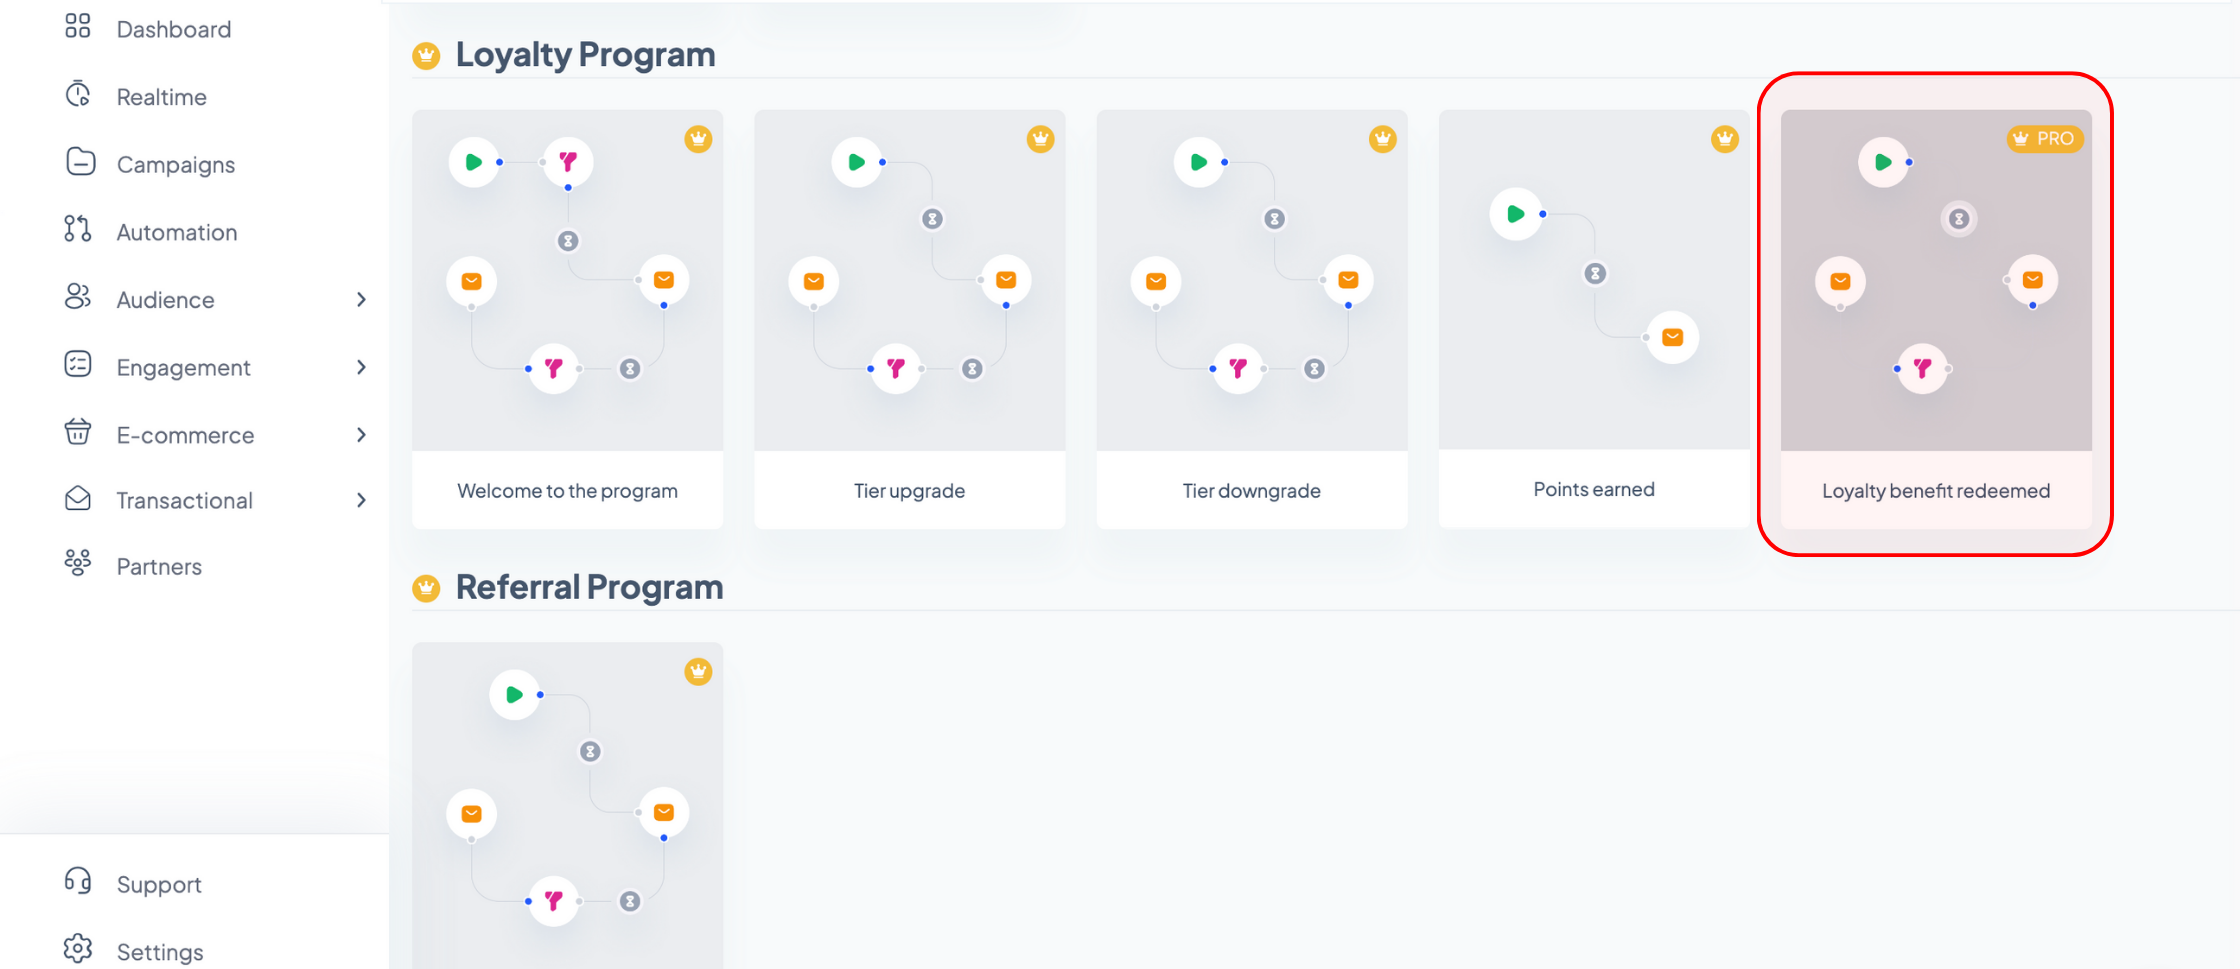
1. Testing the Loyalty Program
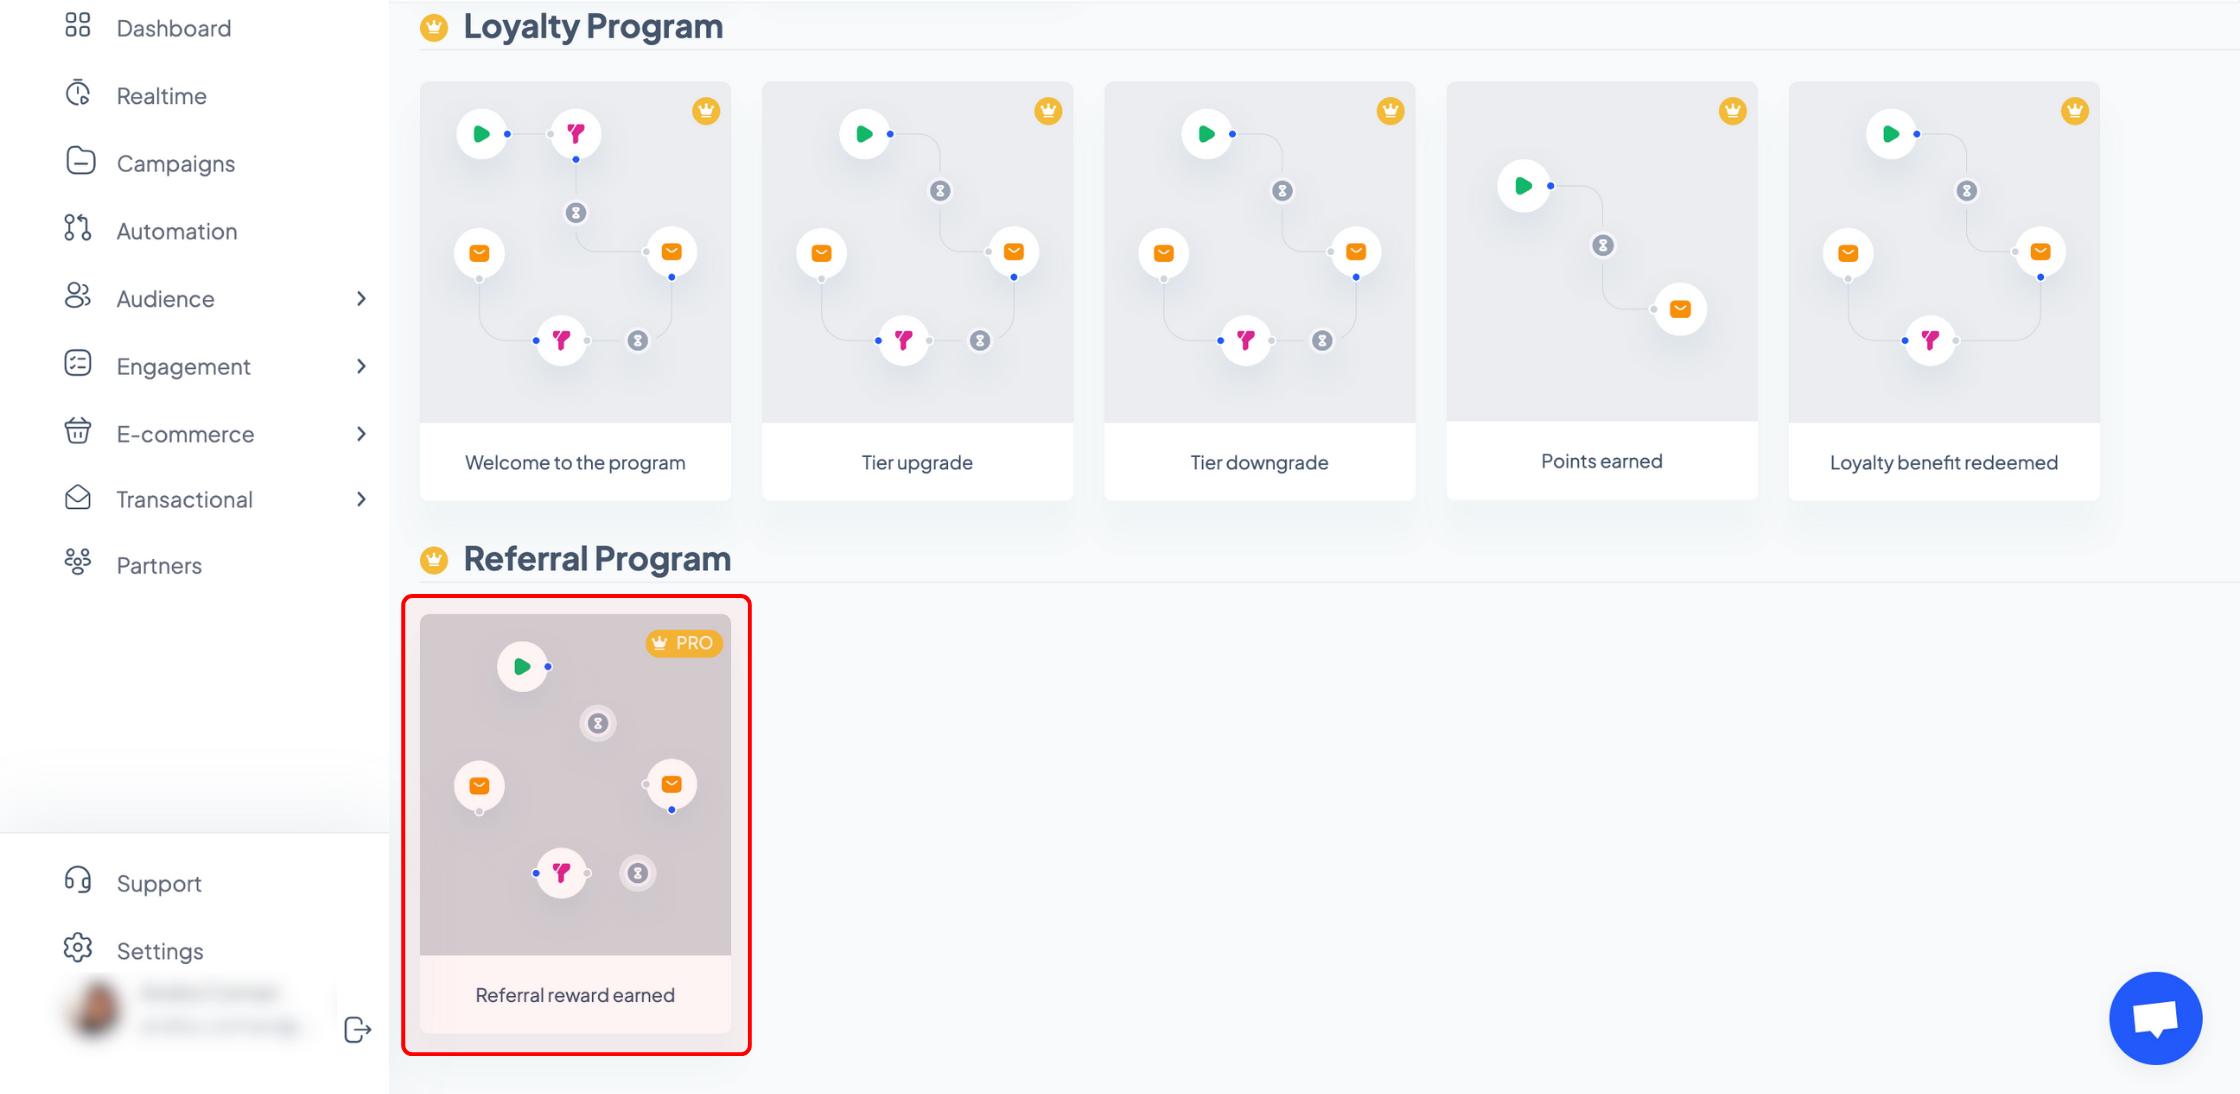
If you’ve set up your loyalty program and the on-site launcher, go to ‘Automation’, click ‘+ Create journey’, select the ‘Loyalty benefit redeemed’ template under the ‘Loyalty Program’ section, and click the ‘Setup journey’ button.
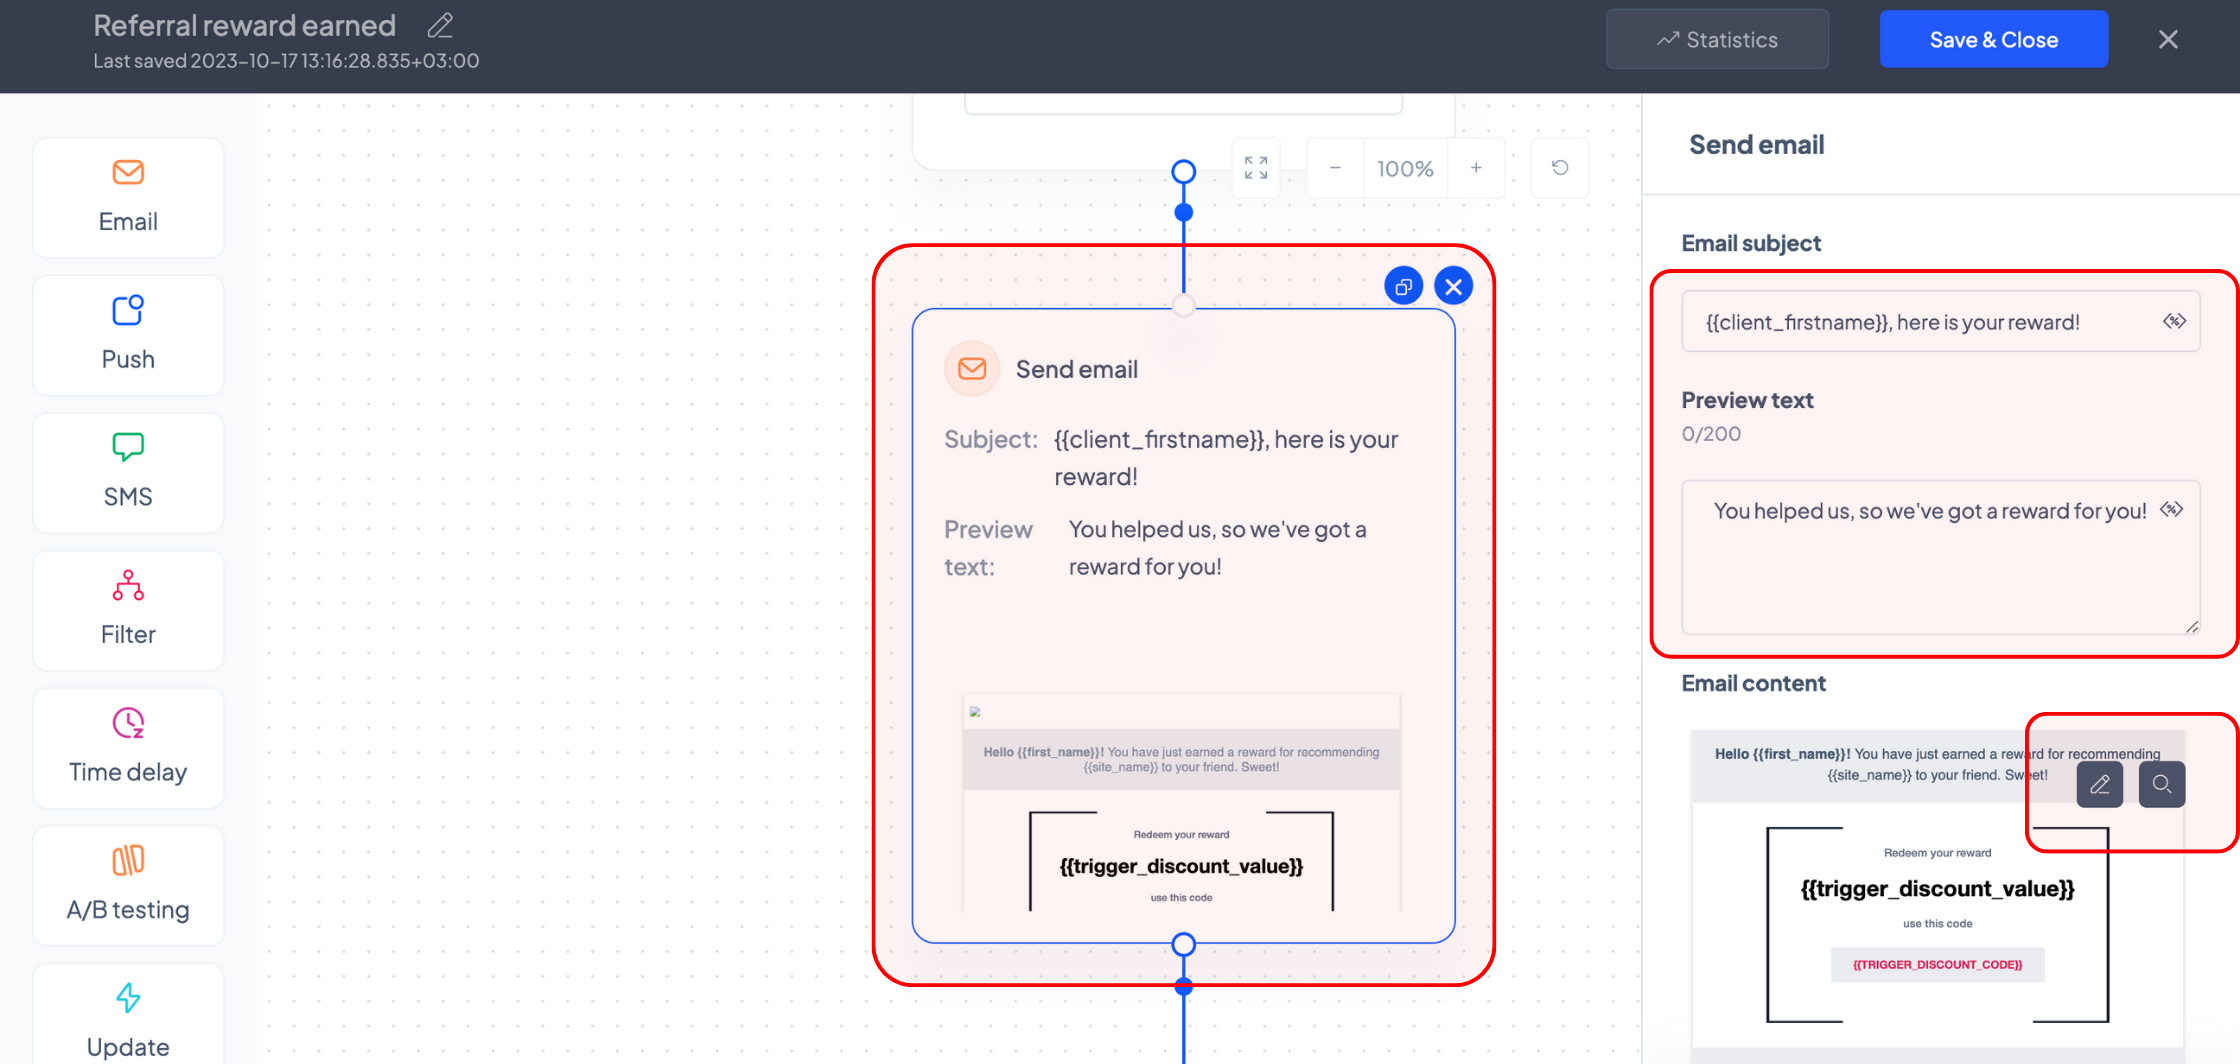
In the automation editor, scroll down and click the ‘Send email’ block. Using the options on the right, you can edit the subject line and the preview text of your email and you can also insert various personalization tags, such as your customer’s full / first / last name or your website link when clicking the ‘<%>’ icon.
To edit or preview the content of your email, hover your cursor over the ‘Email content’ section and click on one of the two dark grey buttons that will appear (the left one to edit your campaign and the right one to preview it).
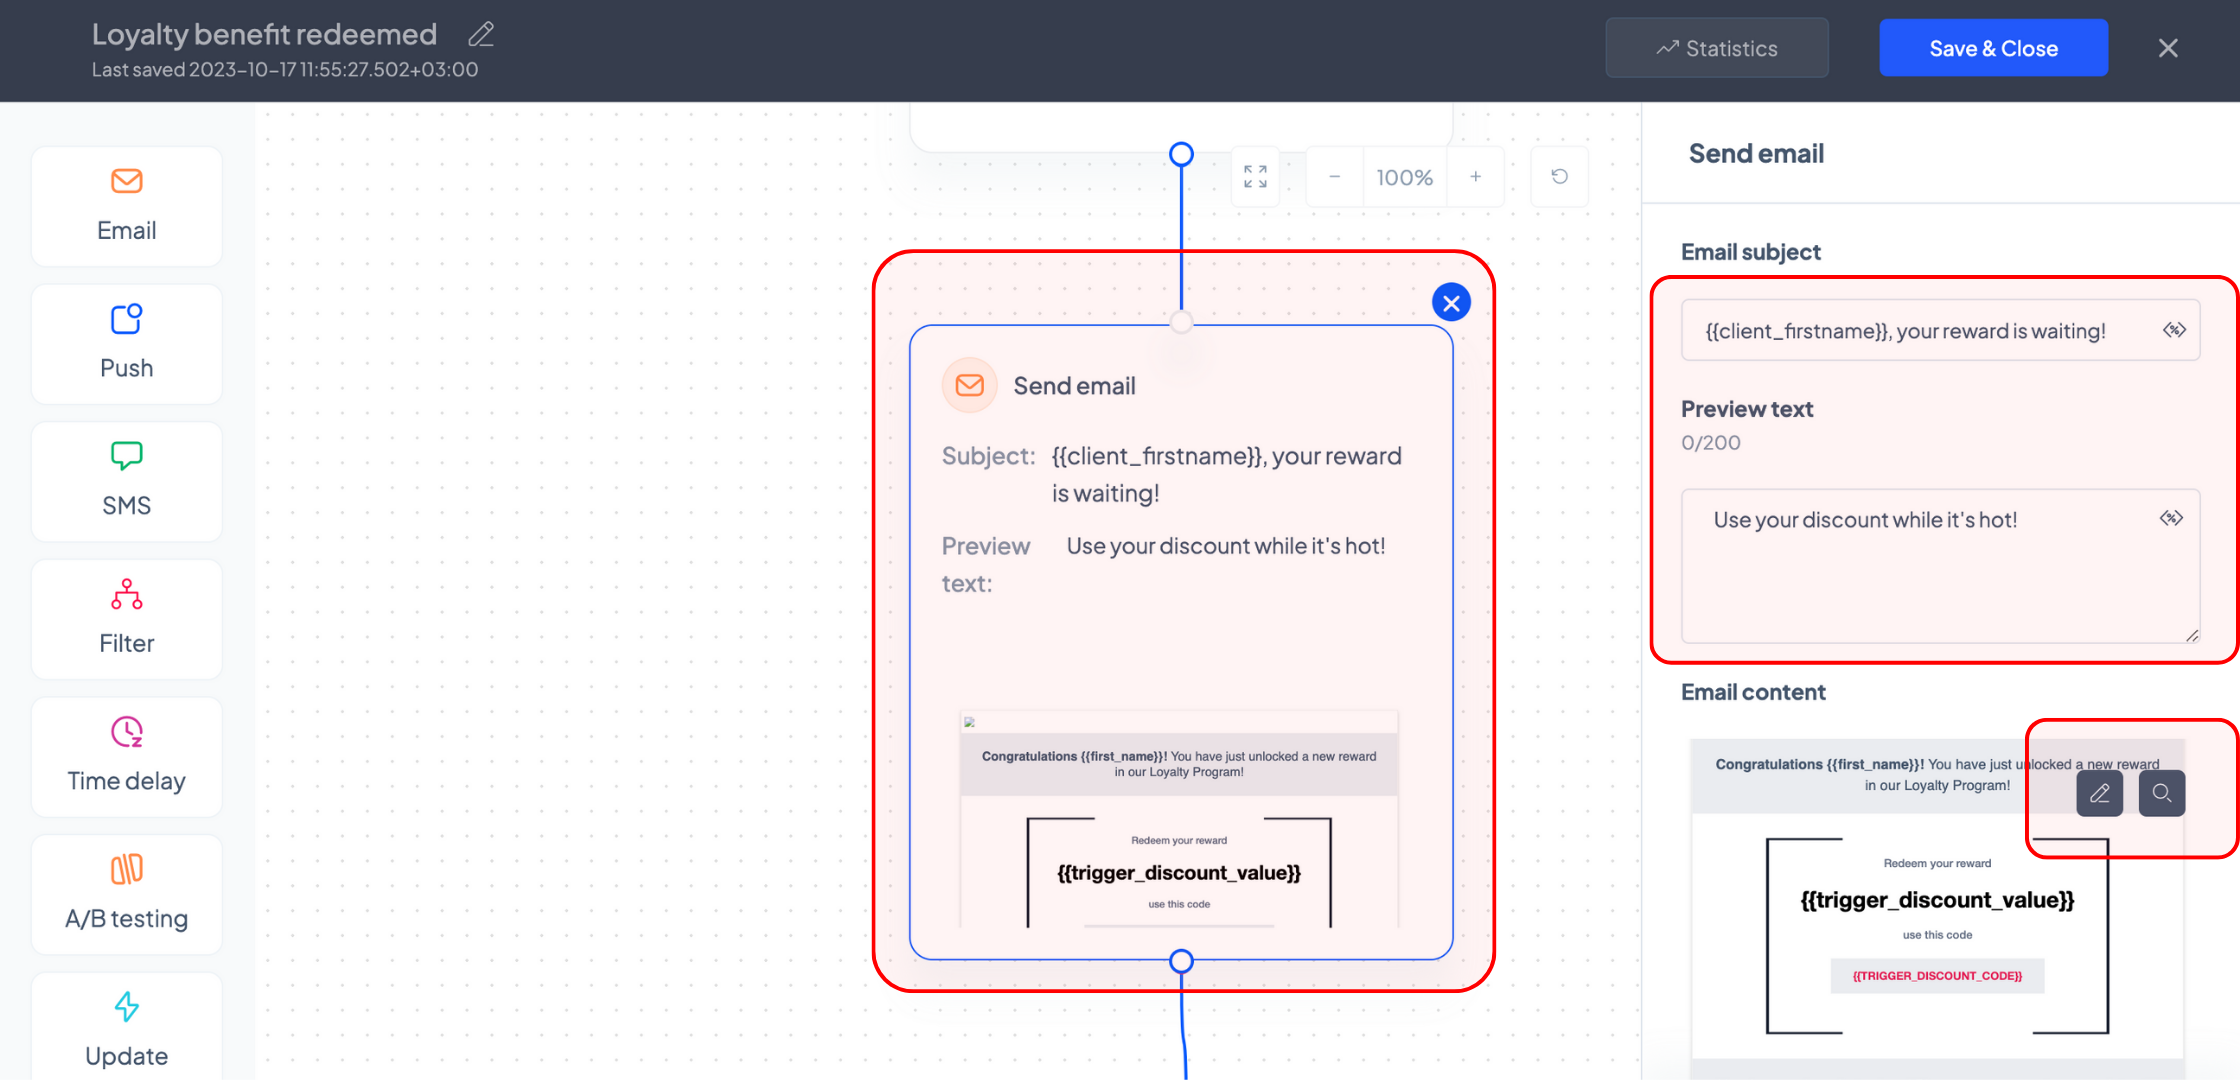
If you choose to edit your campaign, you will be redirected to the newsletter builder. Once you’re done editing your campaign, press the ‘Save & Close’ button and you will be redirected back to the automation builder.
You can customize the rest of your automated flow if you wish to do so or return to it later, once you’ve confirmed that your API-generated discount codes work properly.
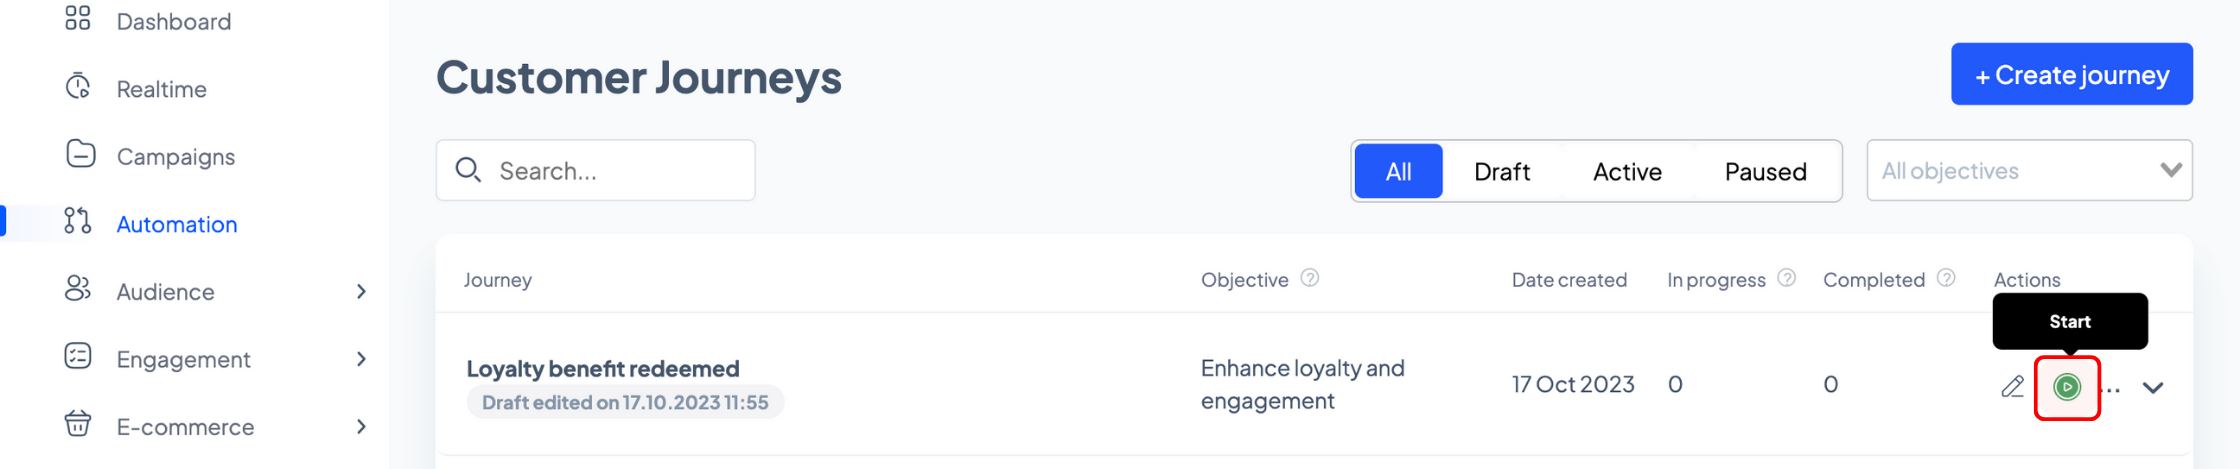
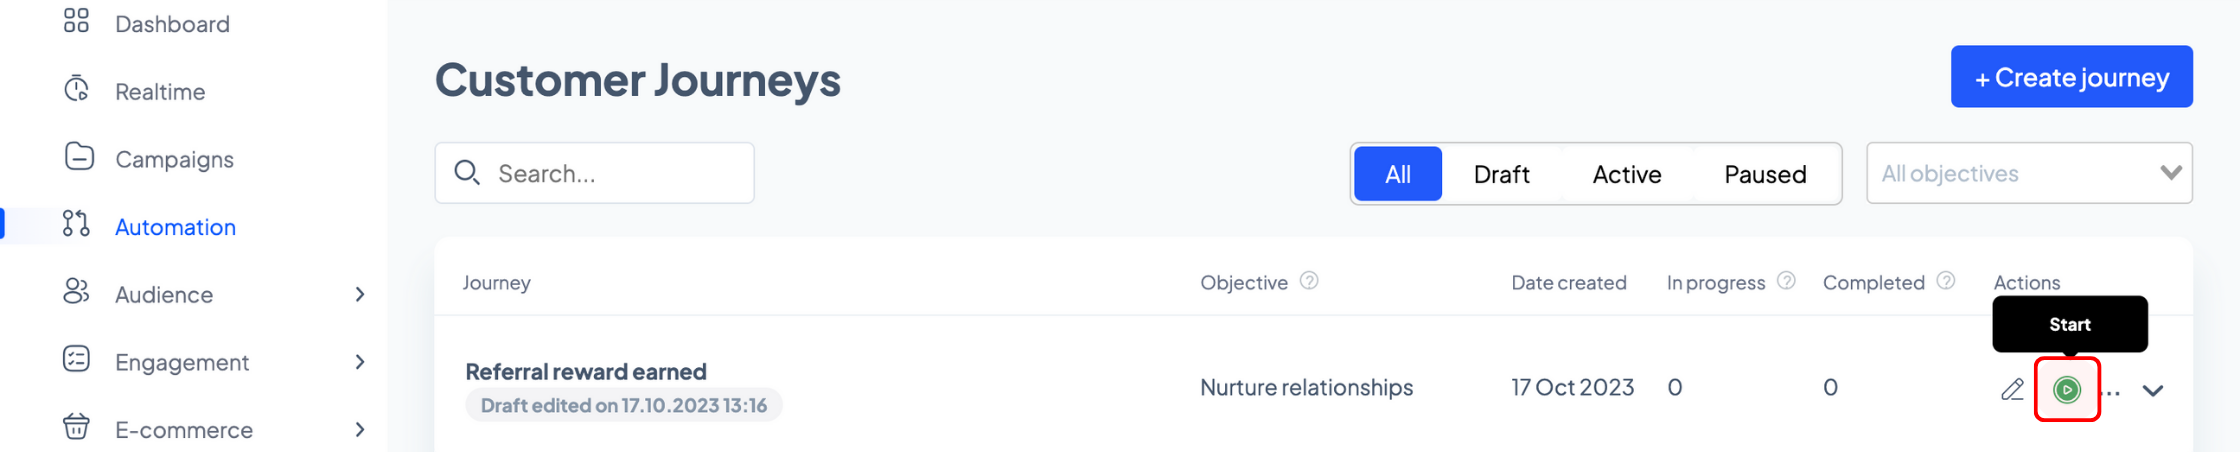
Click the ‘Save & Close’ button and, on the automation listing page, press the green ‘Start’ button of the flow you’ve just created to start your automation.
Next up, go to your online shop and place a test order or take any other action that would help you unlock a discount code according to the rules you’ve set in your loyalty program.
Use the on-site launcher to redeem your loyalty benefit and if you’ve correctly set up your discount webhooks, you should receive an email with the coupon code and value.
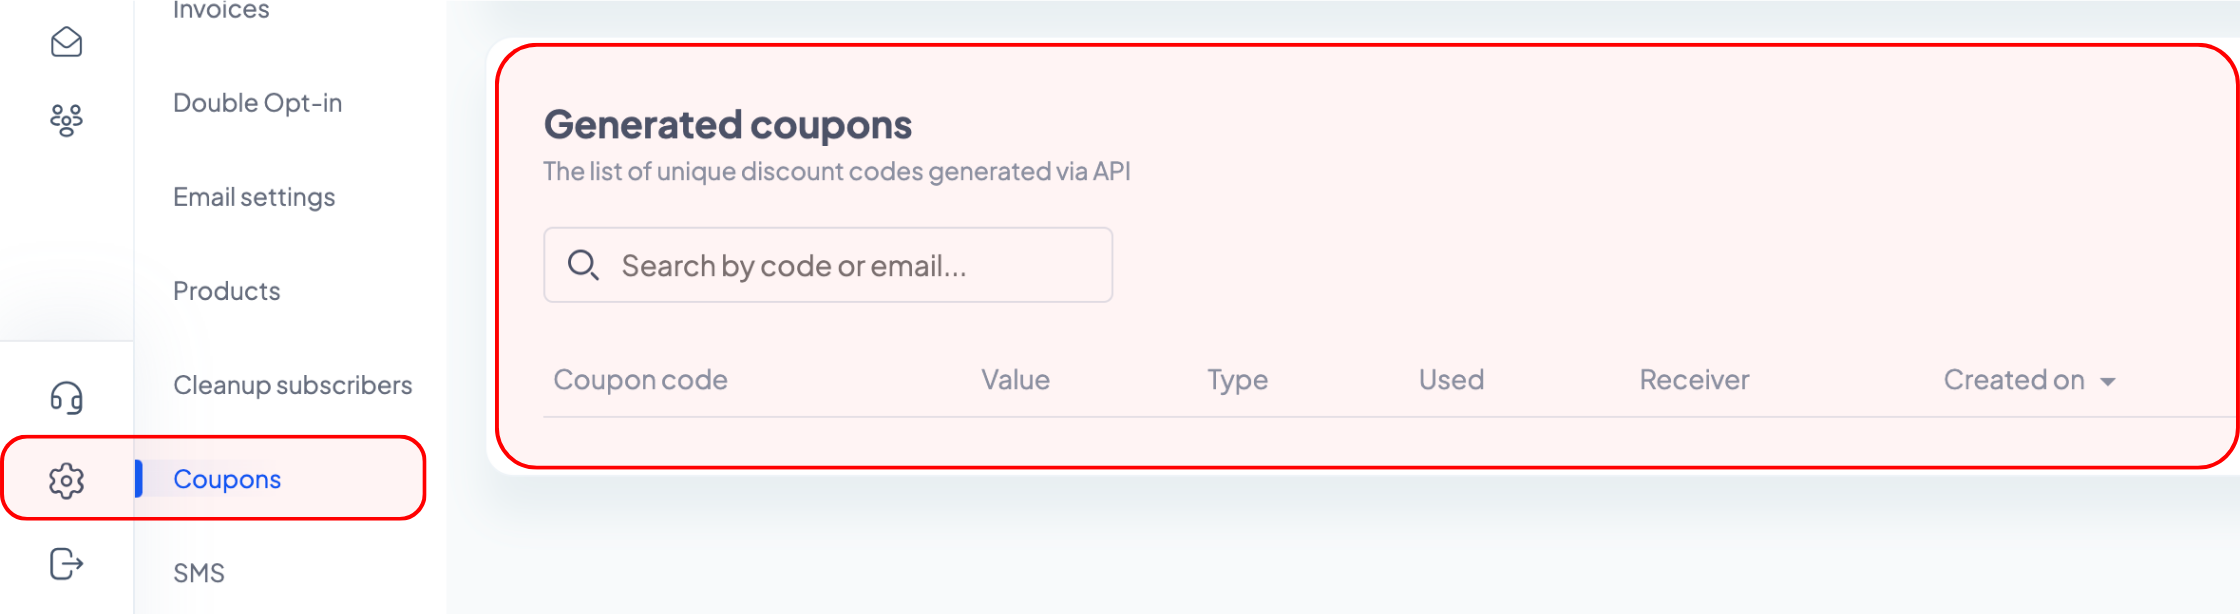
Additionally, if you head to 'Settings' > 'Coupons', you should see all the API-generated discount codes under the 'Generated coupons' section.
2. Testing the Referral Program
You can follow a similar process if you’ve set up your referral program and the on-site launcher. Go to ‘Automation’, click ‘+ Create journey’, but this time select the ‘Referral reward earned’ template under the ‘Referral Program’ section, and click the ‘Setup journey’ button.
In the automation editor, scroll down and click the ‘Send email’ block. Using the options on the right, you can edit the subject line and the preview text of your email and you can also insert various personalization tags, such as your customer’s full / first / last name or your website link when clicking the ‘<%>’ icon.
To edit or preview the content of your email, hover your cursor over the ‘Email content’ section and click on one of the two dark grey buttons that will appear (the left one to edit your campaign and the right one to preview it).
If you choose to edit your campaign, you will be redirected to the newsletter builder. Once you’re done editing your campaign, press the ‘Save & Close’ button and you will be redirected back to the automation builder.
You can customize the rest of your automated flow if you wish to do so or return to it later, once you’ve confirmed that your API-generated discount codes work properly.
Click the ‘Save & Close’ button and, on the automation listing page, press the green ‘Start’ button of the flow you’ve just created to start your automation.
Next up, go to your online shop and use the launcher to refer the business to someone else. If you’ve correctly set up your discount webhooks, you should receive an email with the coupon code and value.
Similarly, if you head to 'Settings' > 'Coupons', you should see all the API-generated discount codes under the 'Generated coupons' section.
We understand that setting up and verifying features can sometimes be daunting, but we’re here to help. If you encounter any issues or have further questions, don’t hesitate to reach out.
Related articles
STILL HAVE QUESTIONS?