/ Knowledge base /
How to connect theMarketer to CalendlyHow to connect theMarketer to Calendly
Integrating Calendly with theMarketer brings the best of both worlds: the meeting scheduling capabilities of Calendly with the robust email marketing and audience management tools of theMarketer. By connecting the two platforms, you will be able to synchronize all the information collected via Calendly with the subscriber information featured and later on used in theMarketer.
Here’s how to link the two platforms:
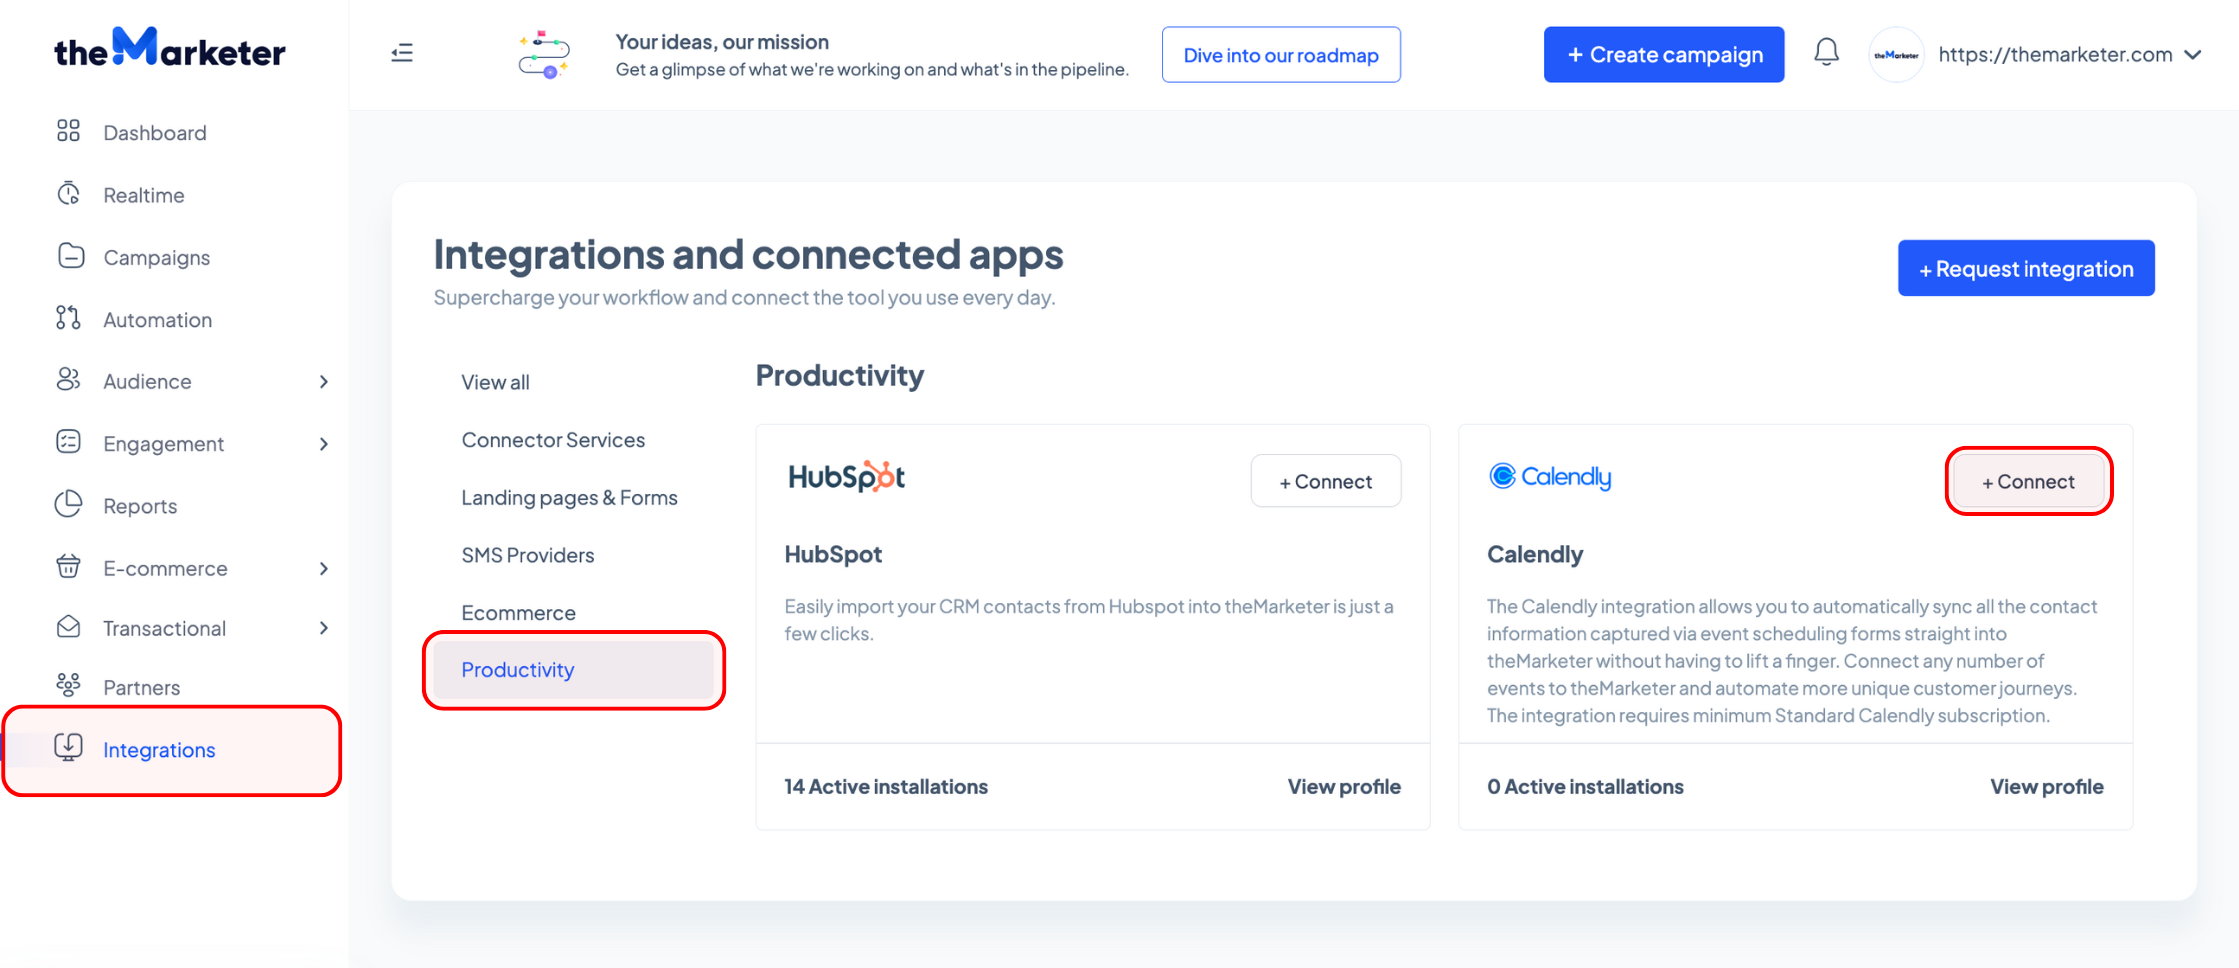
1. In theMarketer app, go to 'Integrations' > 'Productivity', and click the '+ Connect’ button on the Calendly card.
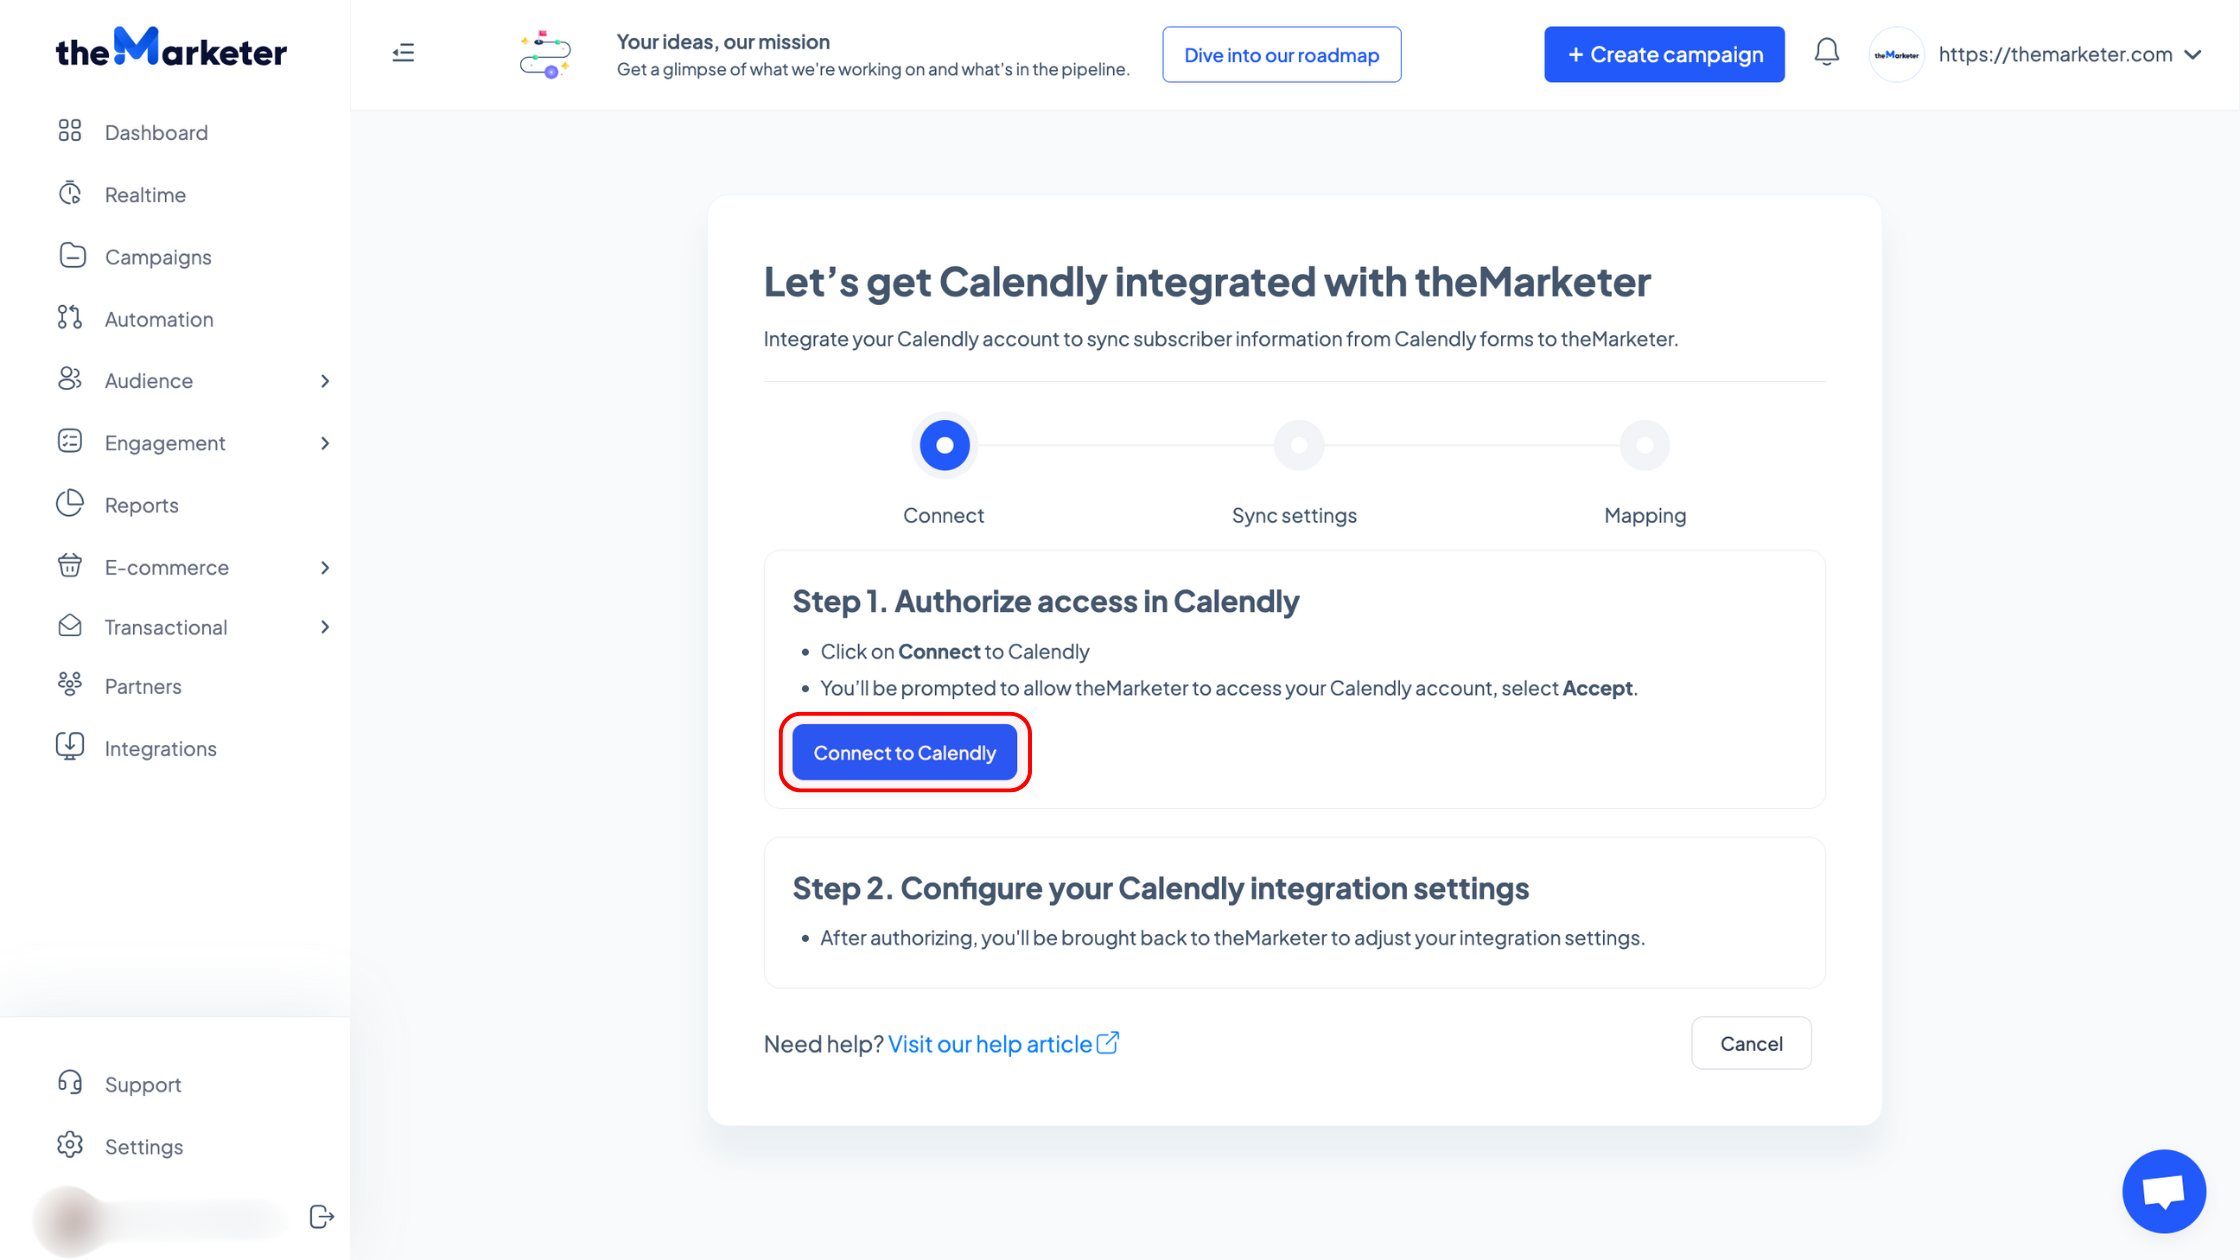
2. Click ‘Connect to Calendly’ to allow theMarketer to access your Calendly account.
3. Log in to your Calendly account.
If you don’t have a Calendly account, you will need to create one.
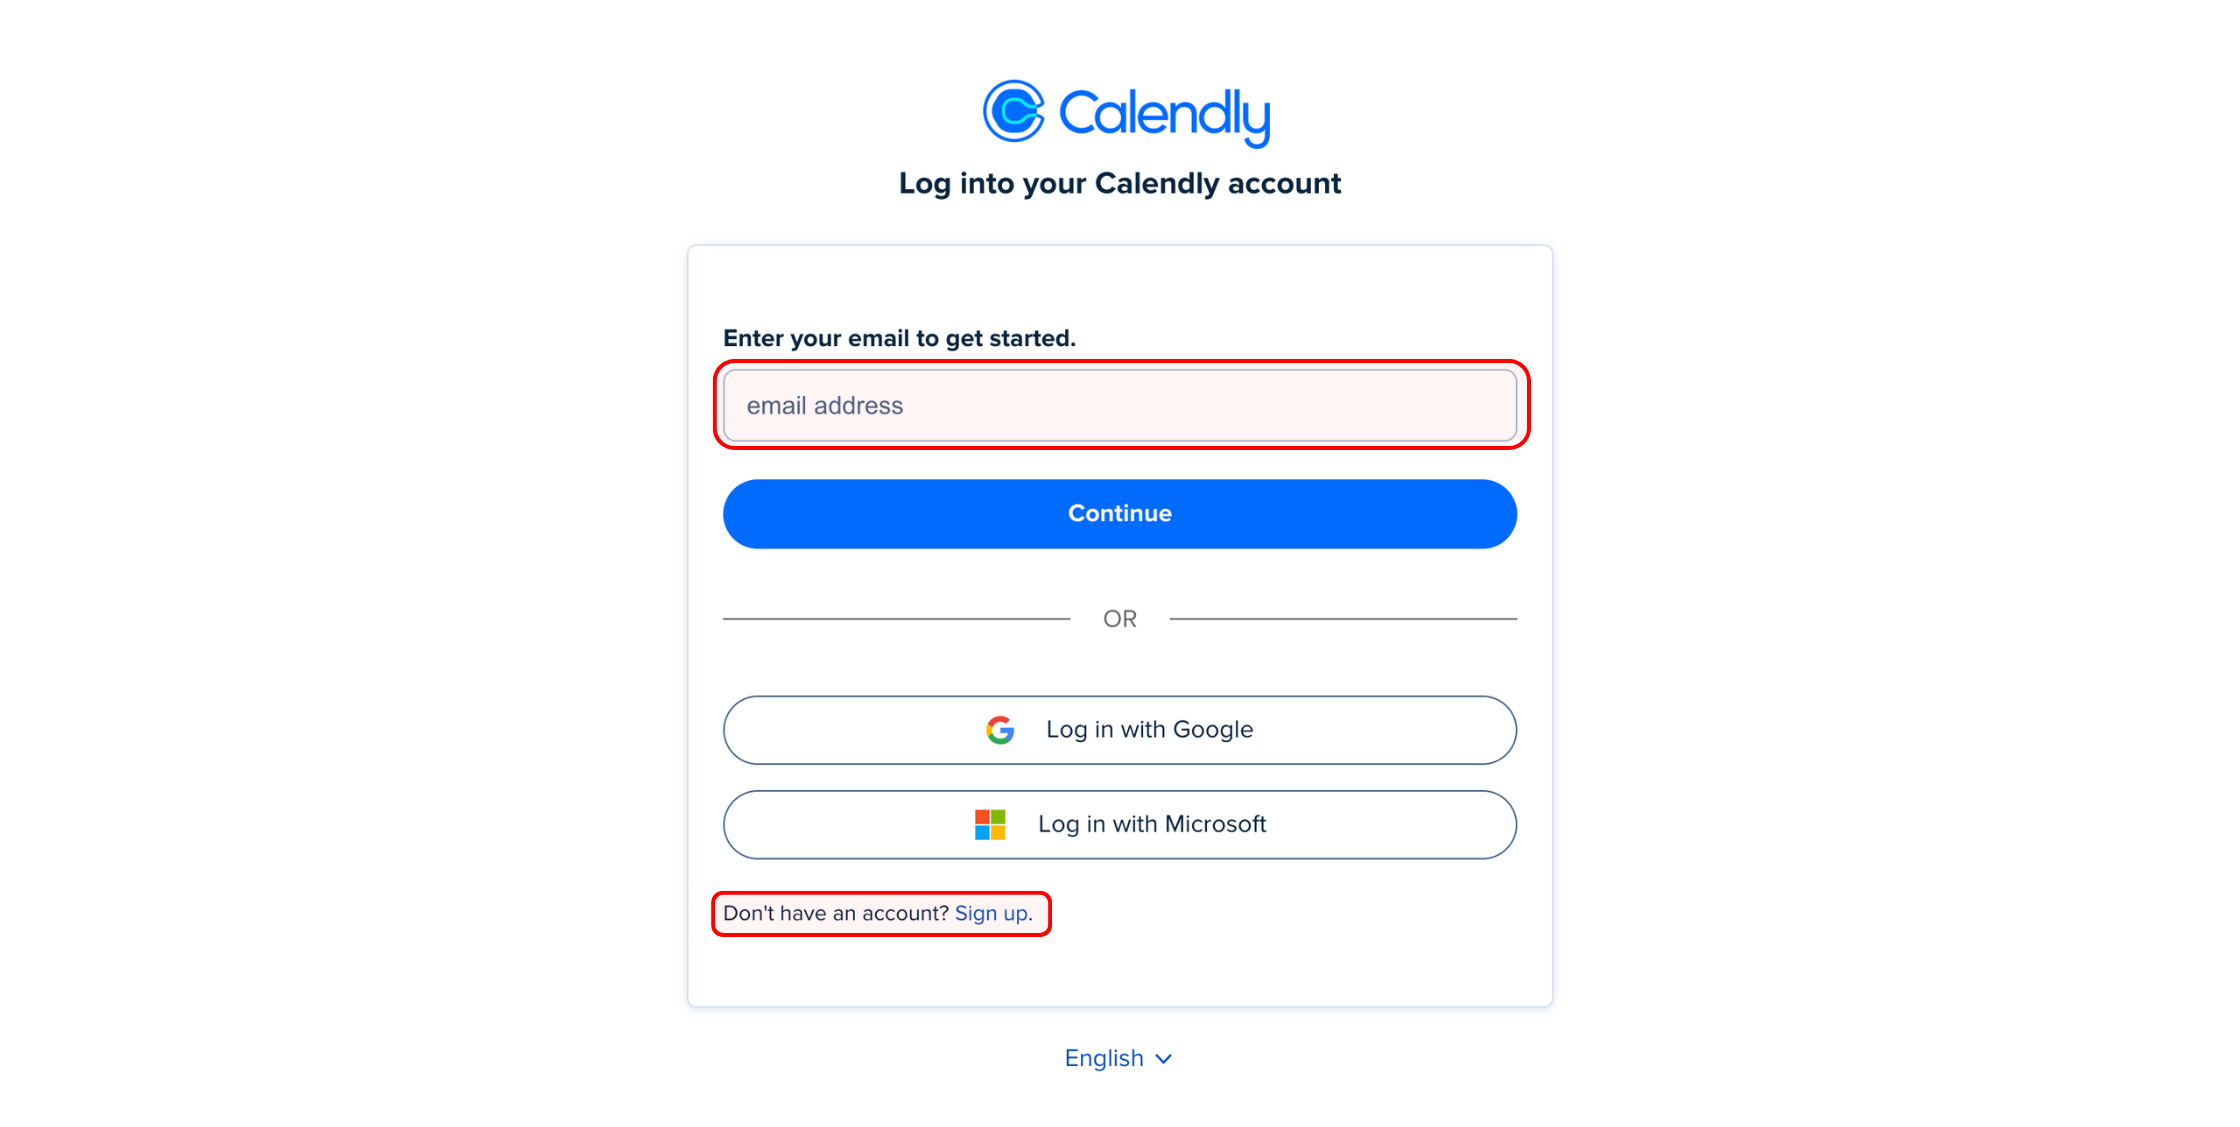
If you’re using Google or Microsoft to log in, make sure you give Calendly all the access it requires. Once you’ve done this, click ‘Connect to Calendly’ to proceed.

4. Use the dropdown to select the meeting you would like to sync.
Keep in mind that only the meetings that have been previously created in your Calendly account will appear. If you haven’t created a meeting yet, you should go back to Calendly, create the meeting you’d like to sync, and then resume the integration process.
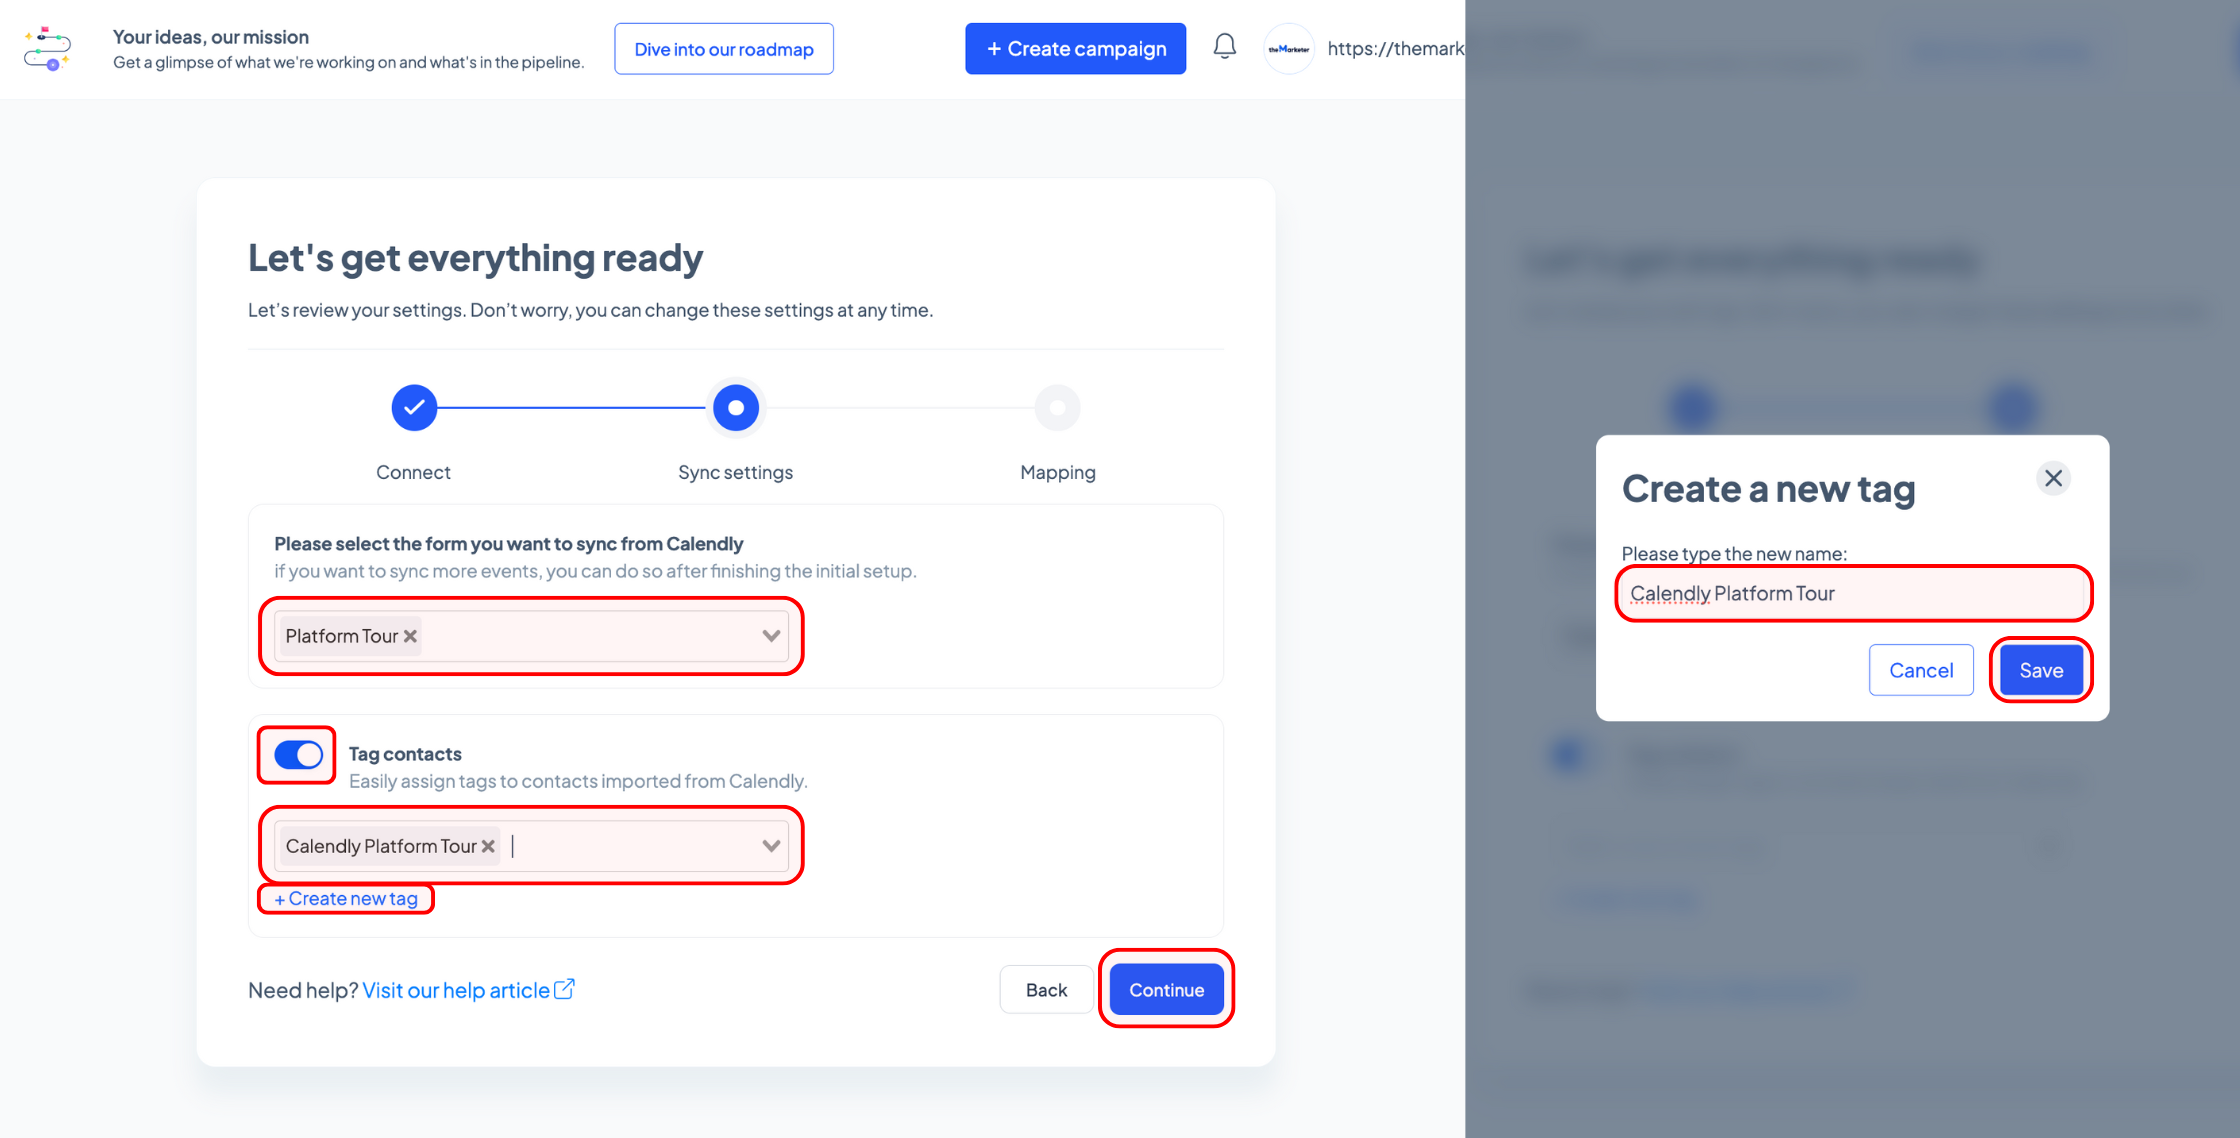
You can also tag the contacts imported via Calendly by clicking the toggle button (turning it blue). Use the dropdown to select an already existing tag or click ‘+Create new tag’ to add a new custom one, which you would then need to select using the dropdown. If needed, you can add multiple tags to your contacts.
Once you’re done, click ‘Continue’.
5. Map and match the information.
Use the dropdown to select the type of information collected via each Calendly field and match it with the corresponding contact attributes found in theMarketer. Keep in mind that your form must include an email or a phone number field, so theMarketer can identify each contact.
You can add more fields by clicking the ‘+ Add field mapping’ button. Similarly, click the bin icon to delete a field.
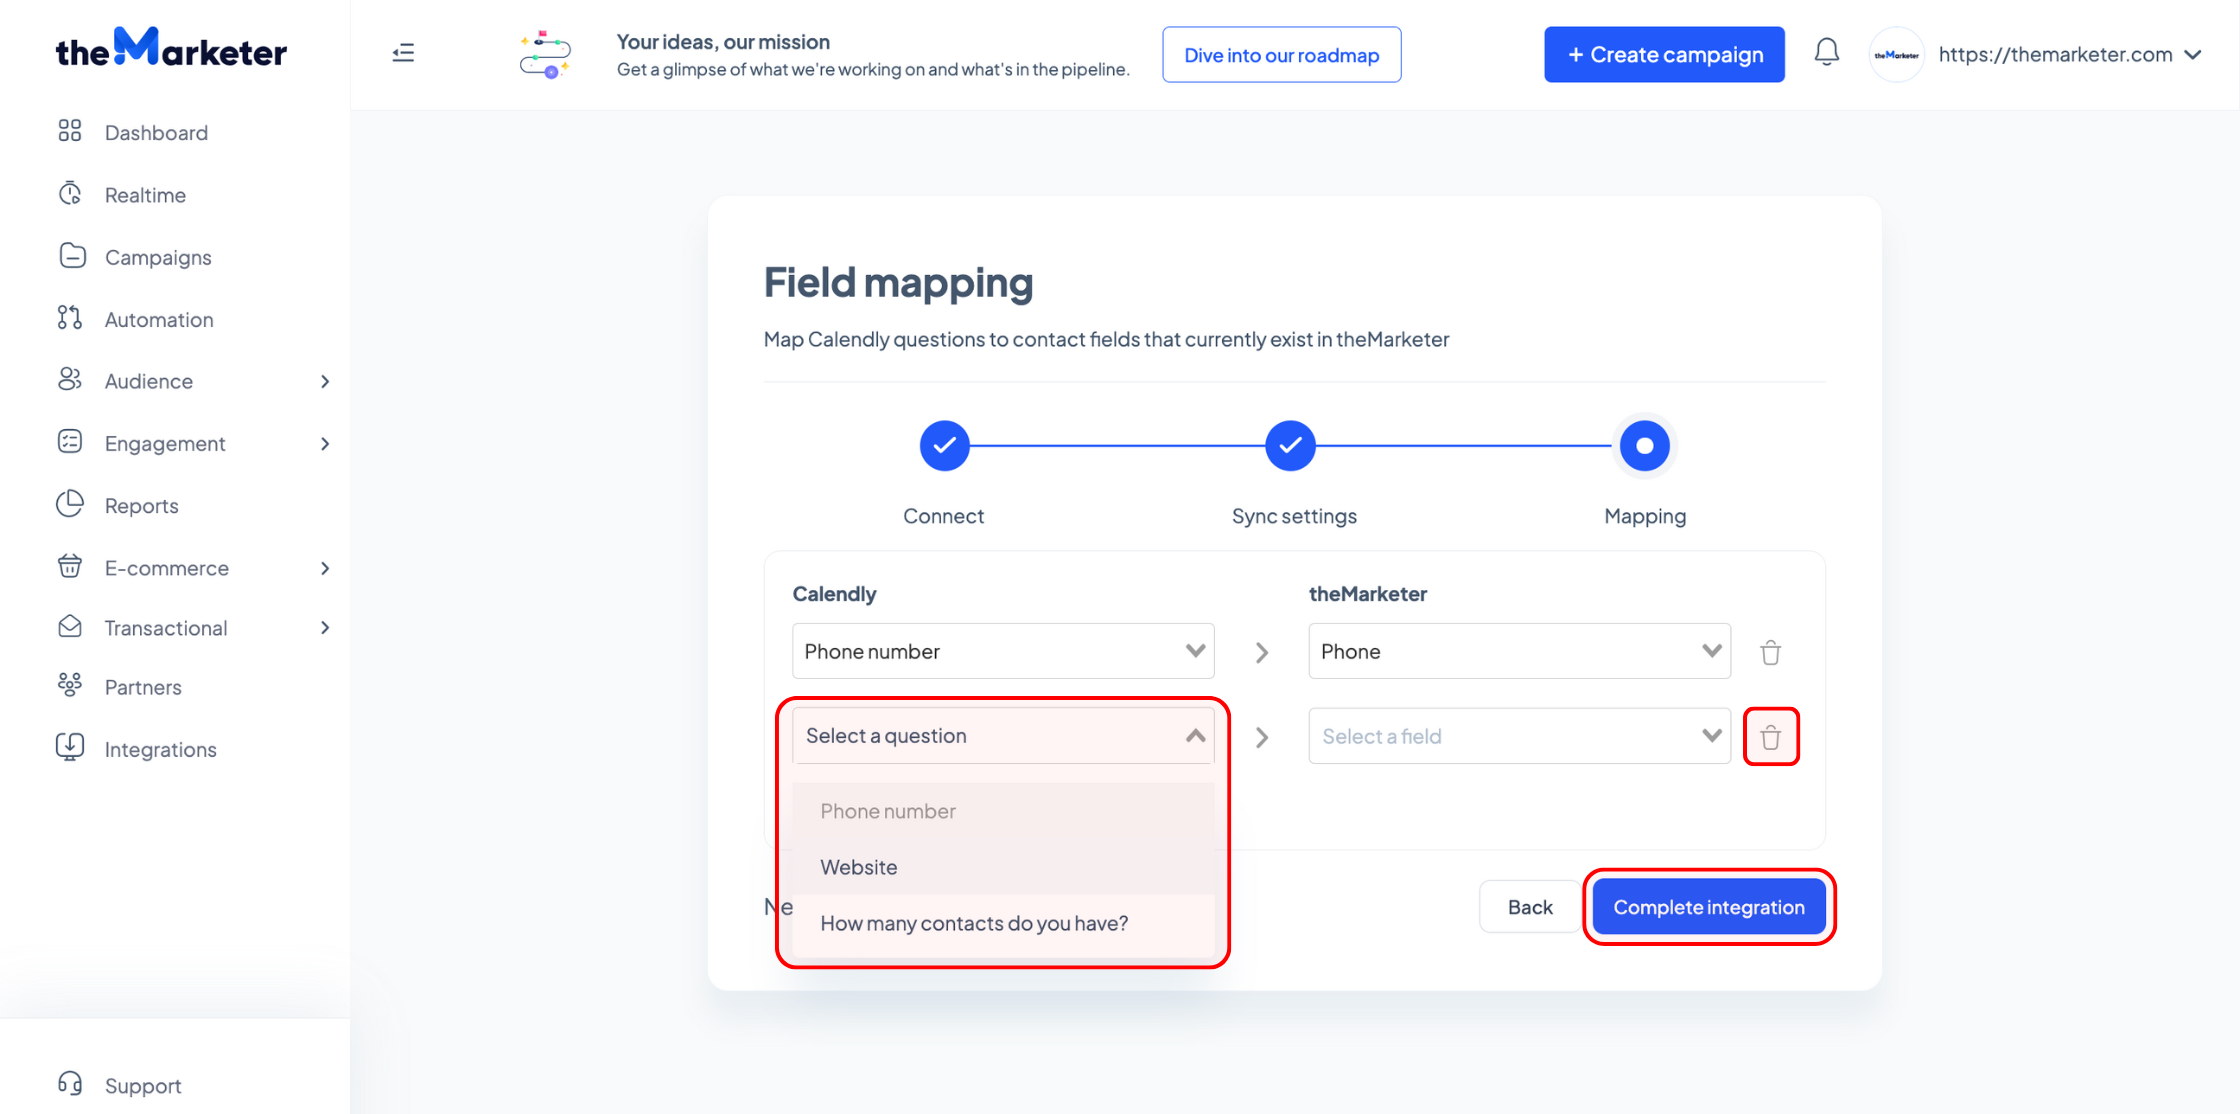
Once you’ve mapped all the information, click ‘Complete integration’.
And… you’re done!
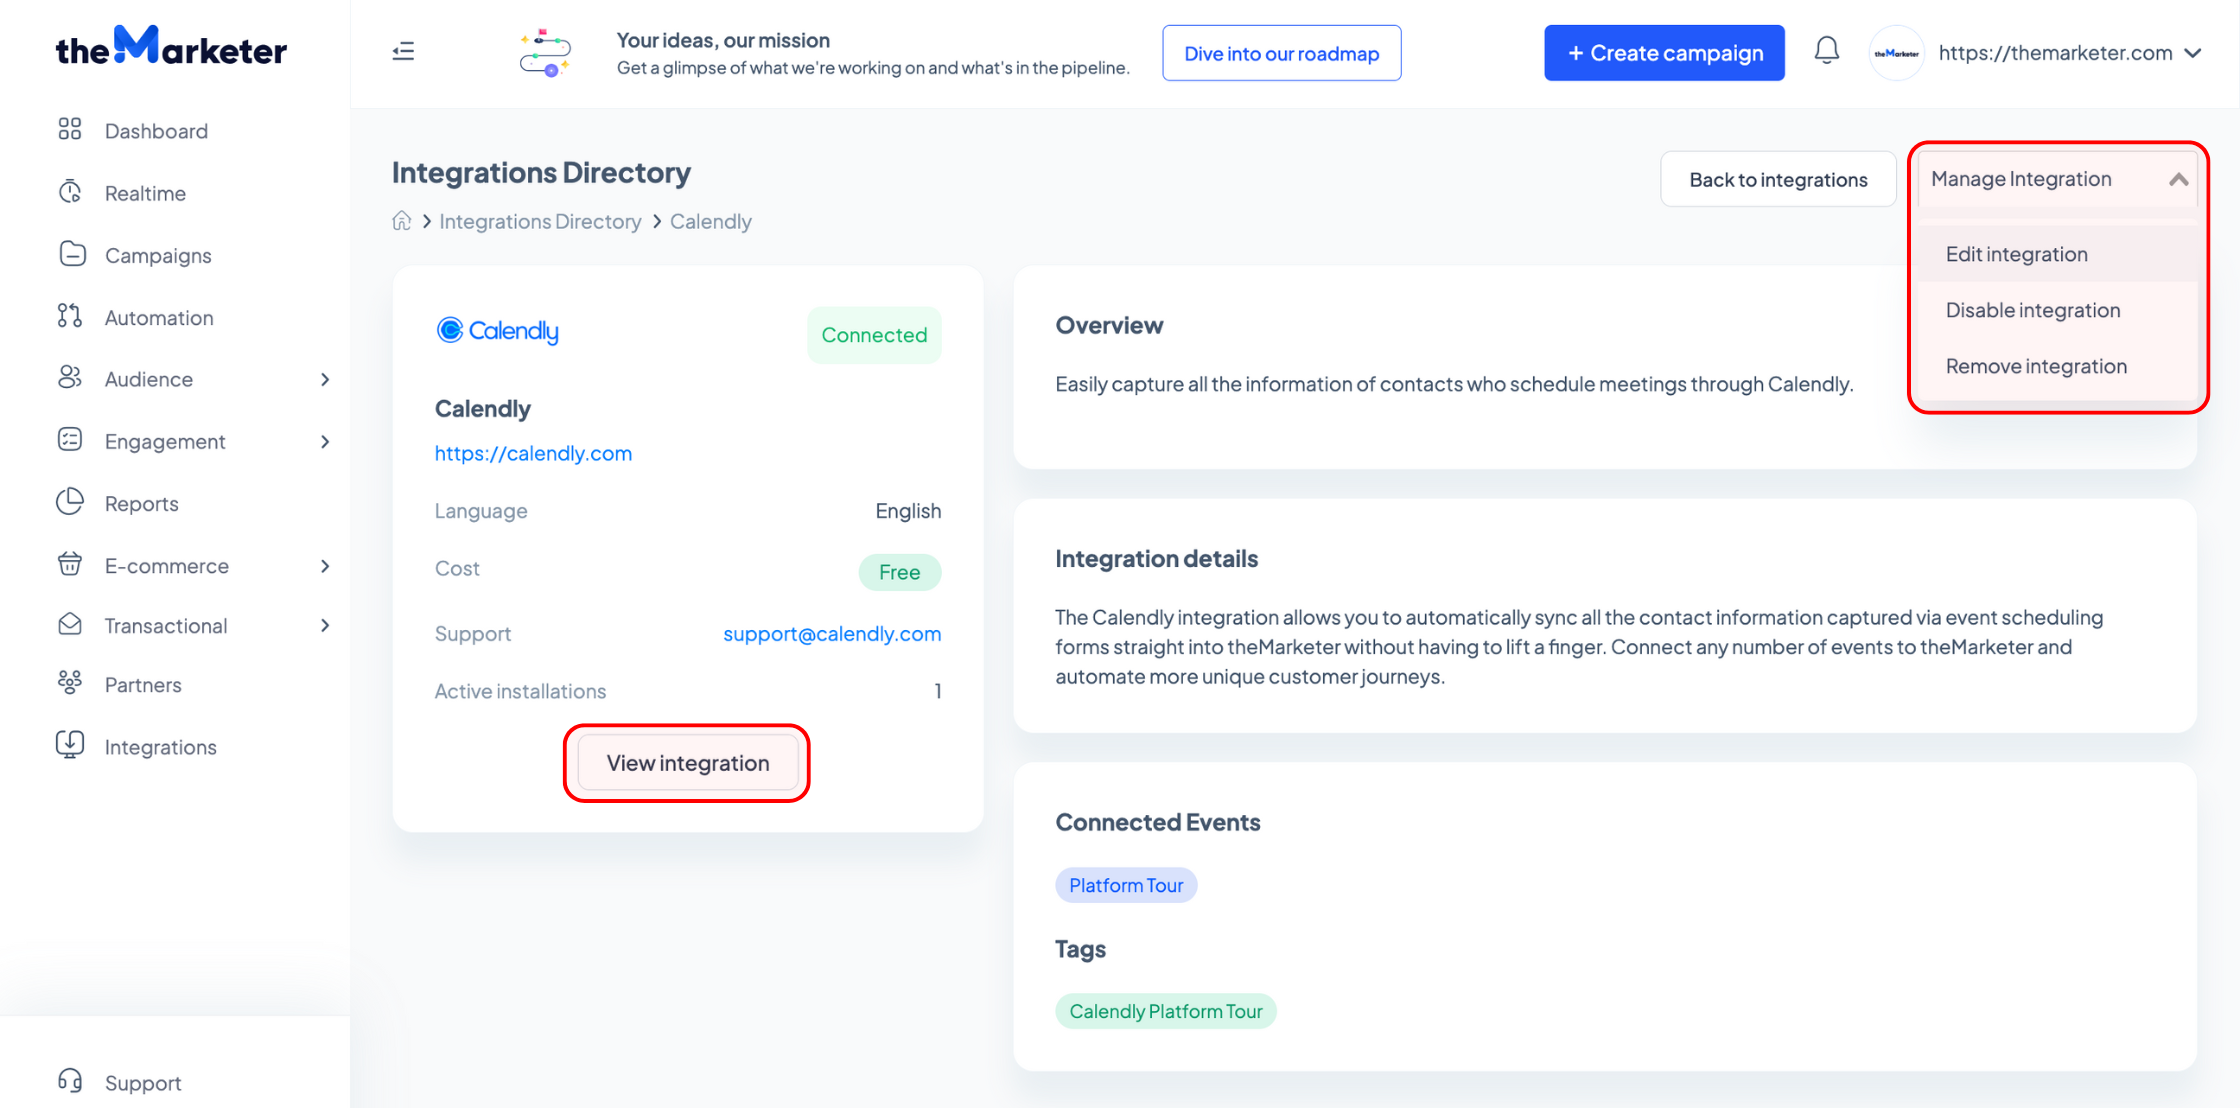
As soon as your integration is completed, you can edit and remove the meetings you have already synced using the dropdown on the top right corner. To quickly edit your Calendly events, you can click ‘View integration’.
If you need further guidance or you would like to suggest other platforms theMarketer should integrate with, our team is always happy to hear from you and assist you.
Related articles
STILL HAVE QUESTIONS?