/ Knowledge base /
How to connect theMarketer to Make.comHow to connect theMarketer to Make.com
If you’re looking to build automated workflows without writing any code, Make.com is an incredibly powerful ally. With its drag-and-drop visual builder, Make allows you to connect theMarketer with other platforms, sync data in real time, and automate repetitive tasks. Using this integration, you can now add and remove contacts in theMarketer automatically, directly from your Make scenarios.
Let’s walk you through the setup process:
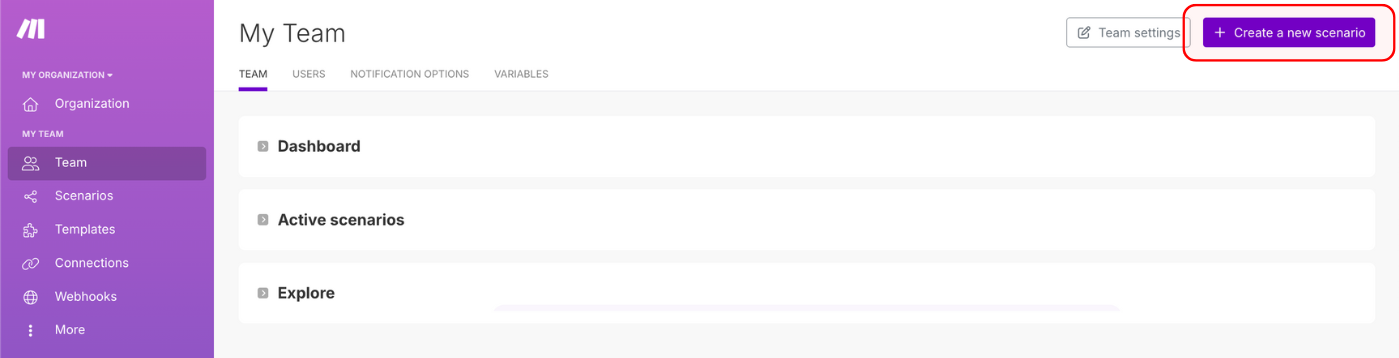
1. Log in to your Make account and click the ‘+ Create a new scenario’ button in the top-right corner.
This will take you to the visual scenario builder, where you can design your workflow by connecting various services and apps.
2. In the scenario builder, click the large purple ‘+’ icon, then search for ‘theMarketer’ using the bar at the bottom.
You’ll see the available actions:
- Add a Contact – Adds a new contact to your theMarketer database.
- Remove a Contact – Removes an existing contact from theMarketer.
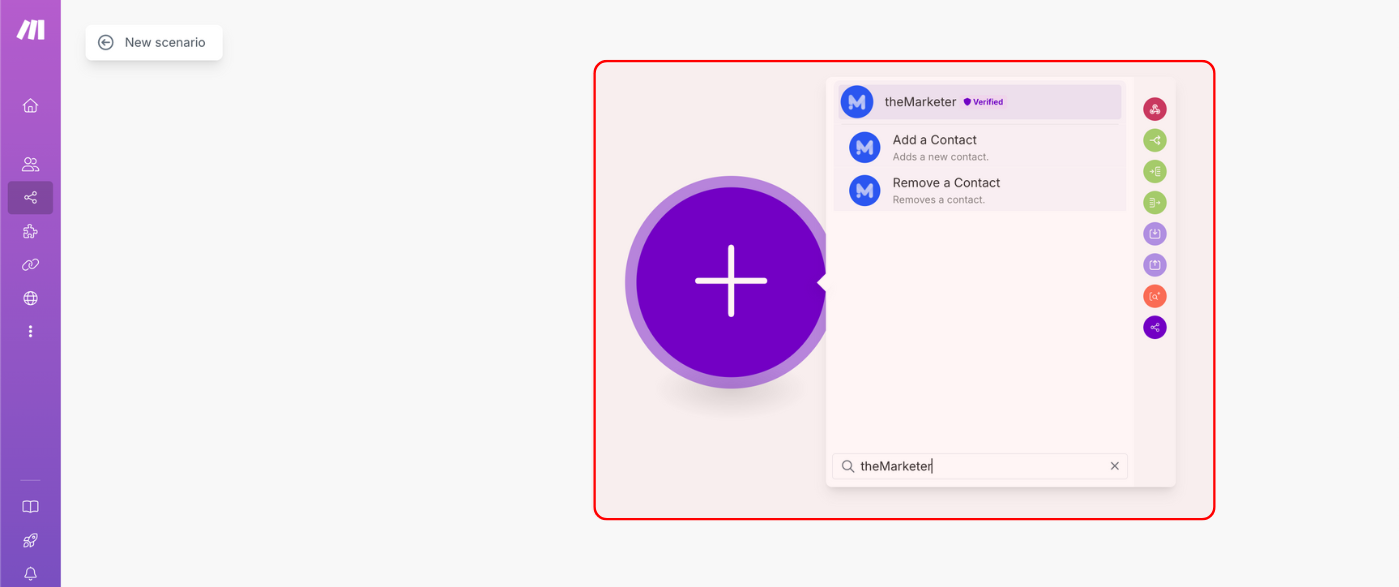
Choose the action you want to use based on your automation goals.
3. Create and authorize your connection.
When prompted, click ‘Create a connection’.
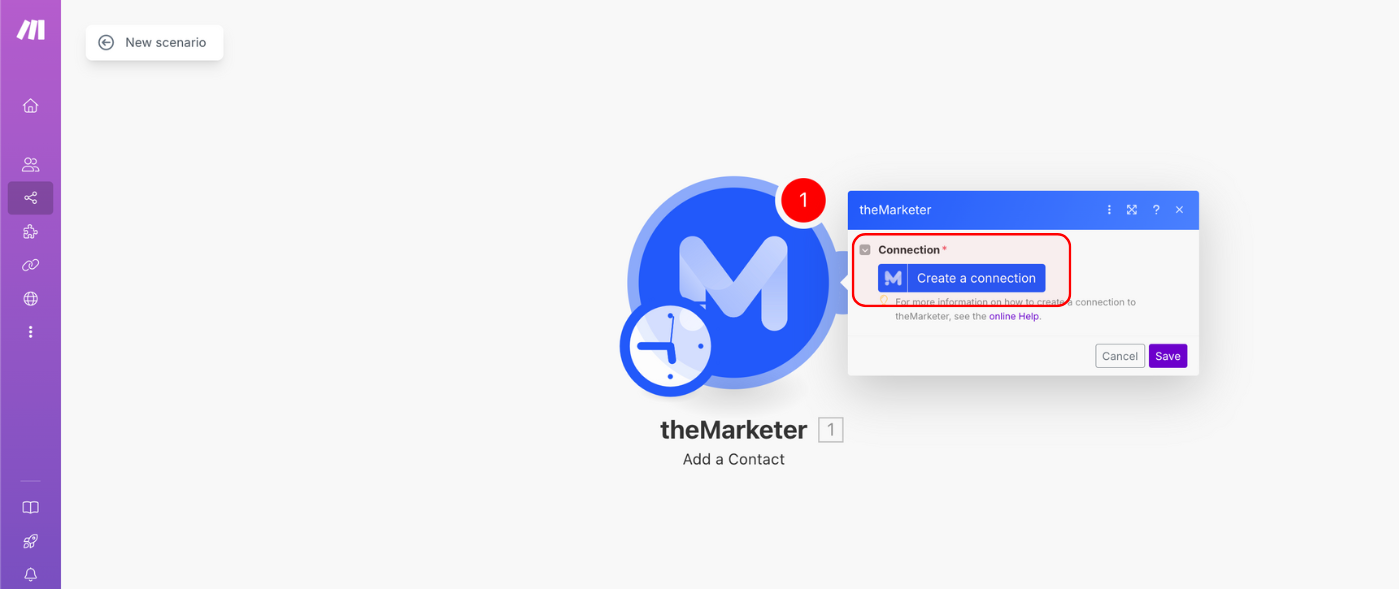
This will open a pop-up asking you to name the connection and paste in your REST Key, and Customer ID from theMarketer.
To find these, log in to theMarketer and go to ‘Settings’ > ‘Technical integration’.
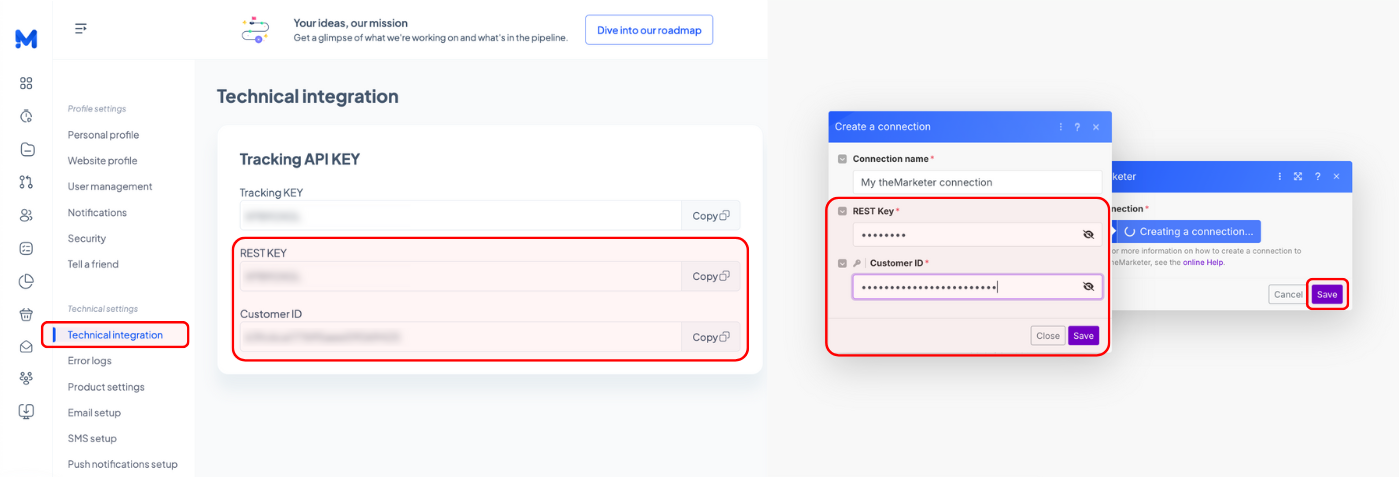
Copy and paste them into the appropriate fields in Make and click ‘Save’.
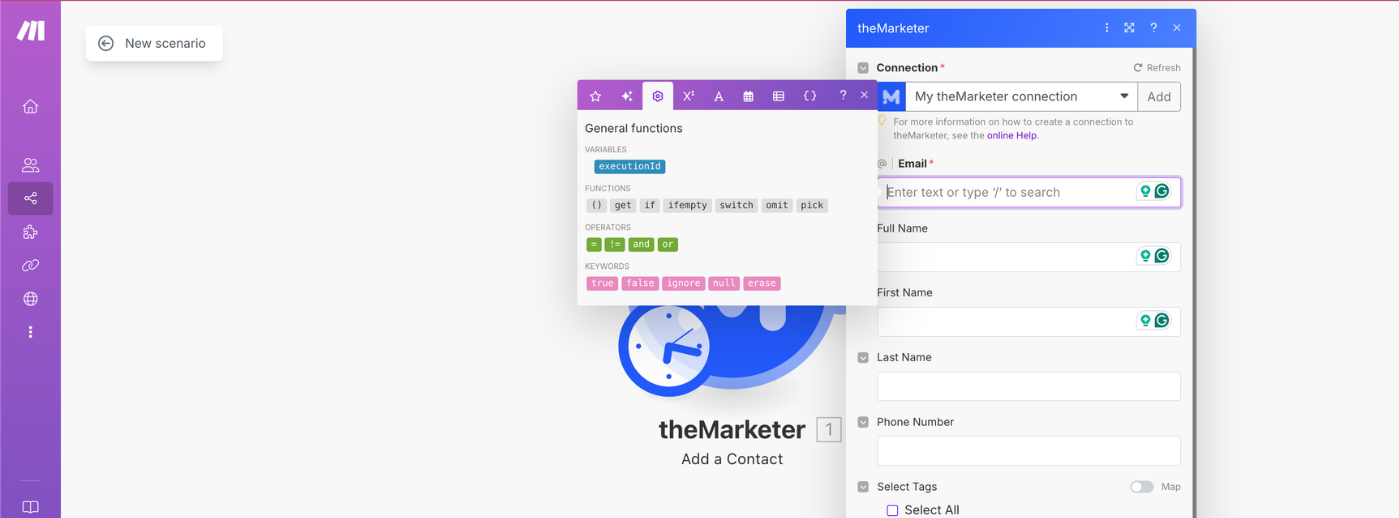
4. Map your fields.
Once your connection is created, you can begin mapping fields between Make and theMarketer.
For example, if you’re adding a contact, you’ll need to map:
- Email (required)
- Full Name or first & last name
- Phone number (optional)
- Tags (optional – you can select from existing tags in theMarketer)
This allows you to send leads from any source connected to Make (like a form, spreadsheet, or another app) directly to theMarketer with the correct information and tags.
5. Activate your scenario
Once everything is mapped and ready, click ‘Run once’ to test the scenario. If it works as expected, click ‘Schedule’ to activate your automation and let Make handle it from now on.
And… you’re done!
With just a few clicks, you’ve connected theMarketer to Make and unlocked a new level of automation potential. Whether you're syncing leads from a CRM, importing signups from Google Sheets, or reacting to webhooks, this setup saves time and ensures your contact base is always up to date.
If you need further assistance or have ideas for additional integrations you'd like to see, our team is always happy to hear from you.
Related articles
STILL HAVE QUESTIONS?