/ Knowledge base /
How to connect theMarketer to SurveyMonkeyHow to connect theMarketer to SurveyMonkey
Integrating SurveyMonkey with theMarketer allows you to combine the power of targeted surveys with advanced audience segmentation and automated communication. By connecting the two platforms, you can automatically sync the data collected via SurveyMonkey forms with your contact profiles in theMarketer, helping you gather insights and act on them in real time.
Here’s how to set up the integration:
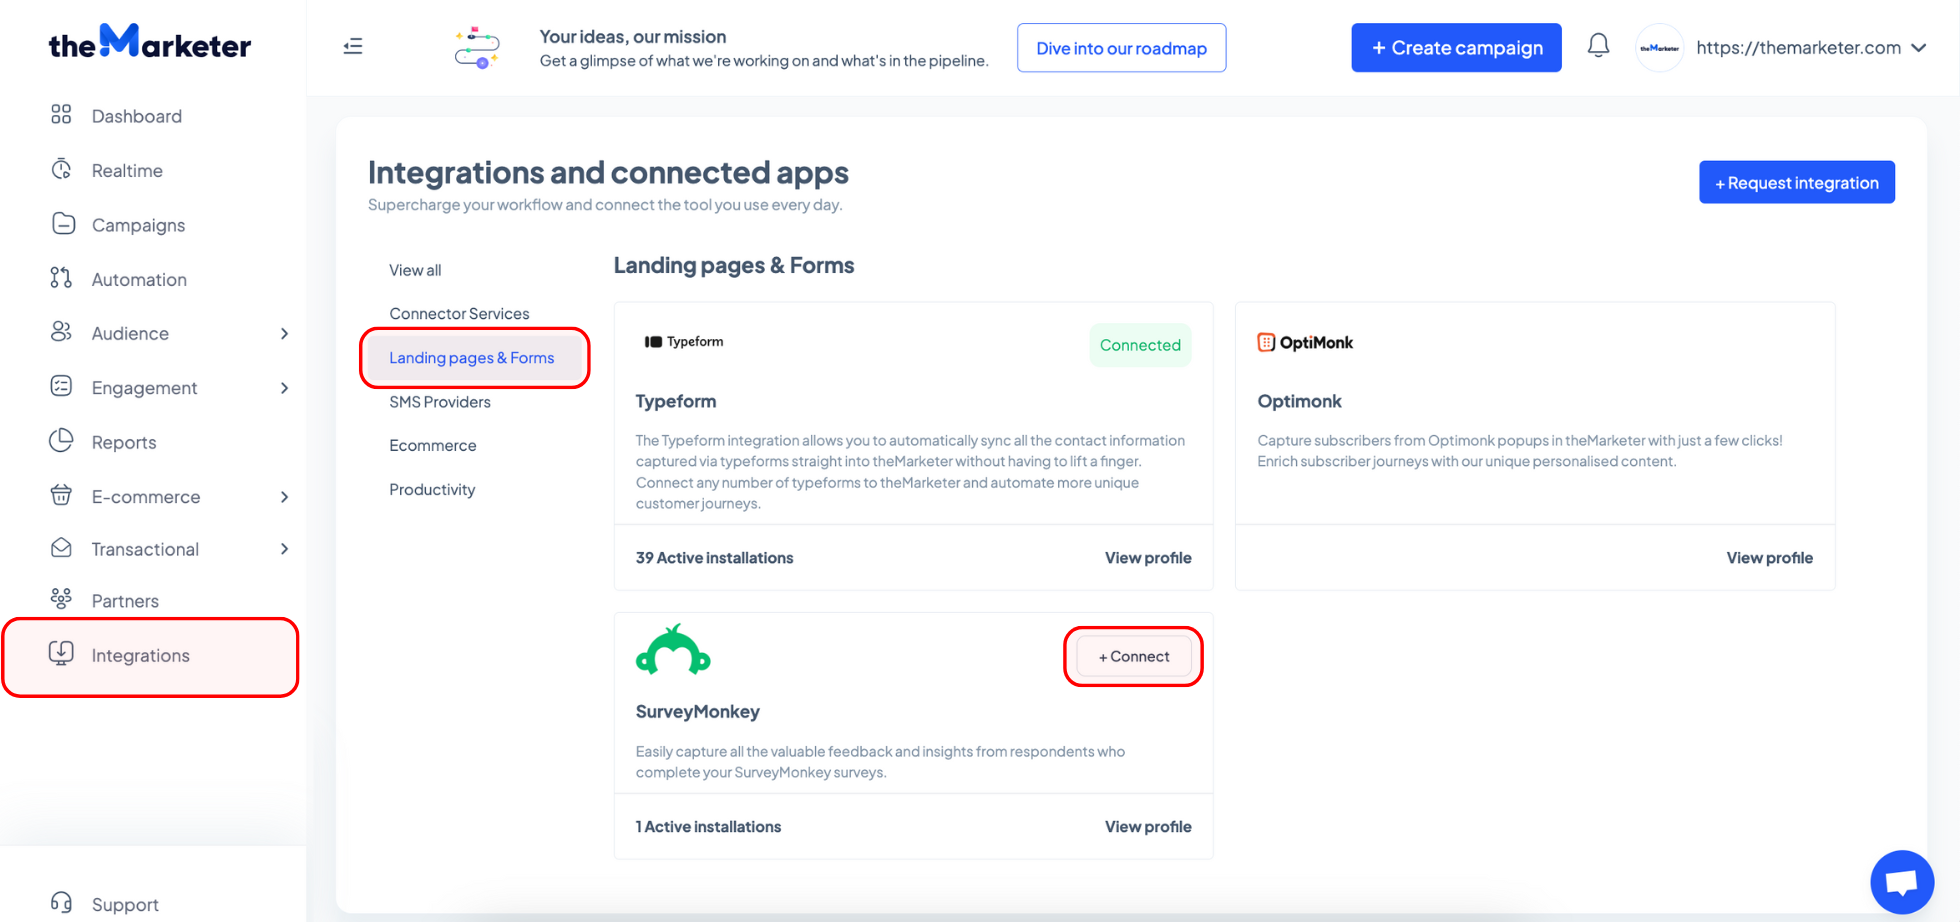
1. In theMarketer app, go to ‘Integrations’ > ‘Landing pages & Forms’, then click the ‘Connect’ button on the SurveyMonkey card.
2. Click ‘Connect to SurveyMonkey’ to begin linking your accounts.
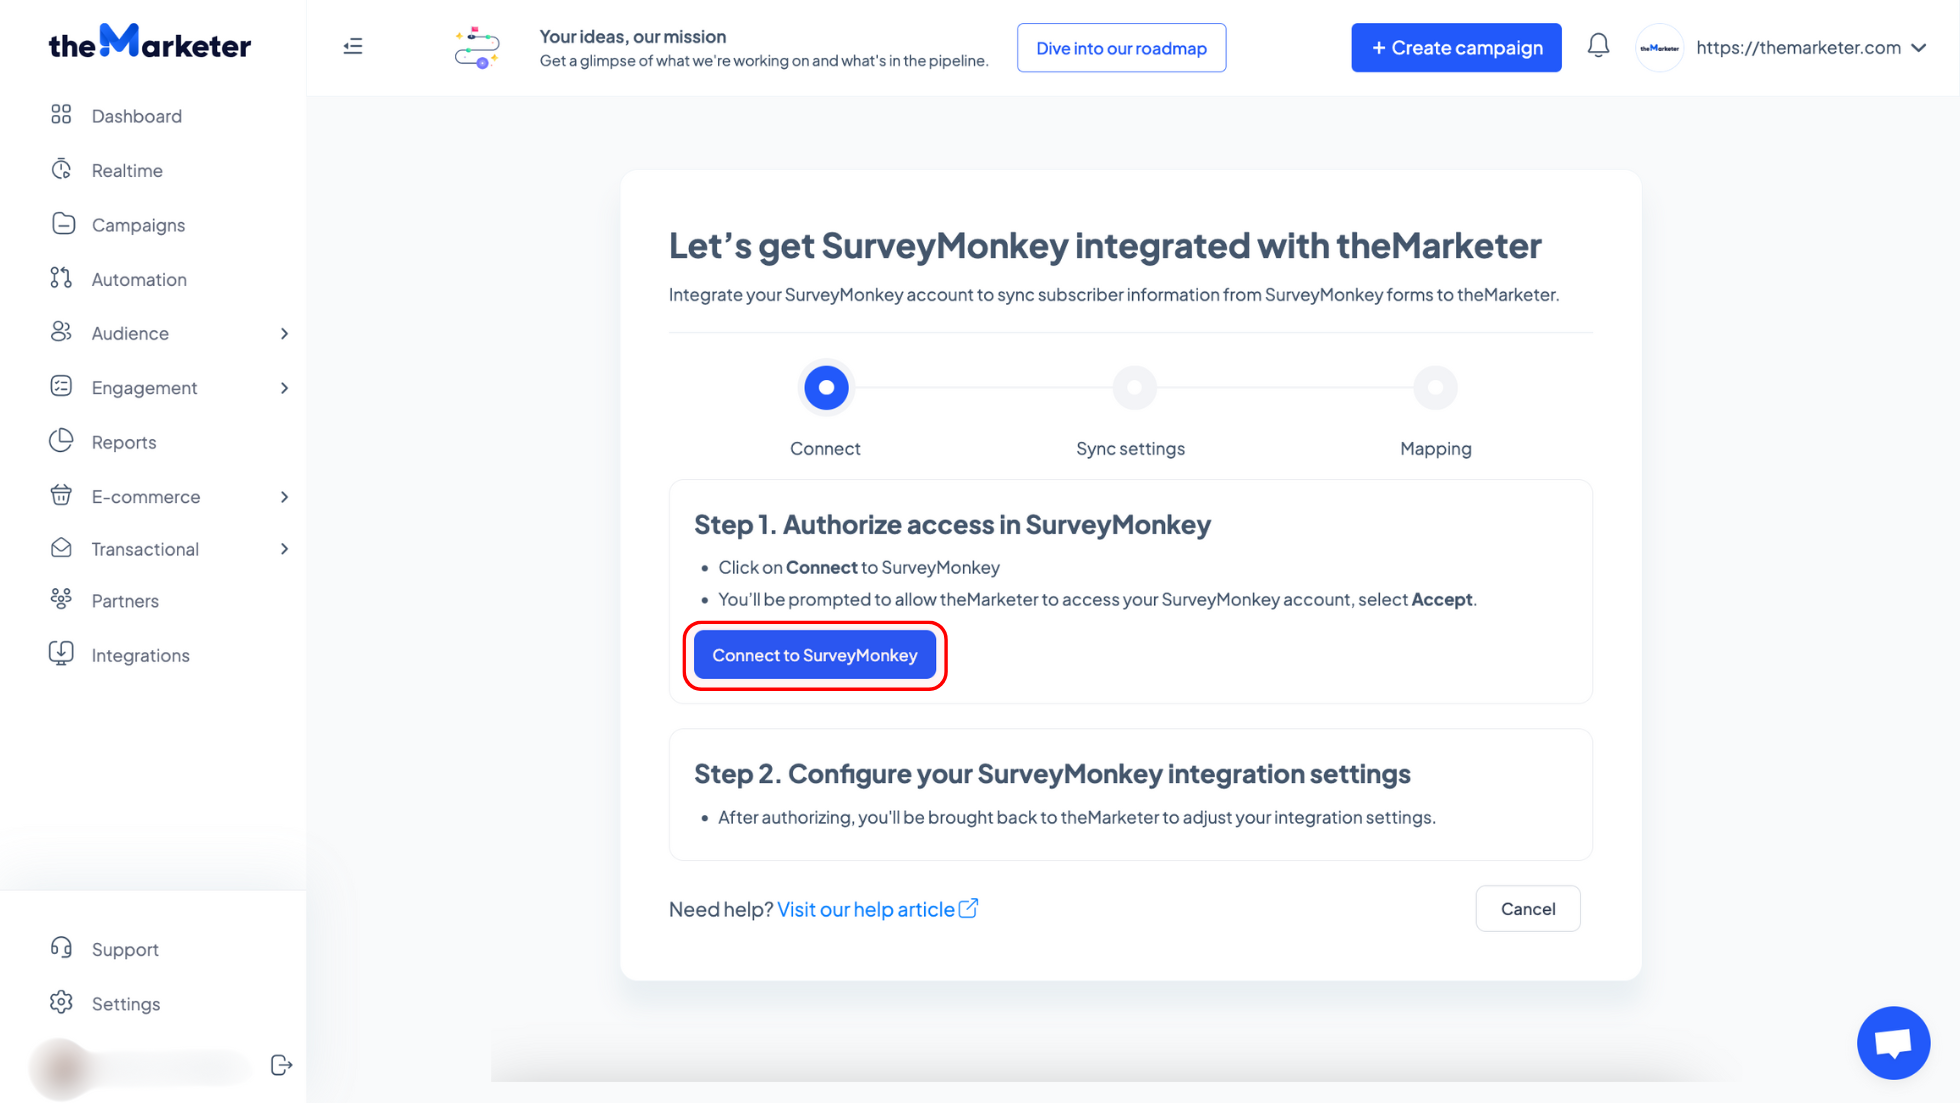
3. Log in to your SurveyMonkey account.
You’ll be redirected to the SurveyMonkey login page. Log in using your preferred method or create a new account if you don’t already have one.

4. Use the dropdown menu to select the form you want to connect with theMarketer.
Remember that only the forms that exist in your SurveyMonkey account will appear here. If your form isn’t listed, return to SurveyMonkey, create it, and then resume the integration process.
You can also tag the contacts filling in your SurveyMonkey forms by clicking the toggle button (turning it blue). Choose an existing tag from the drop-down or click ‘+Create new tag’ to generate a new one. Once created, it will appear in the list, and you will be able to select it. If needed, you can add multiple tags to your contacts.
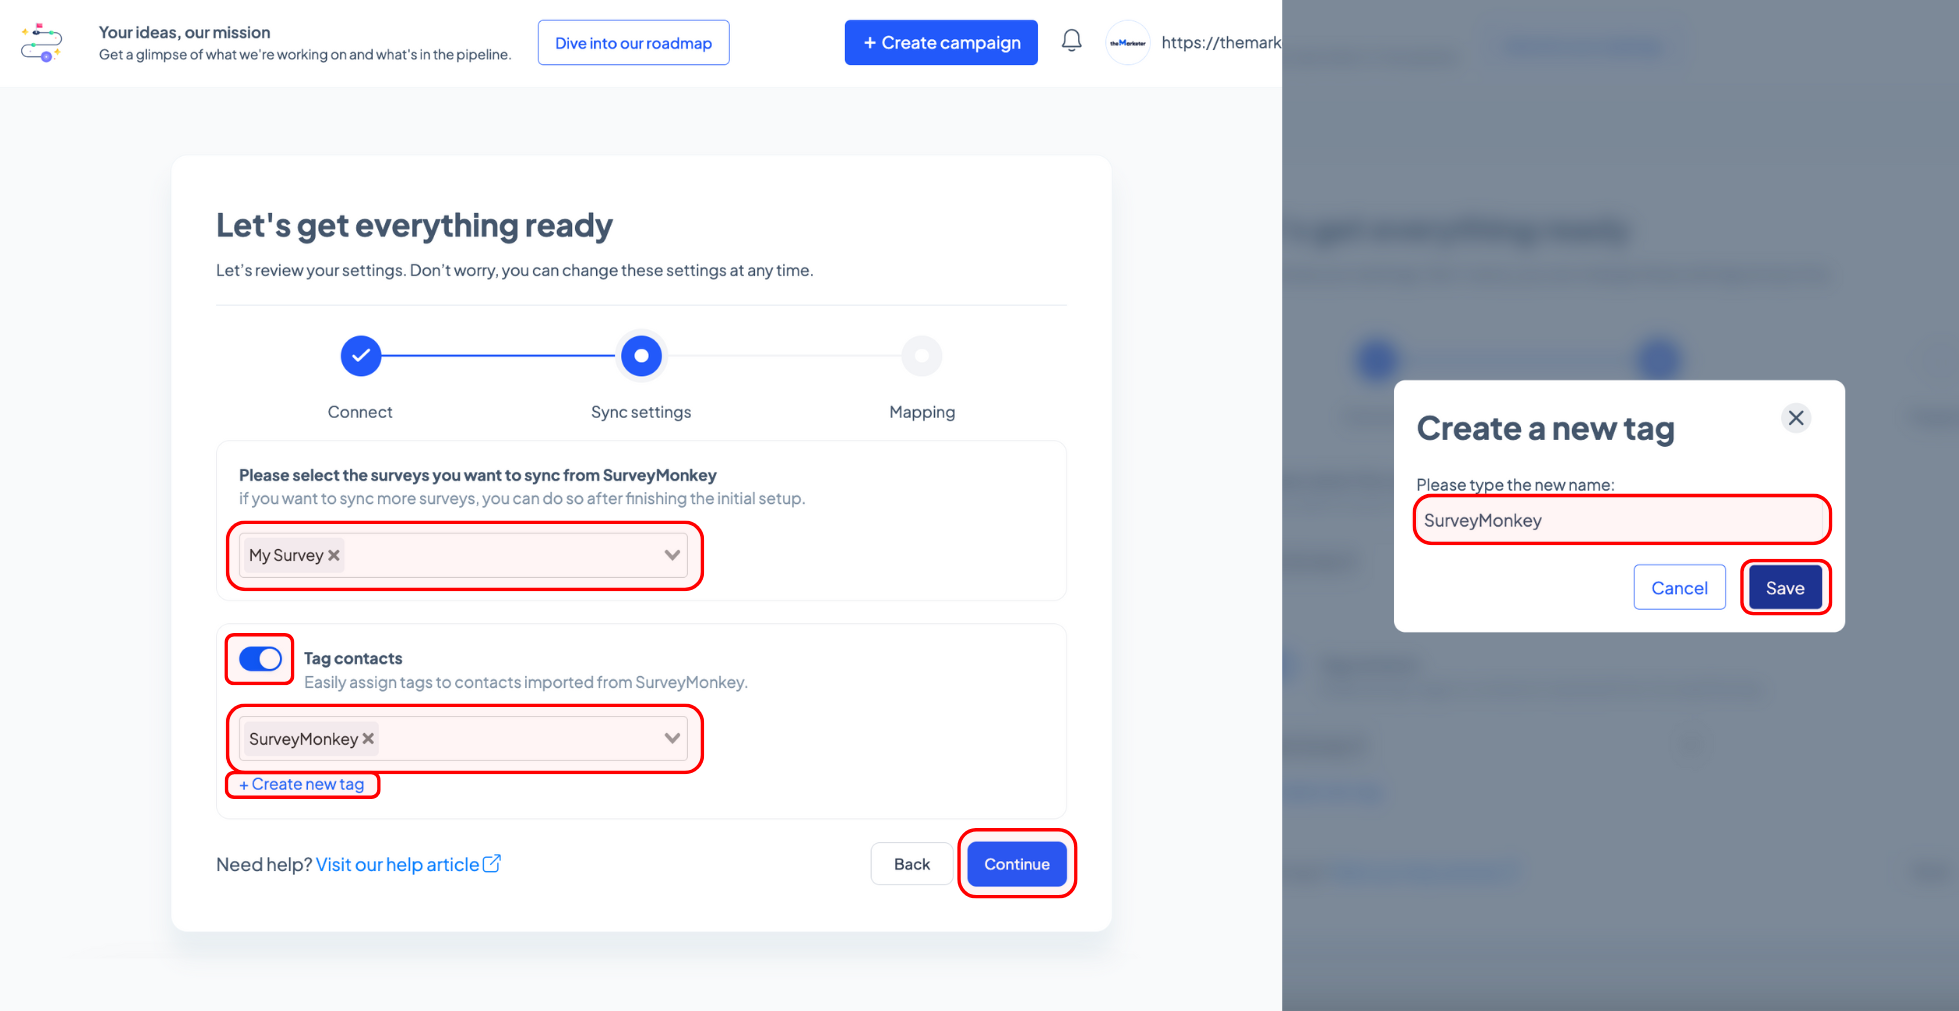
Once you’re done, click ‘Continue’.
5. Map and match the information.
Use the drop-down menus to match each SurveyMonkey question with a corresponding contact attribute in theMarketer. To include more fields, click the ‘+ Add question mapping’ button. To remove a field, click the bin icon next to it.

Once you’ve mapped all the information, click ‘Complete integration’.
And… you’re done!
Your integration is now live. You can edit, disable, or remove the synced surveys at any time using the drop-down menu in the top-right corner. To quickly access and manage your connected surveys, click ‘View integration’.
As soon as your integration is completed, you can edit and remove the meetings you have already synced using the dropdown on the top right corner. To quickly edit your Calendly events, you can click ‘View integration’.

If you need further guidance or you would like to suggest other platforms we should connect with, don’t hesitate to reach out. We’re always happy to hear from you and assist you!
Related articles
STILL HAVE QUESTIONS?