/ Knowledge base /
How to create a segment based on tagsHow to create a segment based on tags
When it comes to organizing your audience, tags are absolute lifesavers. They help you bring more structure to your growing subscriber base and create neat, manageable groups.
Whether someone joined your list from a summer sale pop-up or an end-of-year campaign, tagging them right can make all the difference. Let's dive into how you can use these nifty tools to segment your audience like a pro.
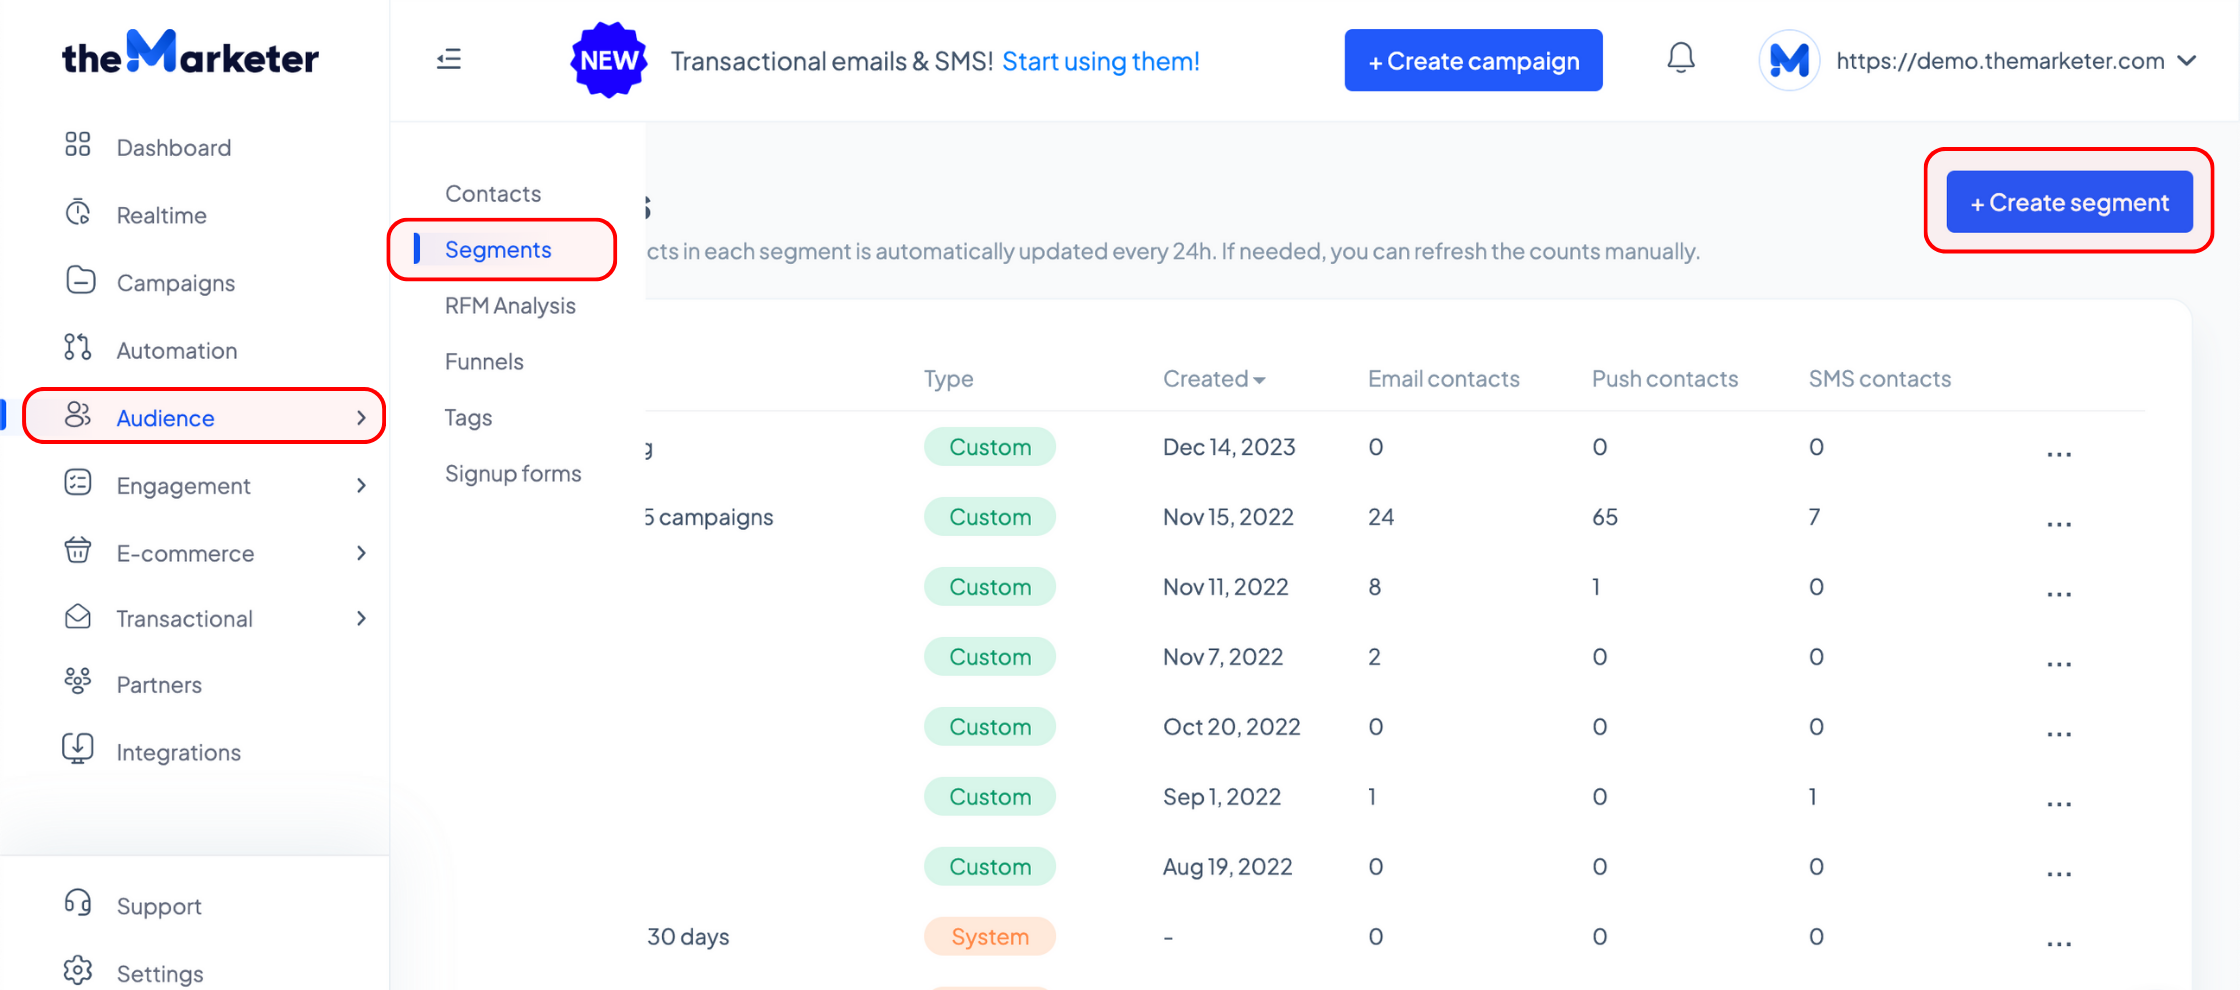
1. Go to ‘Audience’ > ‘Segments’ and click the ‘+ Create segment’ button.
2. Determine who will be included in your segment
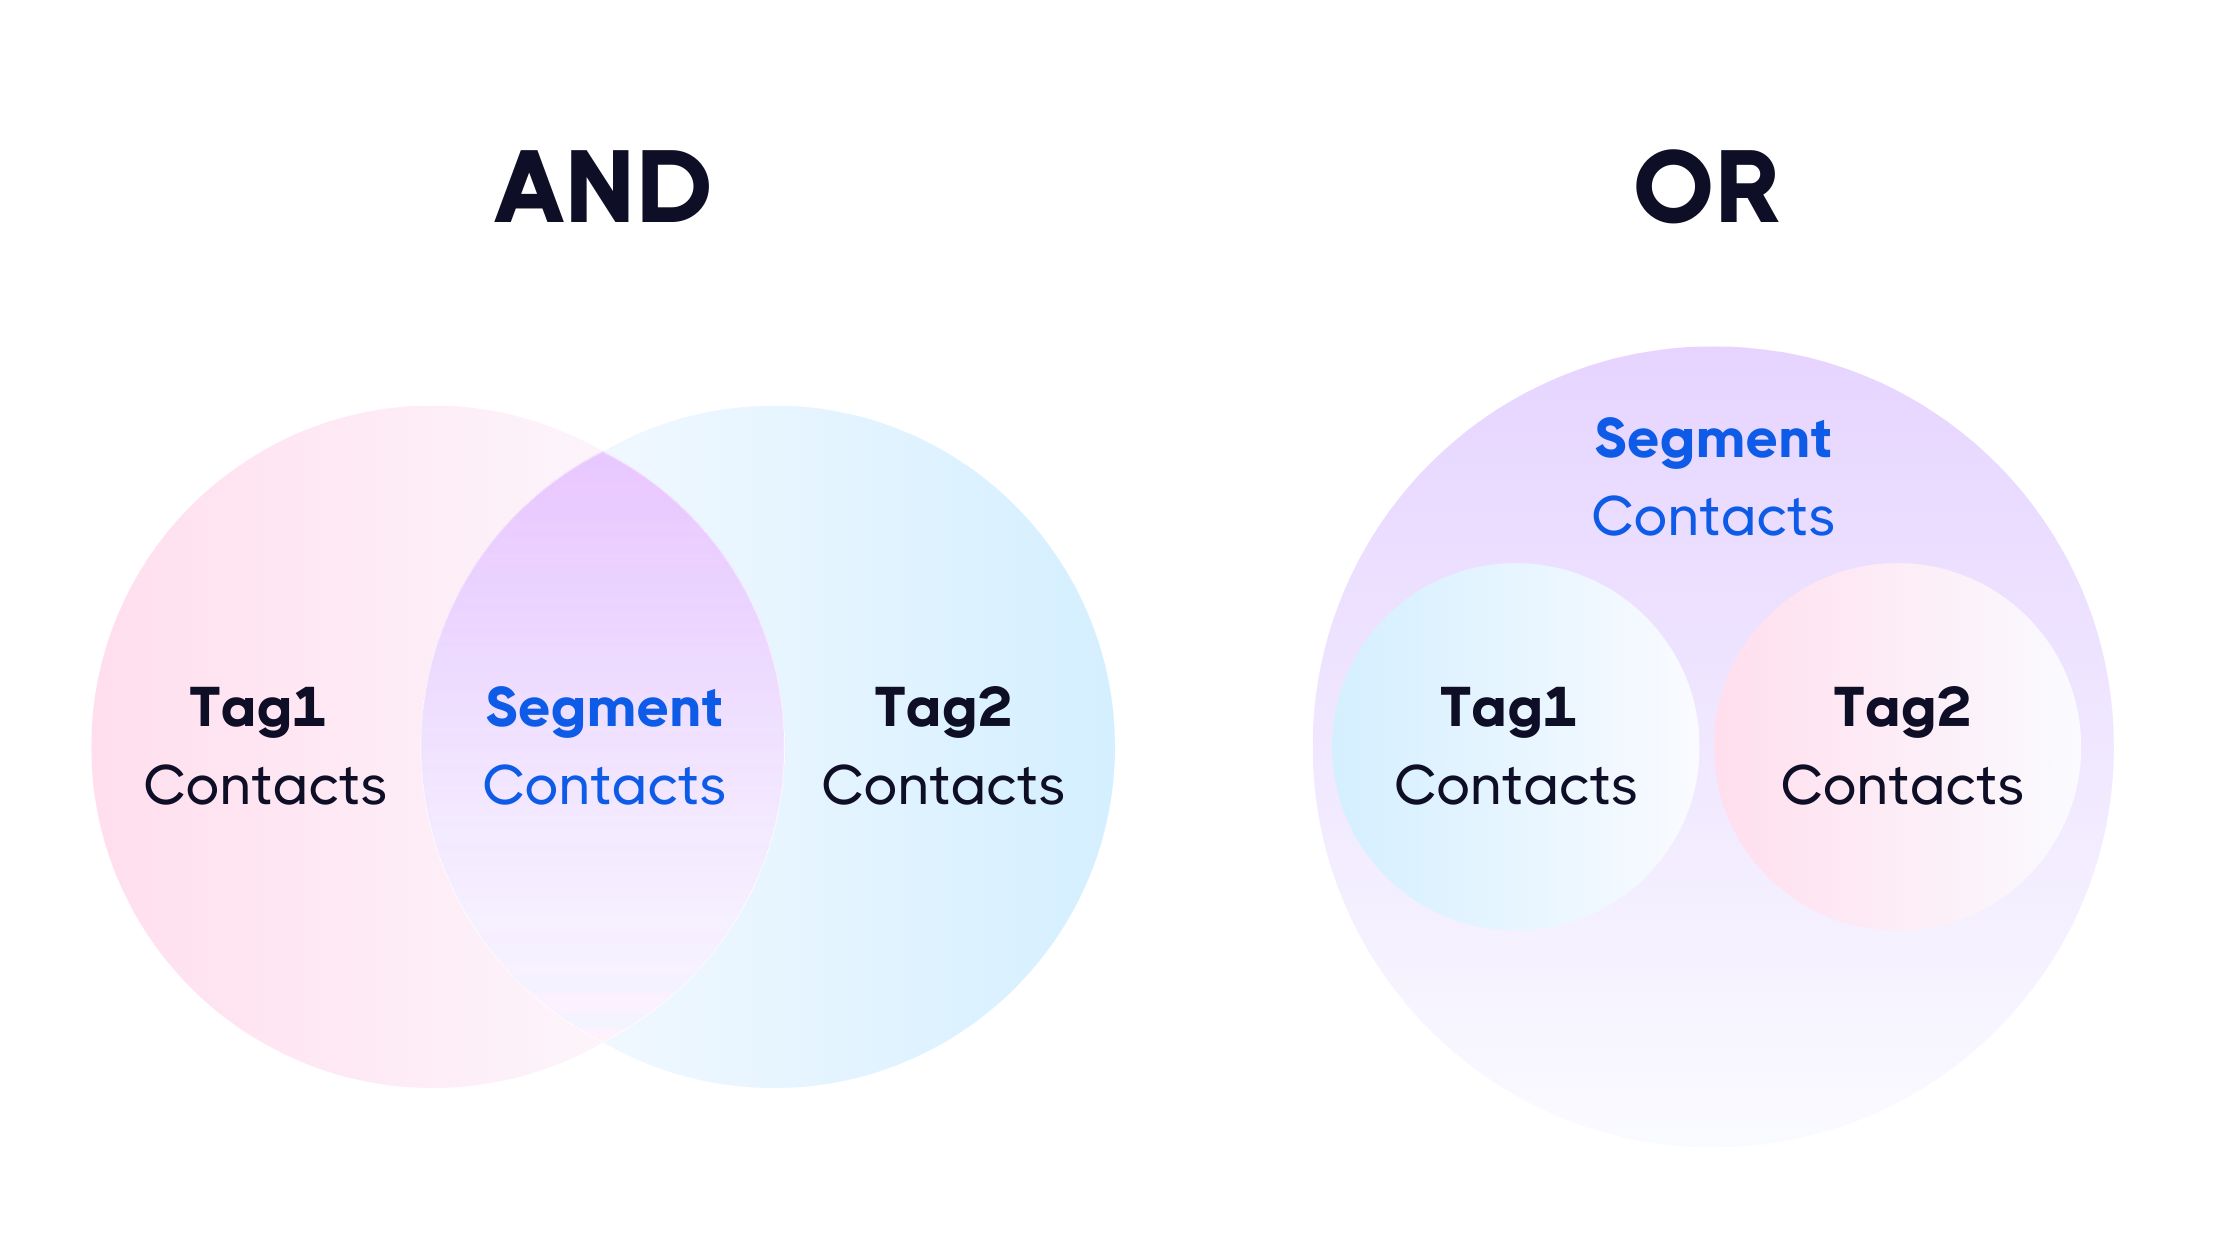
If you are planning on creating a segment with the contacts marked with a single particular tag, you can select the ‘all’ option in the dropdown menu. The same goes for creating a segment consisting of those contacts marked with several tags simultaneously. For example, contacts marked with both ‘Tag1’ and ‘Tag2’.
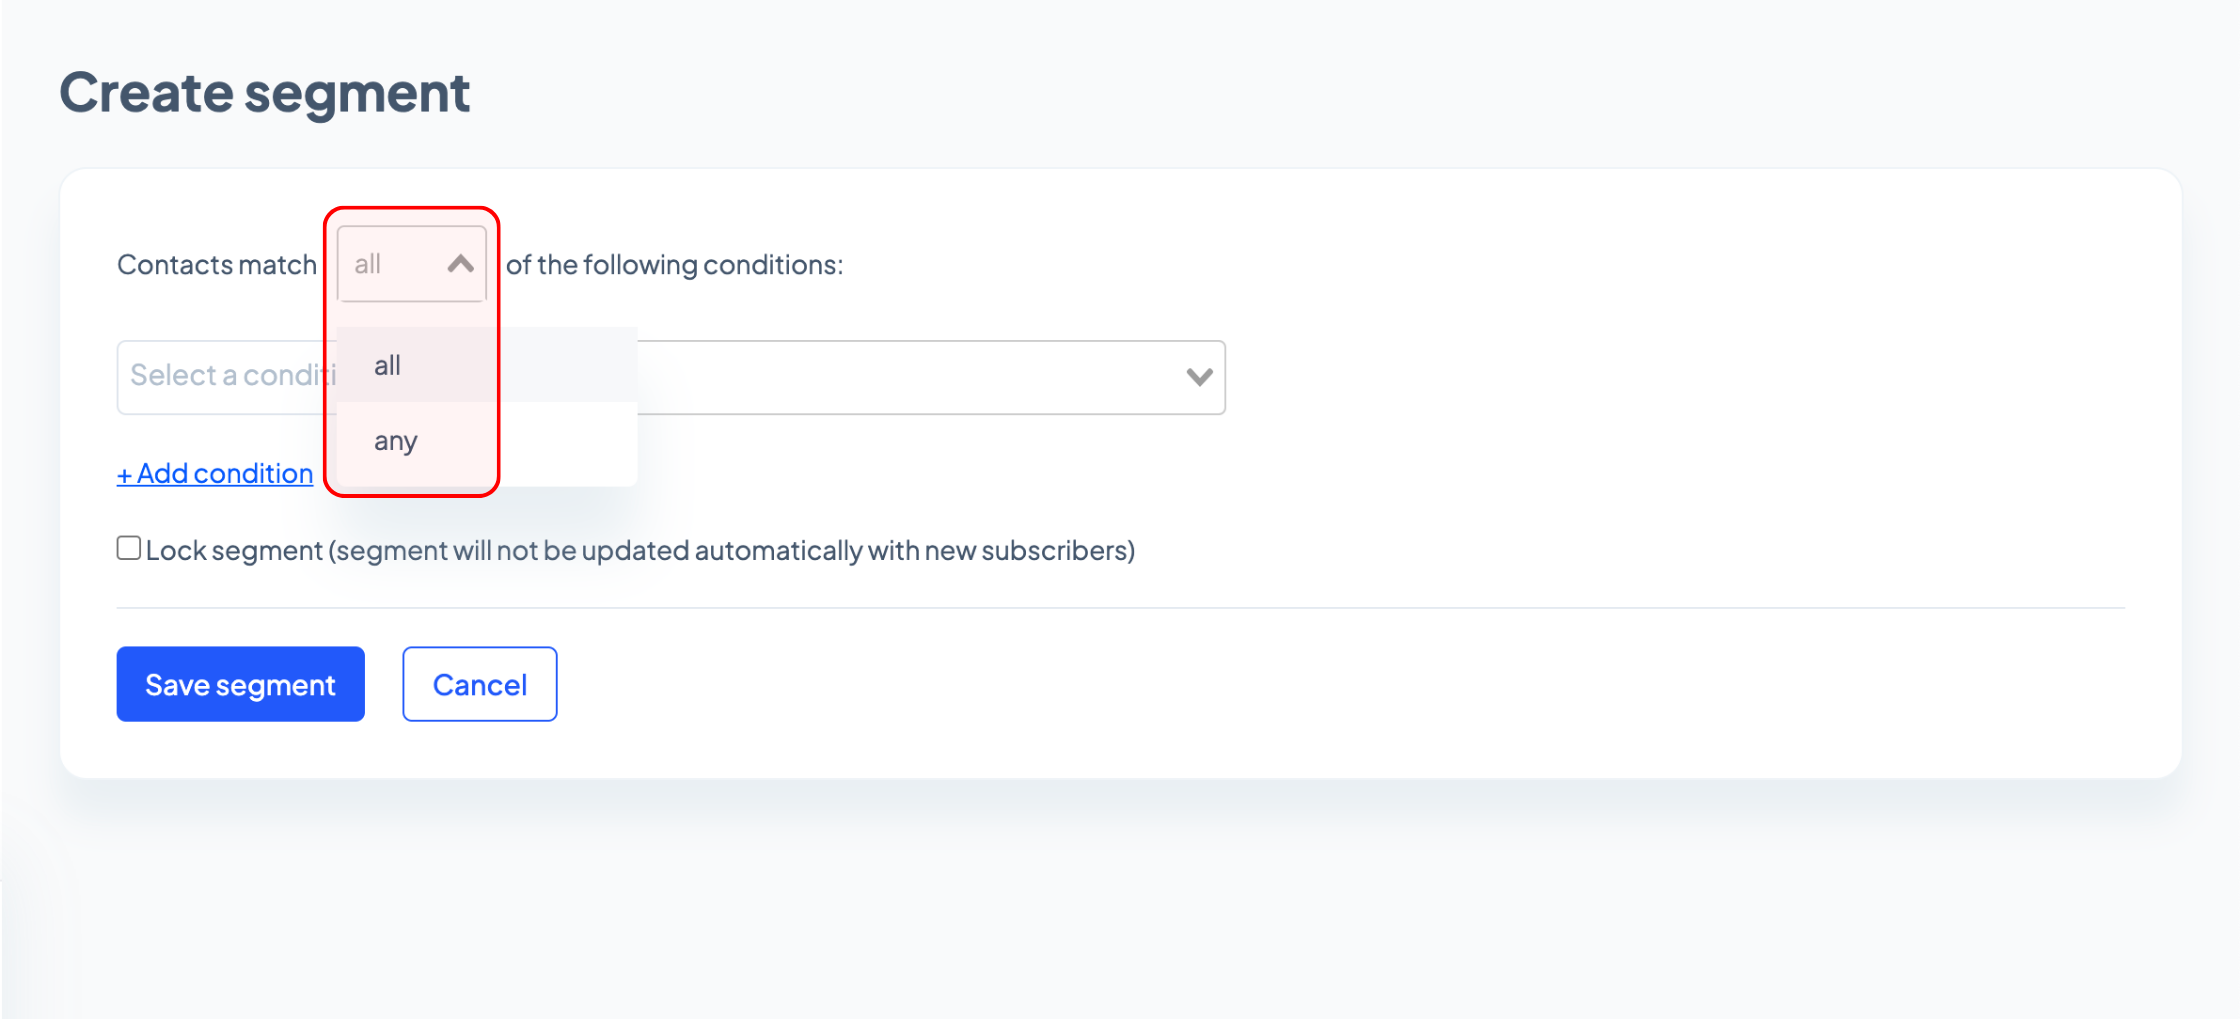
However, if you’d like your segment to include those marked with either ‘Tag1’ or ‘Tag2’, select the ‘or’ option in the dropdown menu and your segment will include all the contacts marked with ‘Tag1’, ‘Tag2’, or both.
Proceed to the second dropdown menu, click the ‘Subscriber data’ tab, and select ‘Customer tag’.
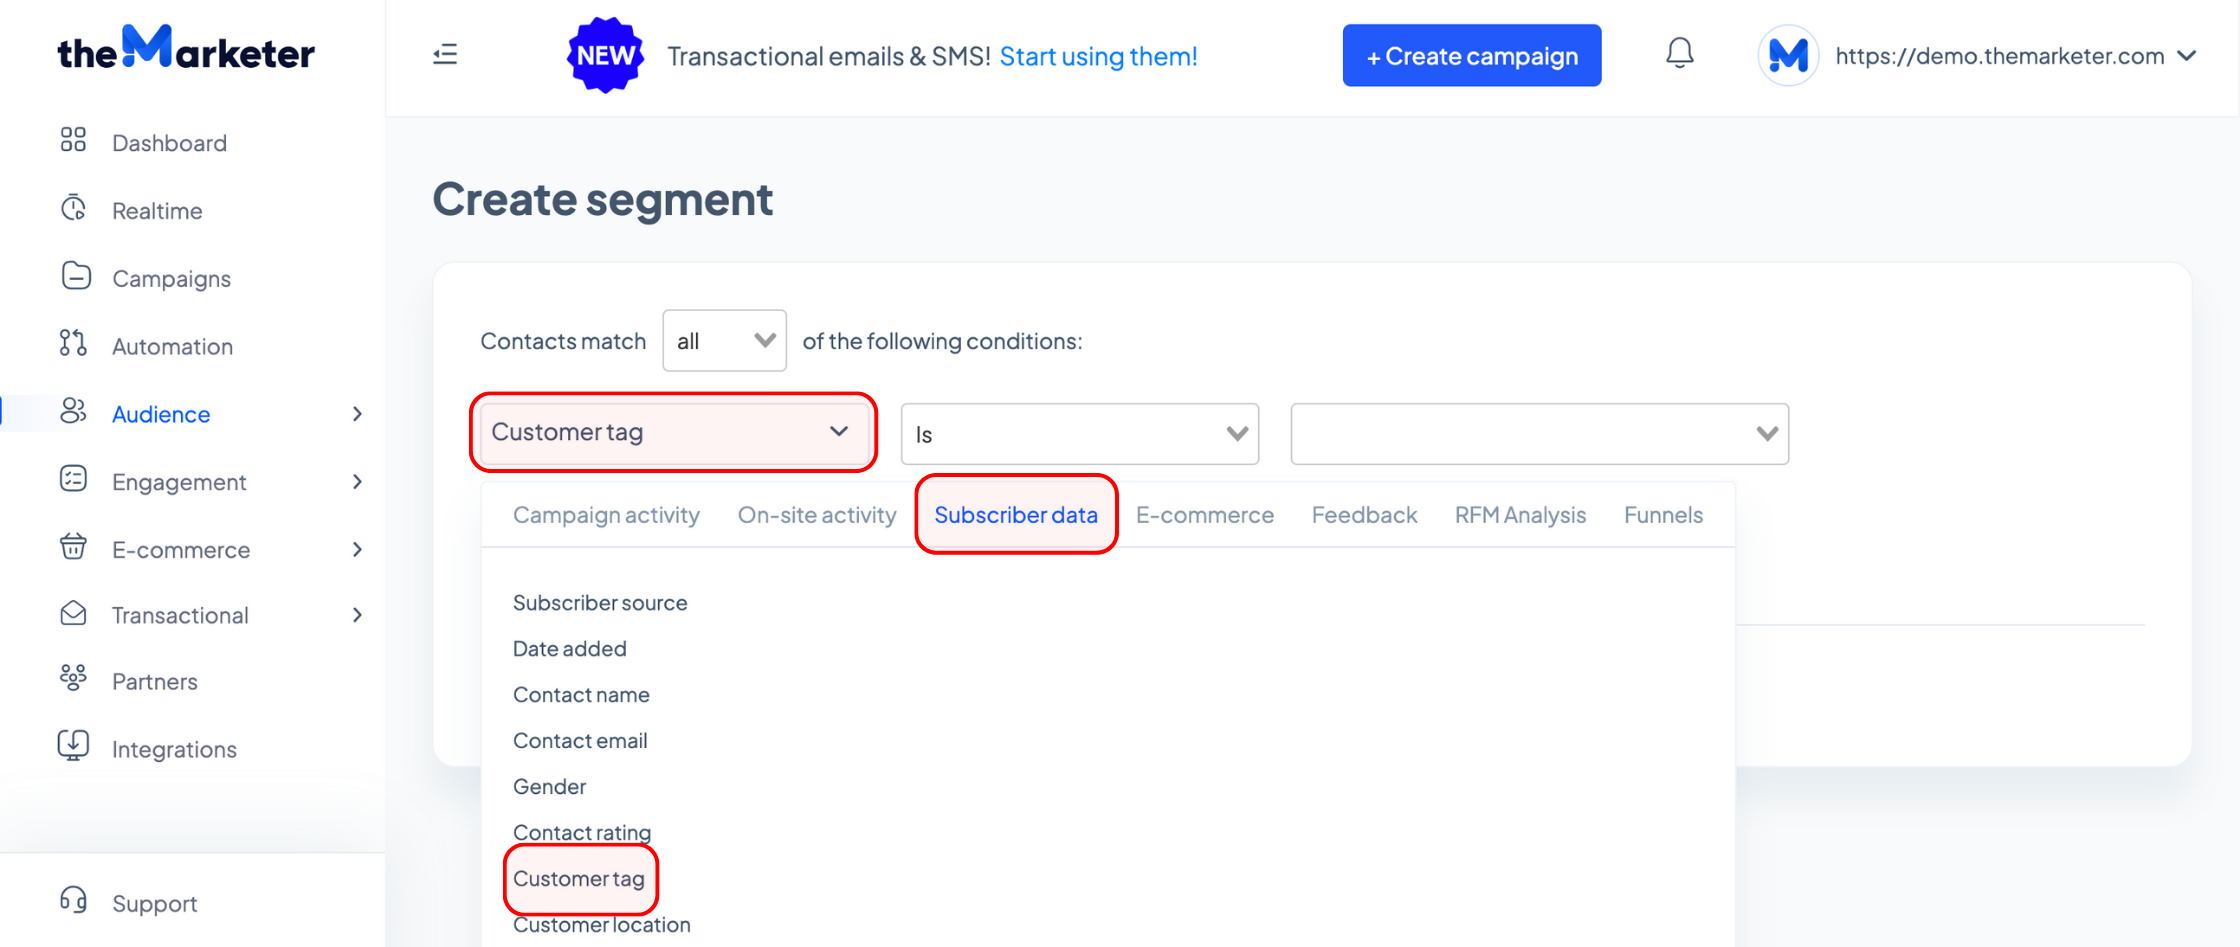
In the last dropdown menu, select the desired tag.
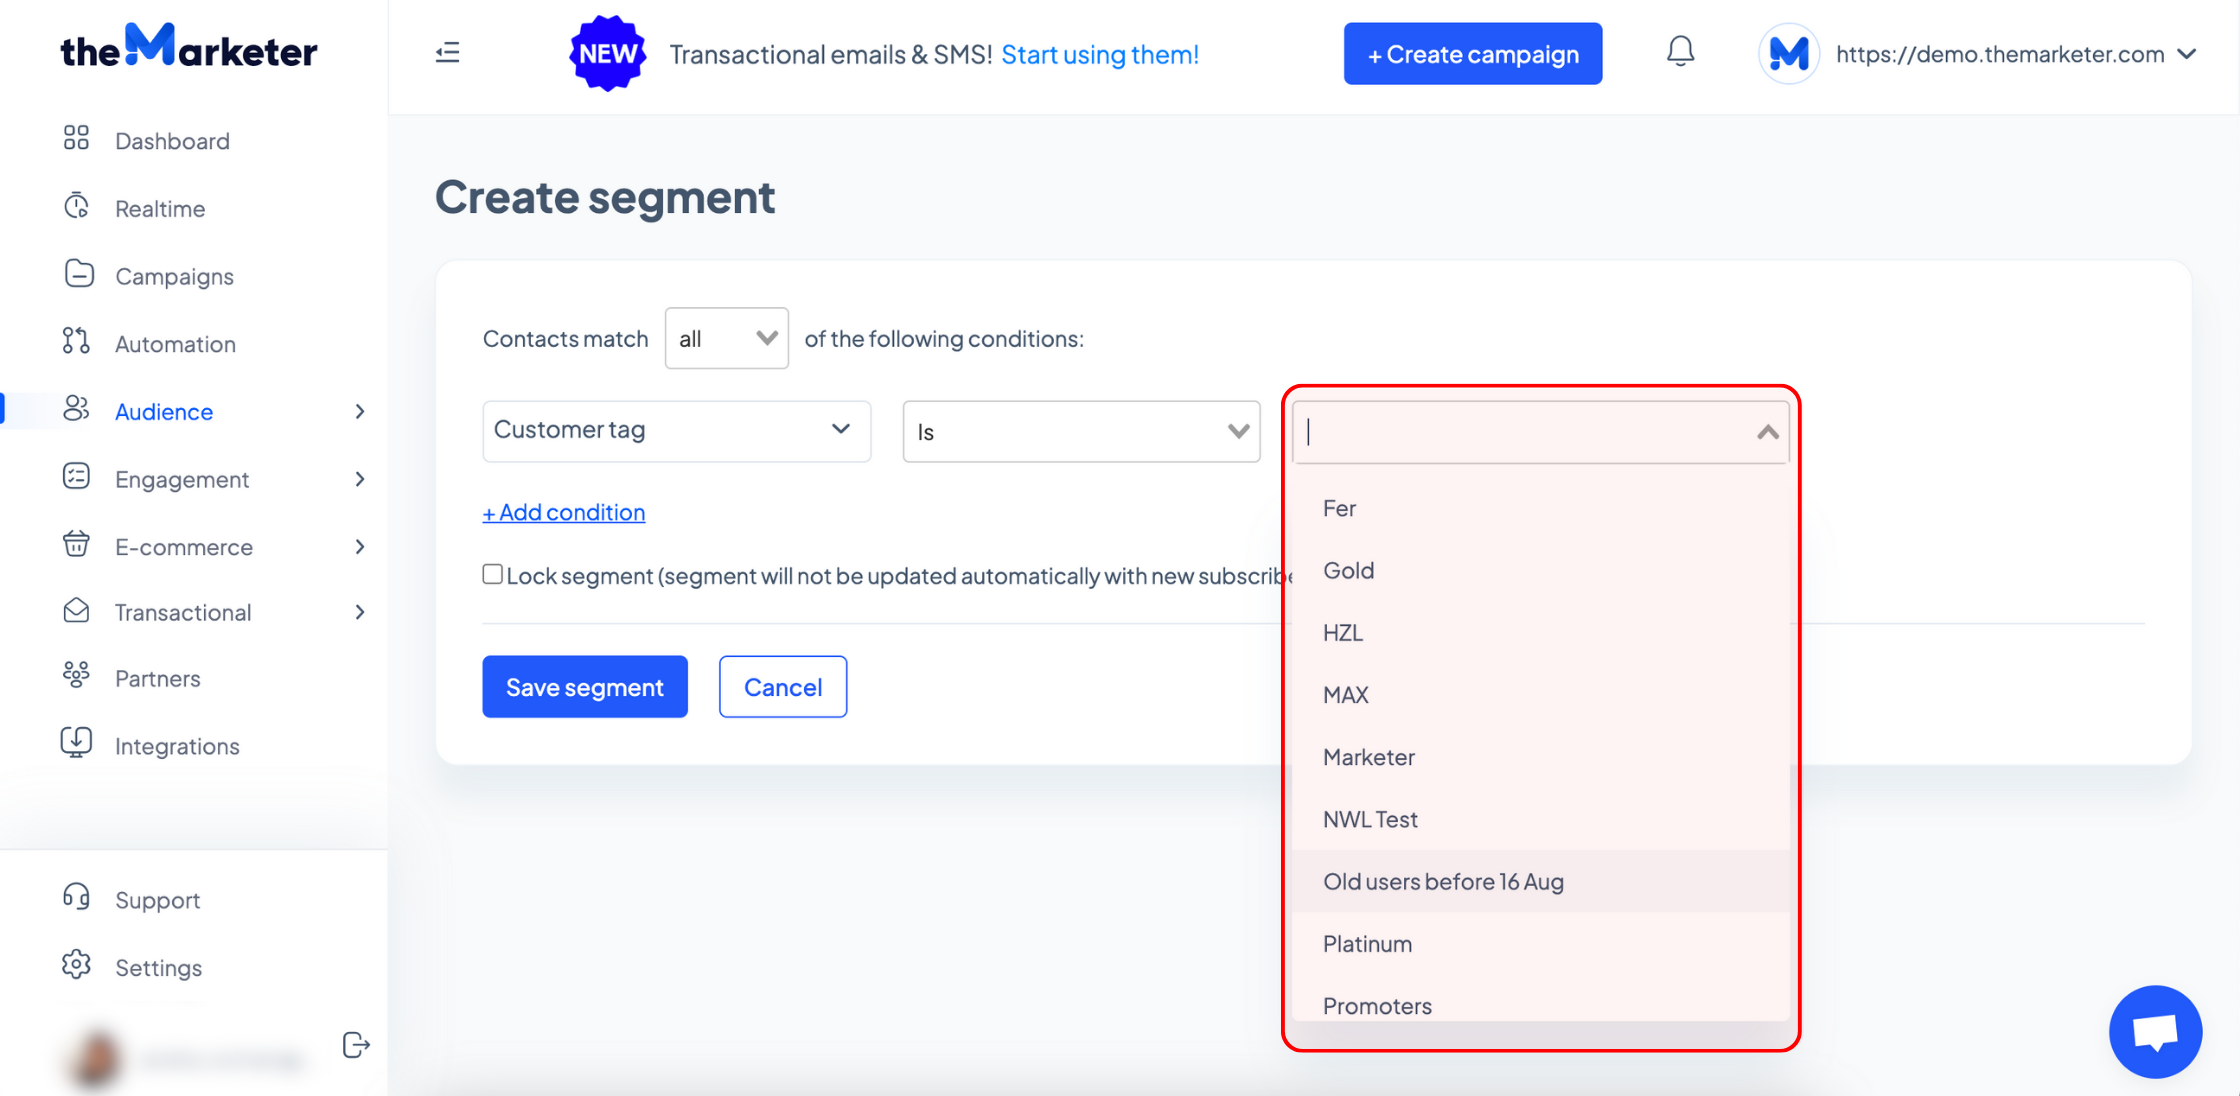
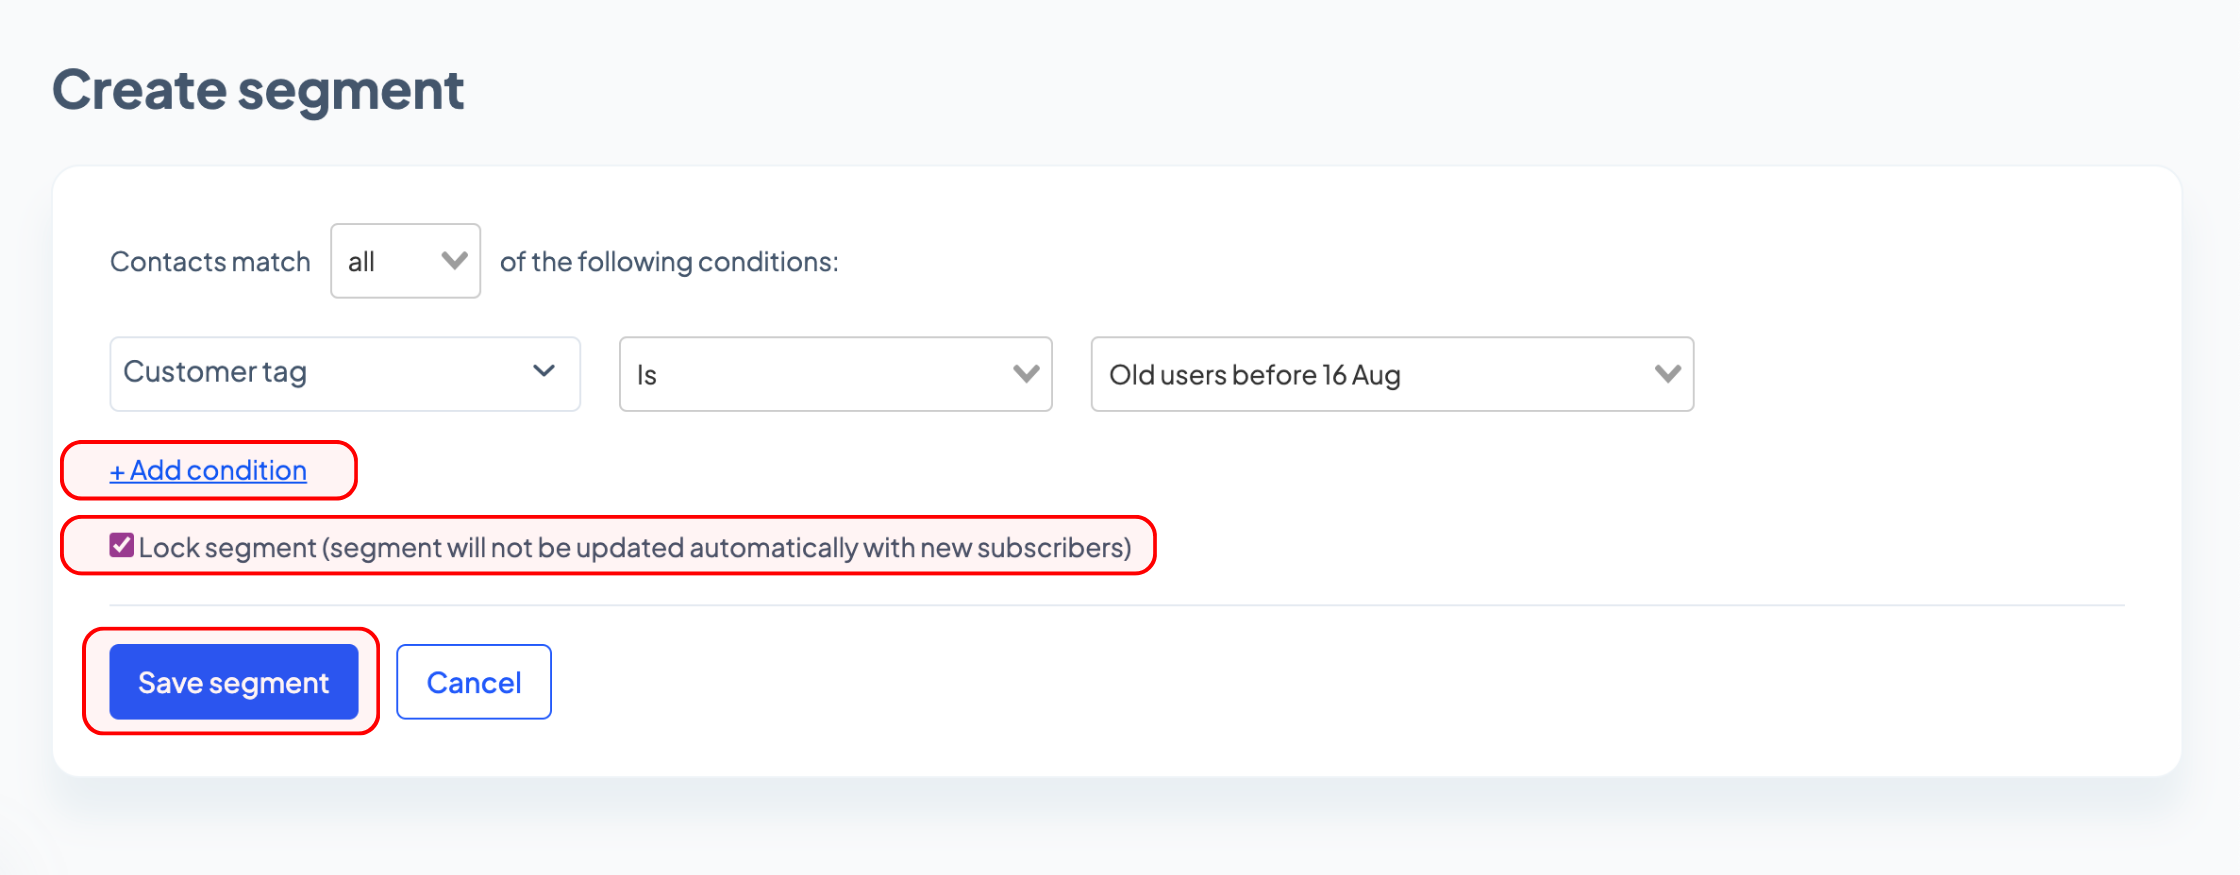
You can add other conditions to refine your targeting by clicking ‘+ Add condition’. Optionally, click the checkbox to prevent your segment from being updated with new subscribers automatically. Once you’re done, click ‘Save segment’.
You will be asked to name your new segment. You can use the same name as the tag you’ve selected earlier, or anything that would help you clearly identify who the targeted audience is.
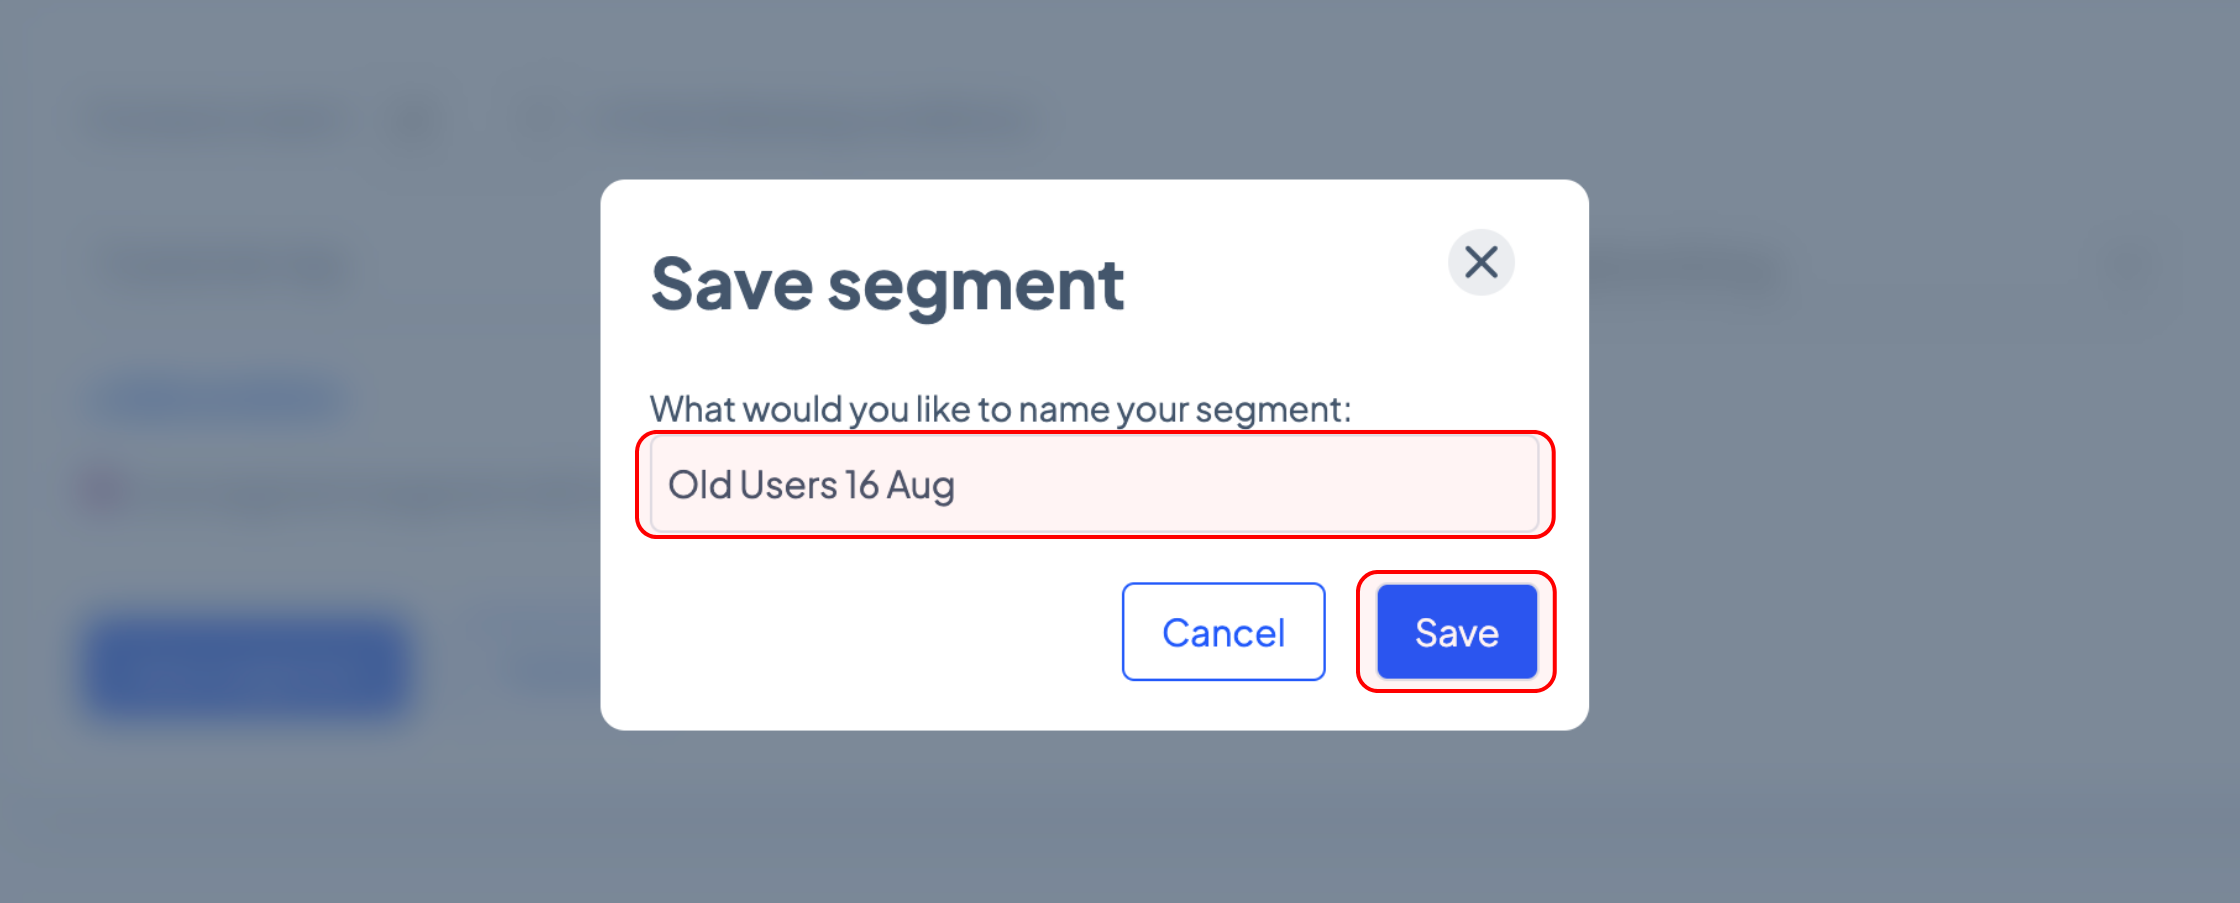
As soon as you click ‘Save’ you’re ready to go. Use these simple steps to create different segments that will help you communicate more effectively, and leave a long-lasting impression on your subscribers. Good luck!
Related articles
STILL HAVE QUESTIONS?