/ Knowledge base /
How to create an automated cart abandonment seriesHow to create an automated cart abandonment series
Online shopping can sometimes be really chaotic. Users add items to their carts, then they get distracted, or reconsider their choices, and all this leads to abandoned carts.
But luckily there are ways to remind shoppers they left their favorite item behind and bring them back to their carts. Using theMarketer, you can set up automated message sequences and deploy your cart abandonment strategy seamlessly to make sure no sale potential is left untapped.
Here’s how you too can do it:
1. Go to ‘Automation’ and set up a ‘Cart abandonment’ journey
In the ‘Automation’ menu, click the ‘+ Create journey’ button on the top right of the screen and scroll down to ‘Cart related’ template section. Here you will see two flows you can choose from.
The ‘Cart abandonment’ option will include by default emails that feature the exact products your visitors left in their carts. Alternatively, the ‘Cart abandonment similar products’ option will include emails that feature other items from the same category as those left by your visitors in their carts. The second option aims to maximize your conversions by tempting your potential customers with a wider range of items.
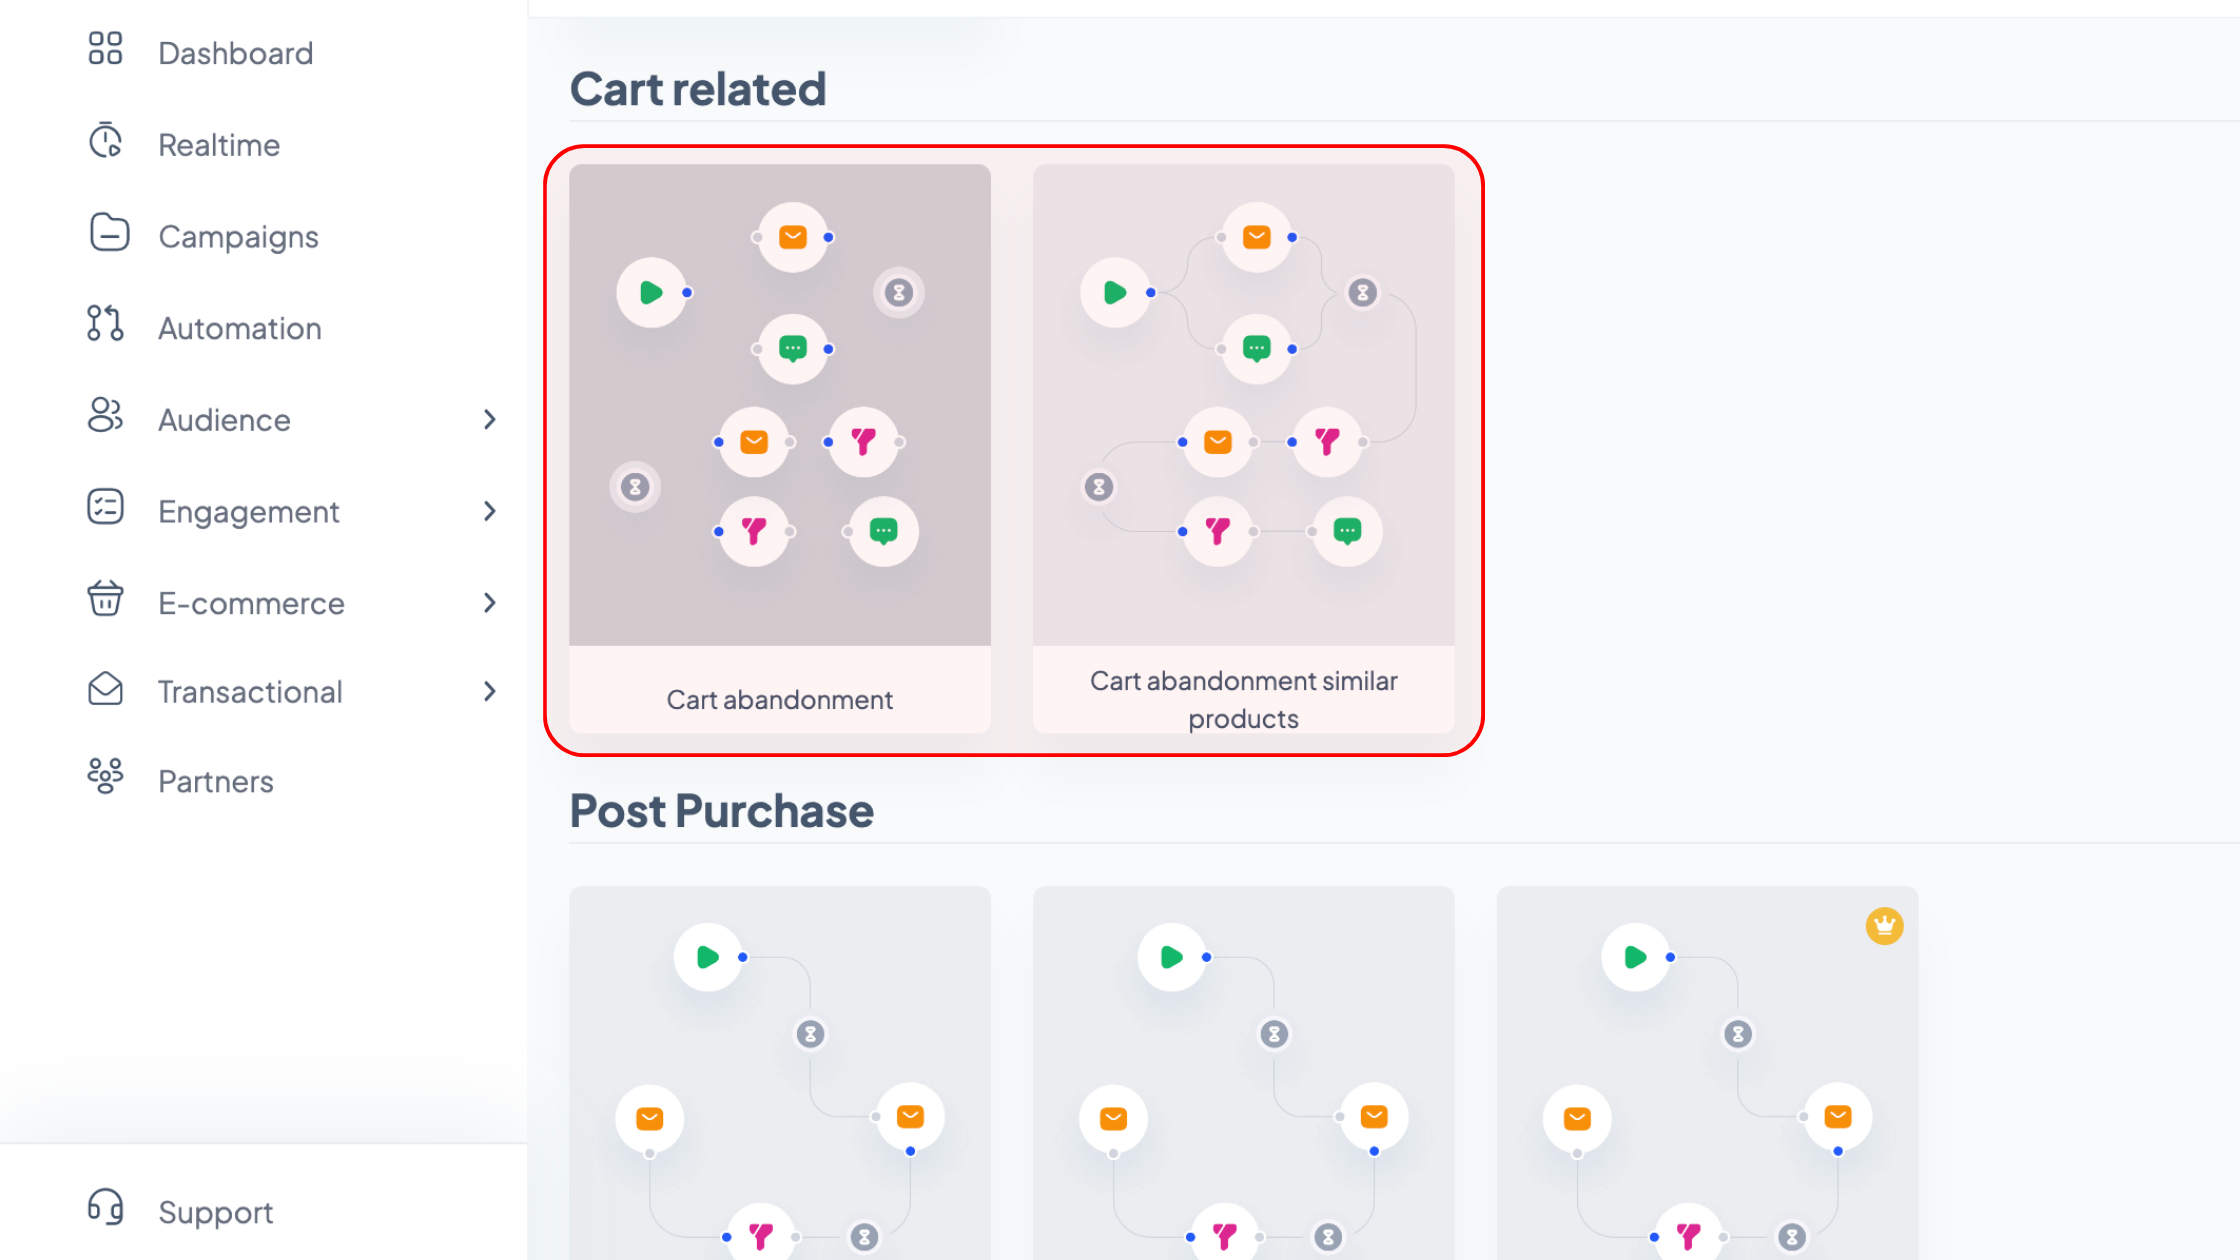
Once you’ve chosen which type of automation you’d like to set up, select it, then click the ‘Setup journey’ button.
2. Use the editor to customize your email flow.
a. Determine the starting point of the automation
Click the ‘Start of automation’ block and use the options on the right to decide how much time should pass before considering a cart to be abandoned. For example, if you type ‘30’ and select the ‘Minutes’ option, the visitor who abandoned certain items in their cart will receive an email 30 minutes after leaving your website.
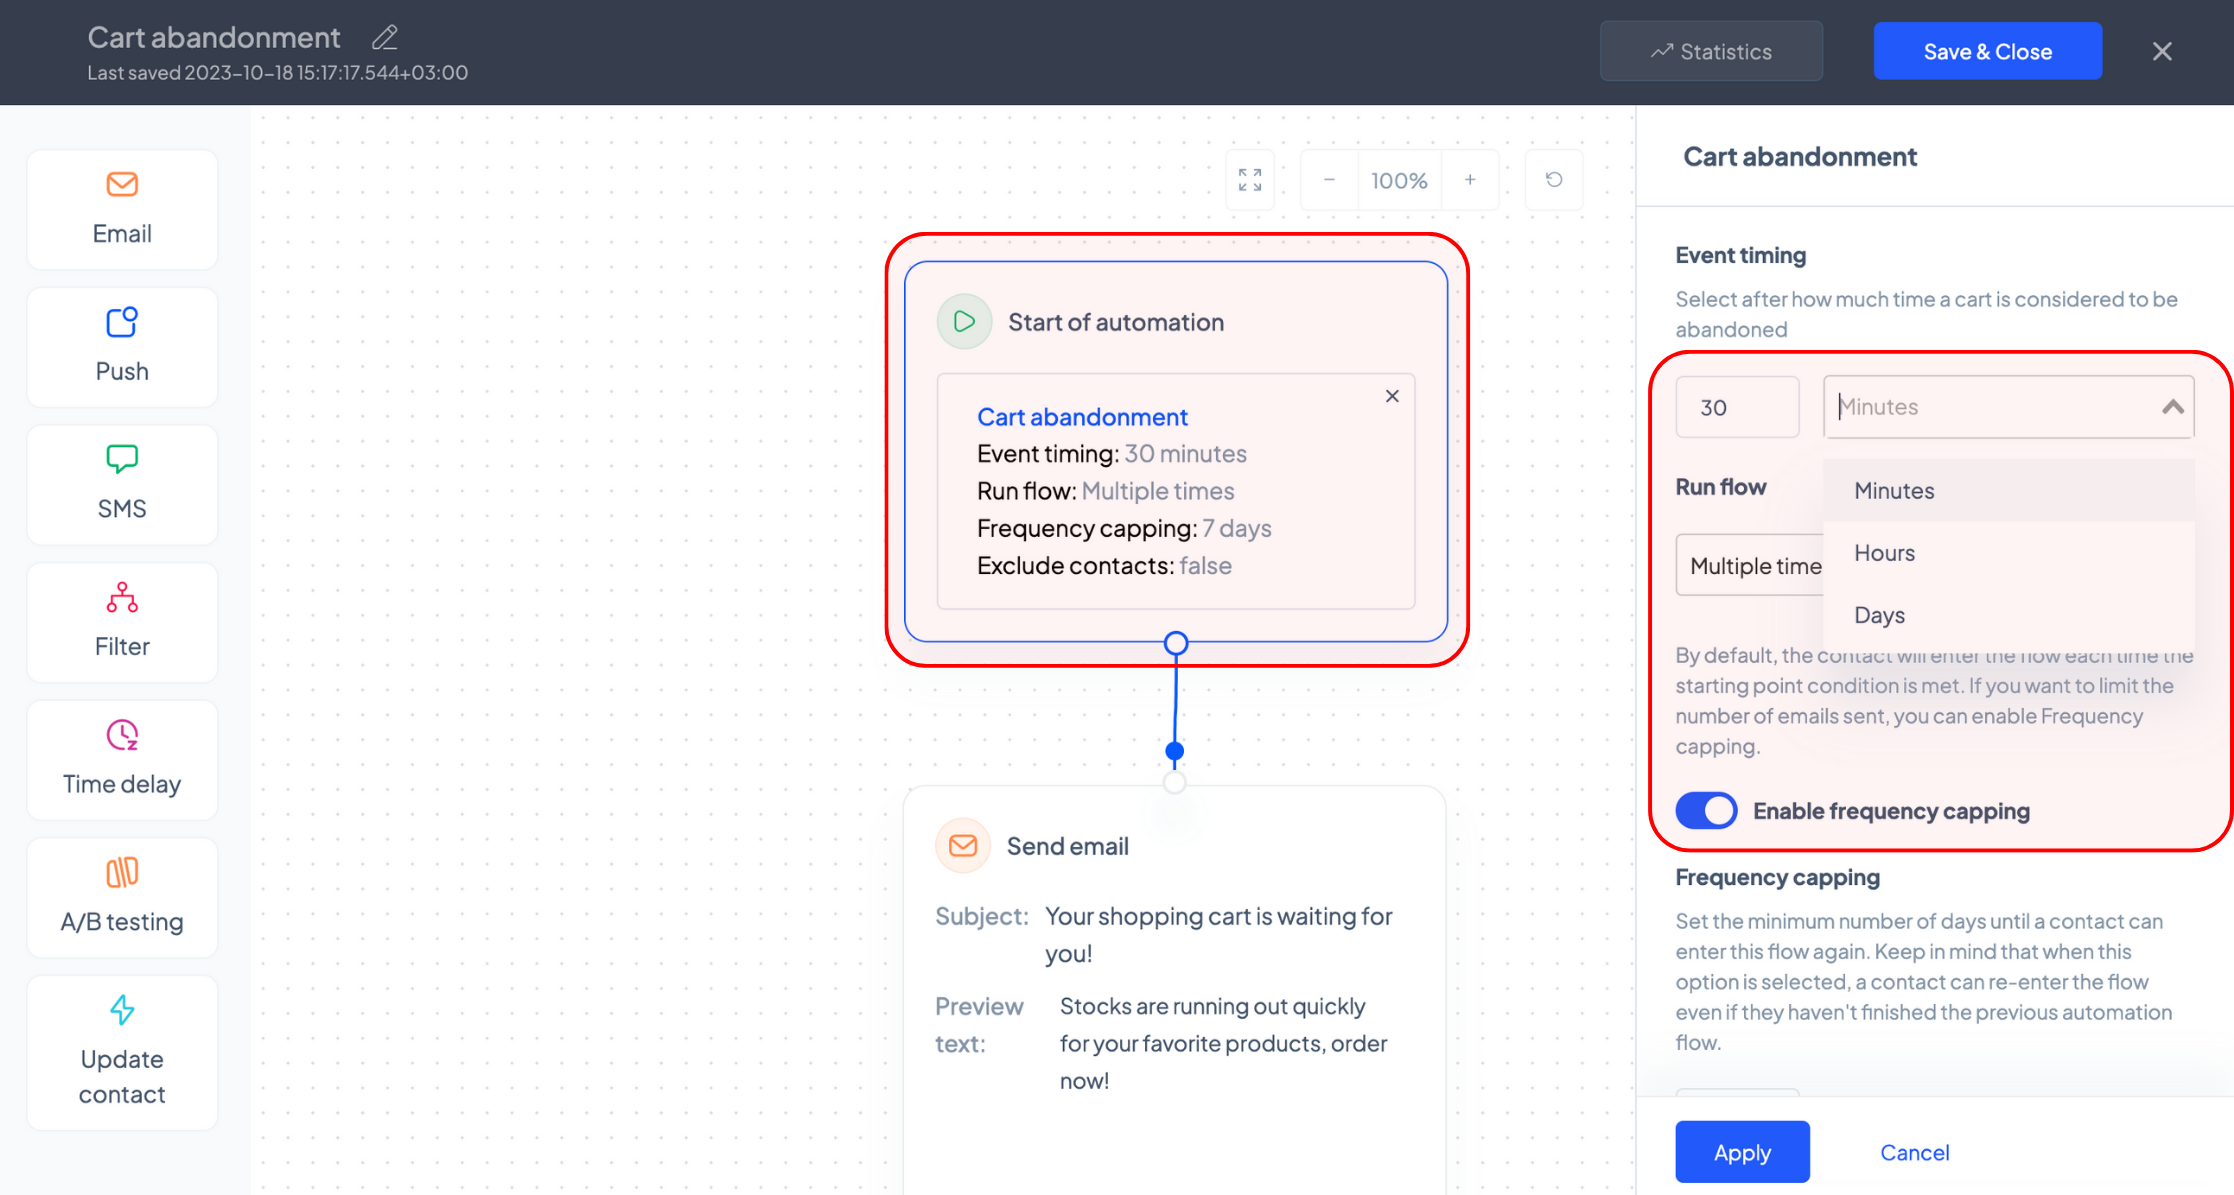
In the ‘Run flow’ section, you can choose how often you would like to remind your customers about their abandoned carts by running this automation flow.
If you select the ‘Only once’ option, they will only be sent the series of automated reminders following their first abandoned cart. If you select the ‘Multiple times’ option, they will receive a series of messages following each cart they abandon, regardless of whether they ended the previous flow or not.
If you are concerned about sending too many emails to your customers, you can click the ‘Enable frequency capping’ toggle button. When on (blue), this option will not allow a contact to re-enter the automation flow unless the number of days you mention in the ‘days’ field has passed.
Similarly, if you click the ‘Exclude contacts who have not exited this automation flow yet.’ toggle button you will prevent contacts from re-entering the automation flow unless they have finalized their purchase or have received all the communications in your flow.
b. Design your email campaign
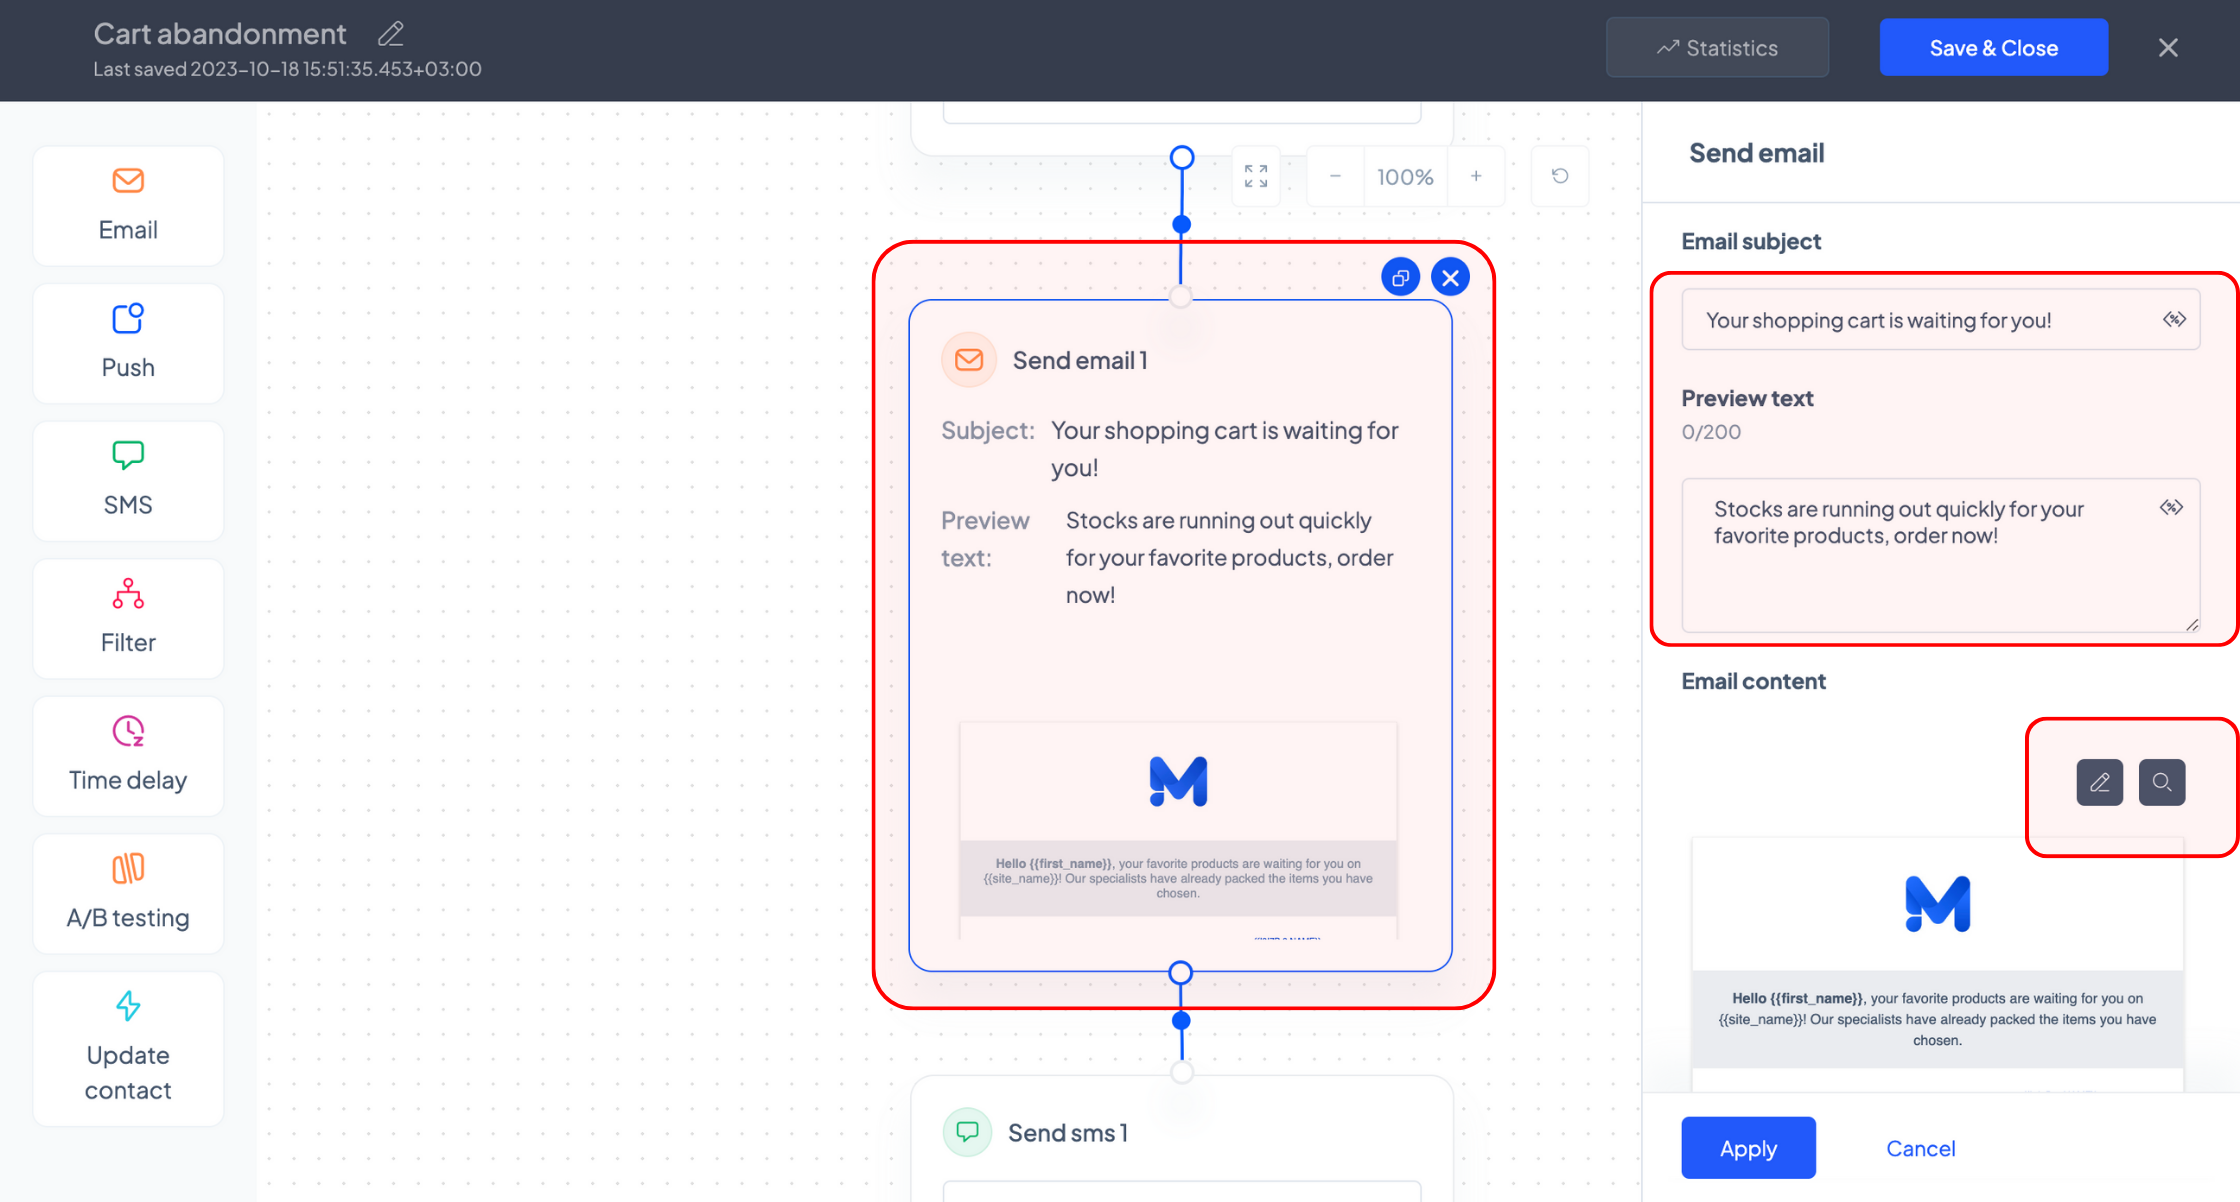
The next box in the editor allows you to edit the email campaign which will be sent to every contact that enters the automation flow.
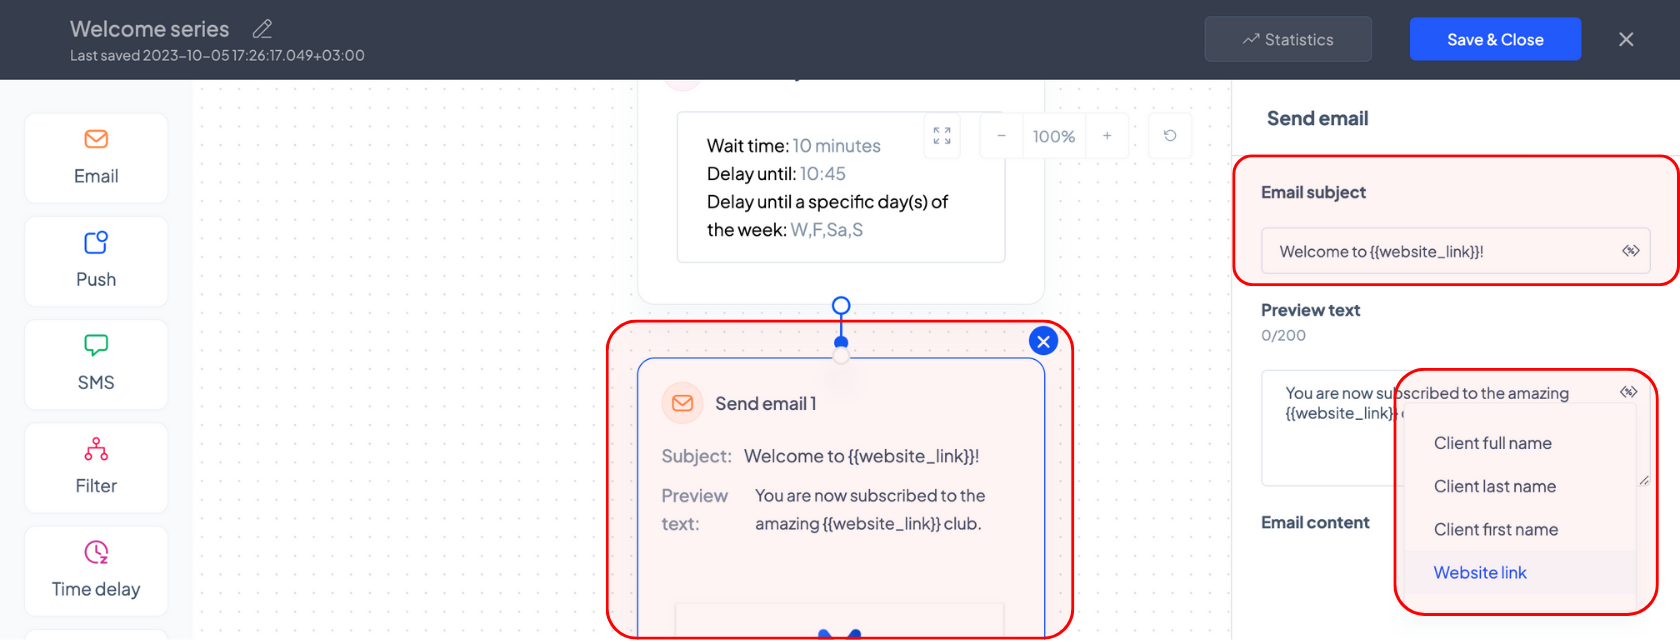
Click the ‘Send email 1’ block and use the options on the right to edit the subject line and the preview text of your campaign. By clicking the ‘<%>’ icon, you can also insert various personalization tags, such as your customer’s full / first / last name or your website link.
Click the ‘Send email 1’ block and use the options on the right to edit the subject line and the preview text of your campaign. By clicking the ‘<%>’ icon, you can also insert various personalization tags, such as your customer’s full / first / last name or your website link.
To edit or preview the content of your email, hover your cursor over the ‘Email content’ section and click on one of the two dark grey buttons that will appear (the left one to edit your campaign and the right one to preview it).
If you choose to edit your campaign, you will be redirected to the newsletter builder. Once you’re done editing your campaign, press the ‘Save & Close’ button and you will be redirected back to the automation builder.
Under the ‘Campaign UTM’ section you will see the default UTM structure for your cart abandonment campaigns, which you can customize if you wish.
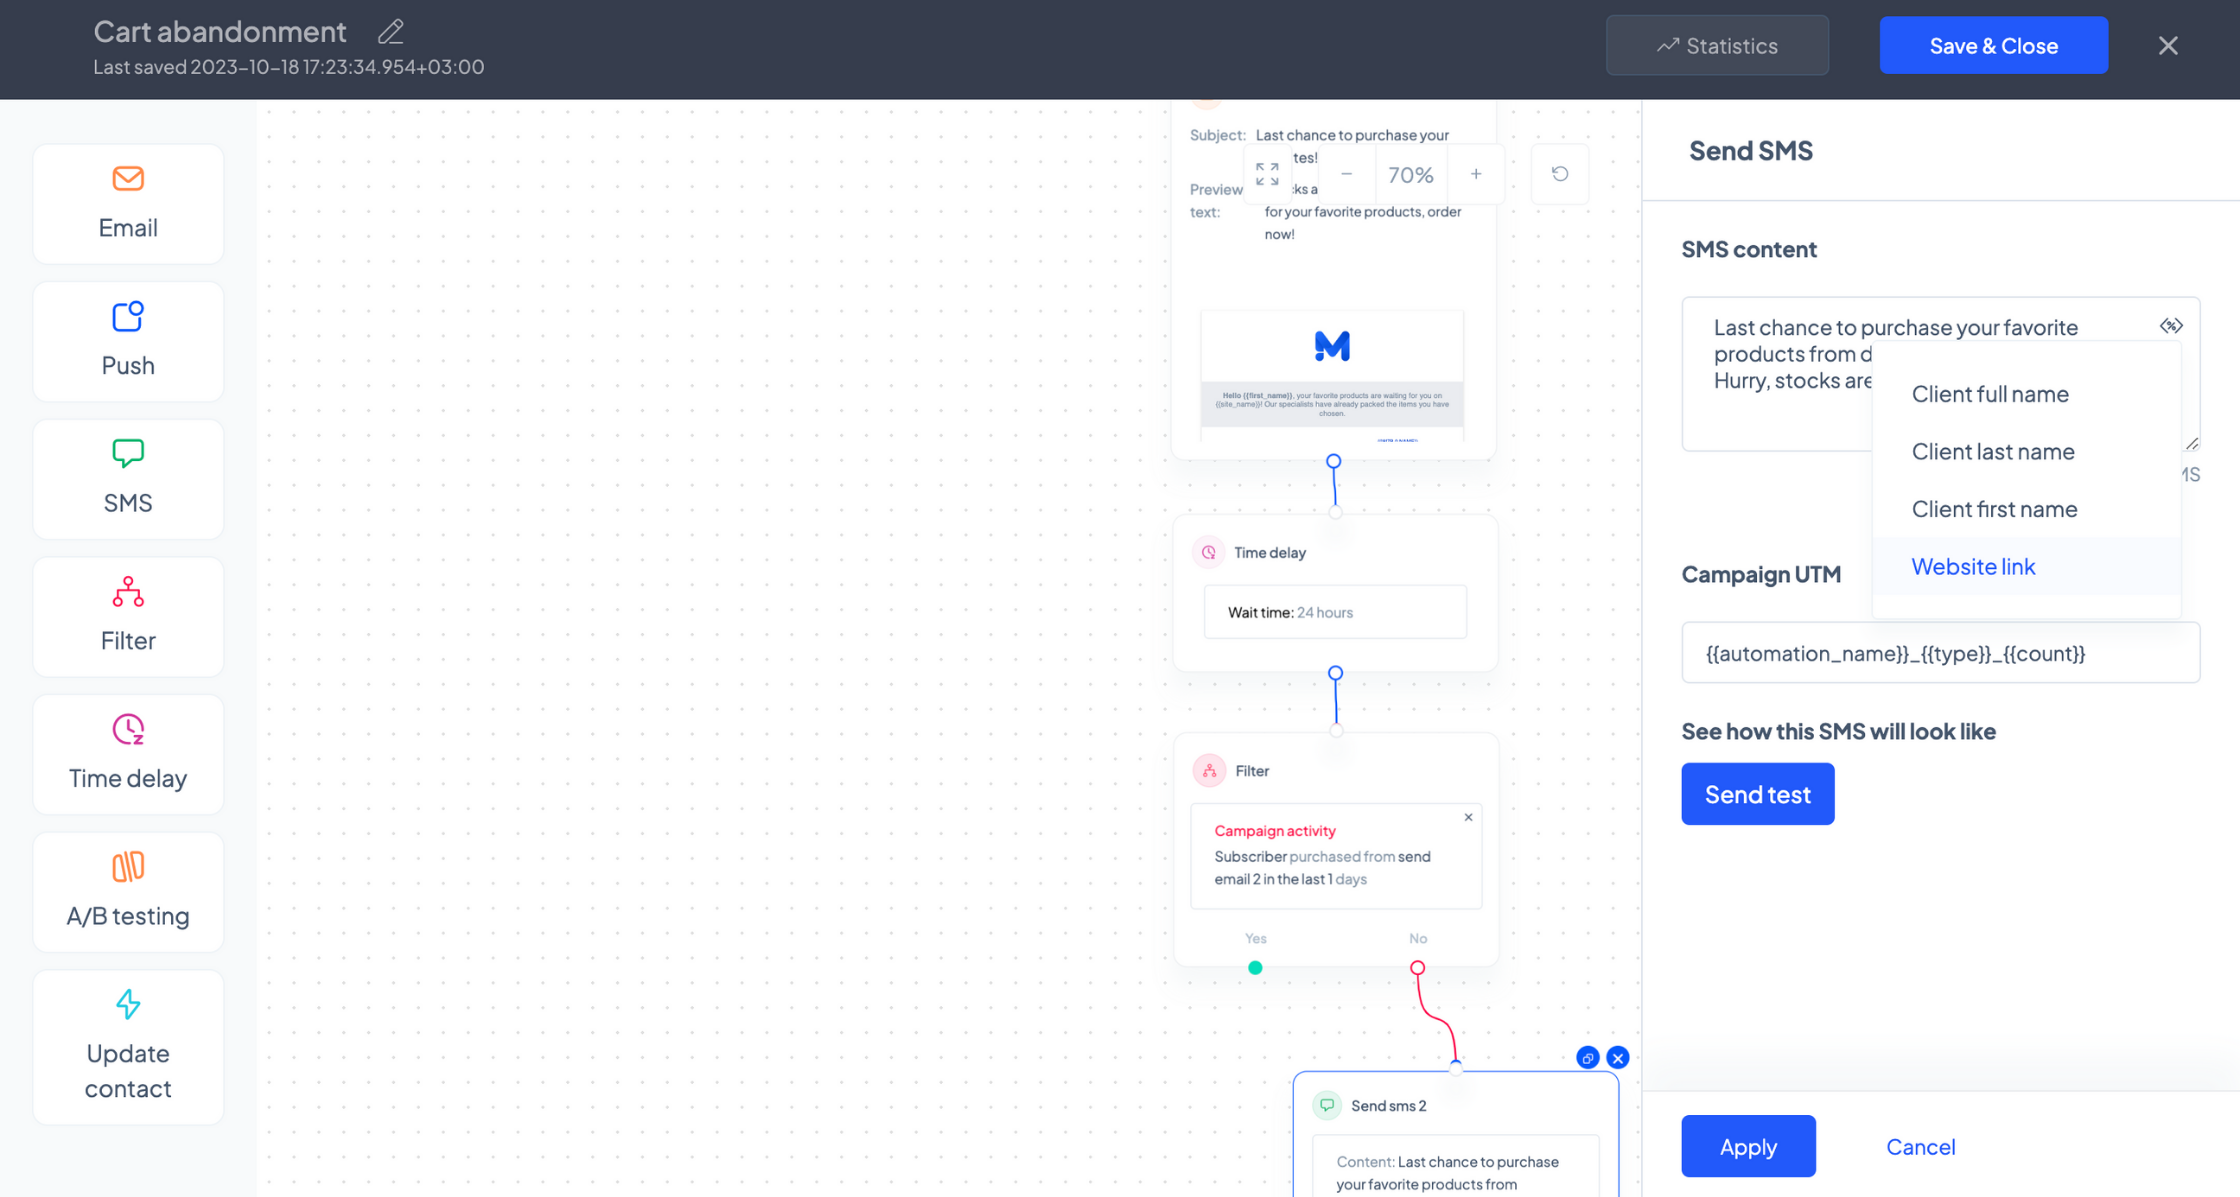
c. Edit your SMS reminder
Since SMS messages tend to produce quicker results than email campaigns, you can notify your customers abolut their abandoned carts across both channels. Click the next block in the editor (‘Send sms 1’) and use the options on the right to edit the content of your SMS campaign, customize its UTM, and send a test SMS– but keep in mind that the cost of each message will be subtracted from your SMS balance.
d. Maximize your chances
Not every visitor will finalize their order immediately. You might need to remind them about the great products that await for them by sending a second email or another SMS message.
Click the ‘Time delay’ block to determine how long you should wait until sending the second campaign in your cart abandonment series. Use the dropdown to select the unit of time, and indicate the desired duration in the field preceding it.
You can delay the second campaign until a specific time of the day by turning on (blue) the ‘Delay until a specific time of the day’ toggle button and using the dropdown to select the exact time (AM or PM).
Similarly, you can opt to delay the campaign until specific days of the week by turning on (blue) the ‘Delay until a specific day(s) of the week’ toggle button and clicking the desired days.
For example, if you’d like to send your second reminder 12 hours after the cart was abandoned, simply type ‘12’ and select the ‘Hours’ option from the dropdown list, keeping every other option disabled.
If you’d like your message to be sent out at 09:30 AM, at least 12 hours after the cart was abandoned, you would need to also enable the specific time option and select ‘9’ in the first dropdown list, ‘30’ in the second one, and click ‘AM’.
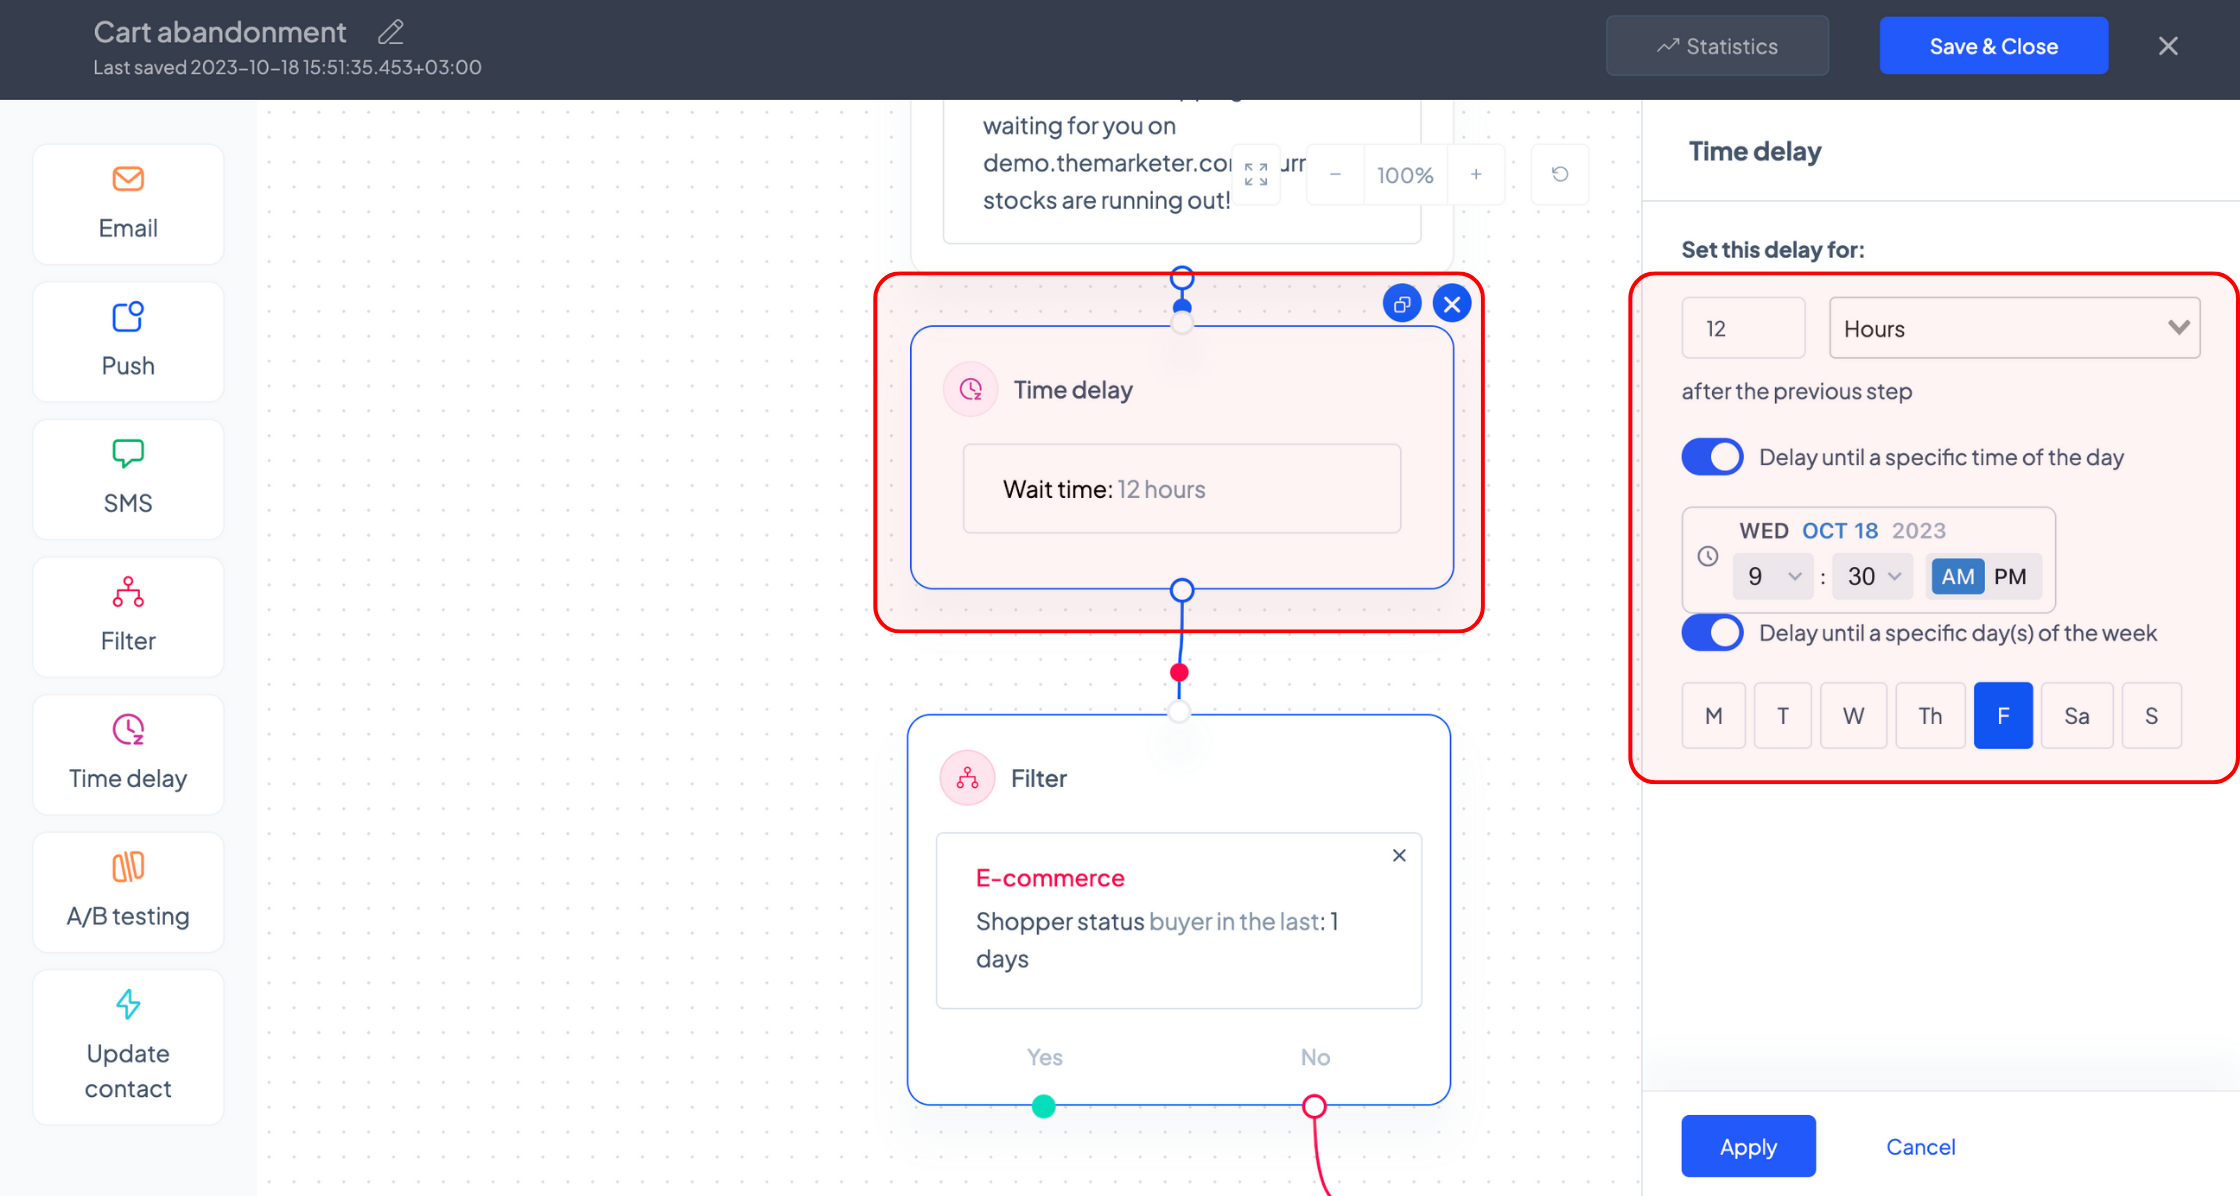
However, if you’d like your second reminder to be sent on a Friday as soon as 12 hours have passed since the cart was abandoned, you would need to enable the specific day of the week option and click on ‘F’. To add the time of day on Fridays that your campaigns will be sent out, enable the specific time option and select the desired time.
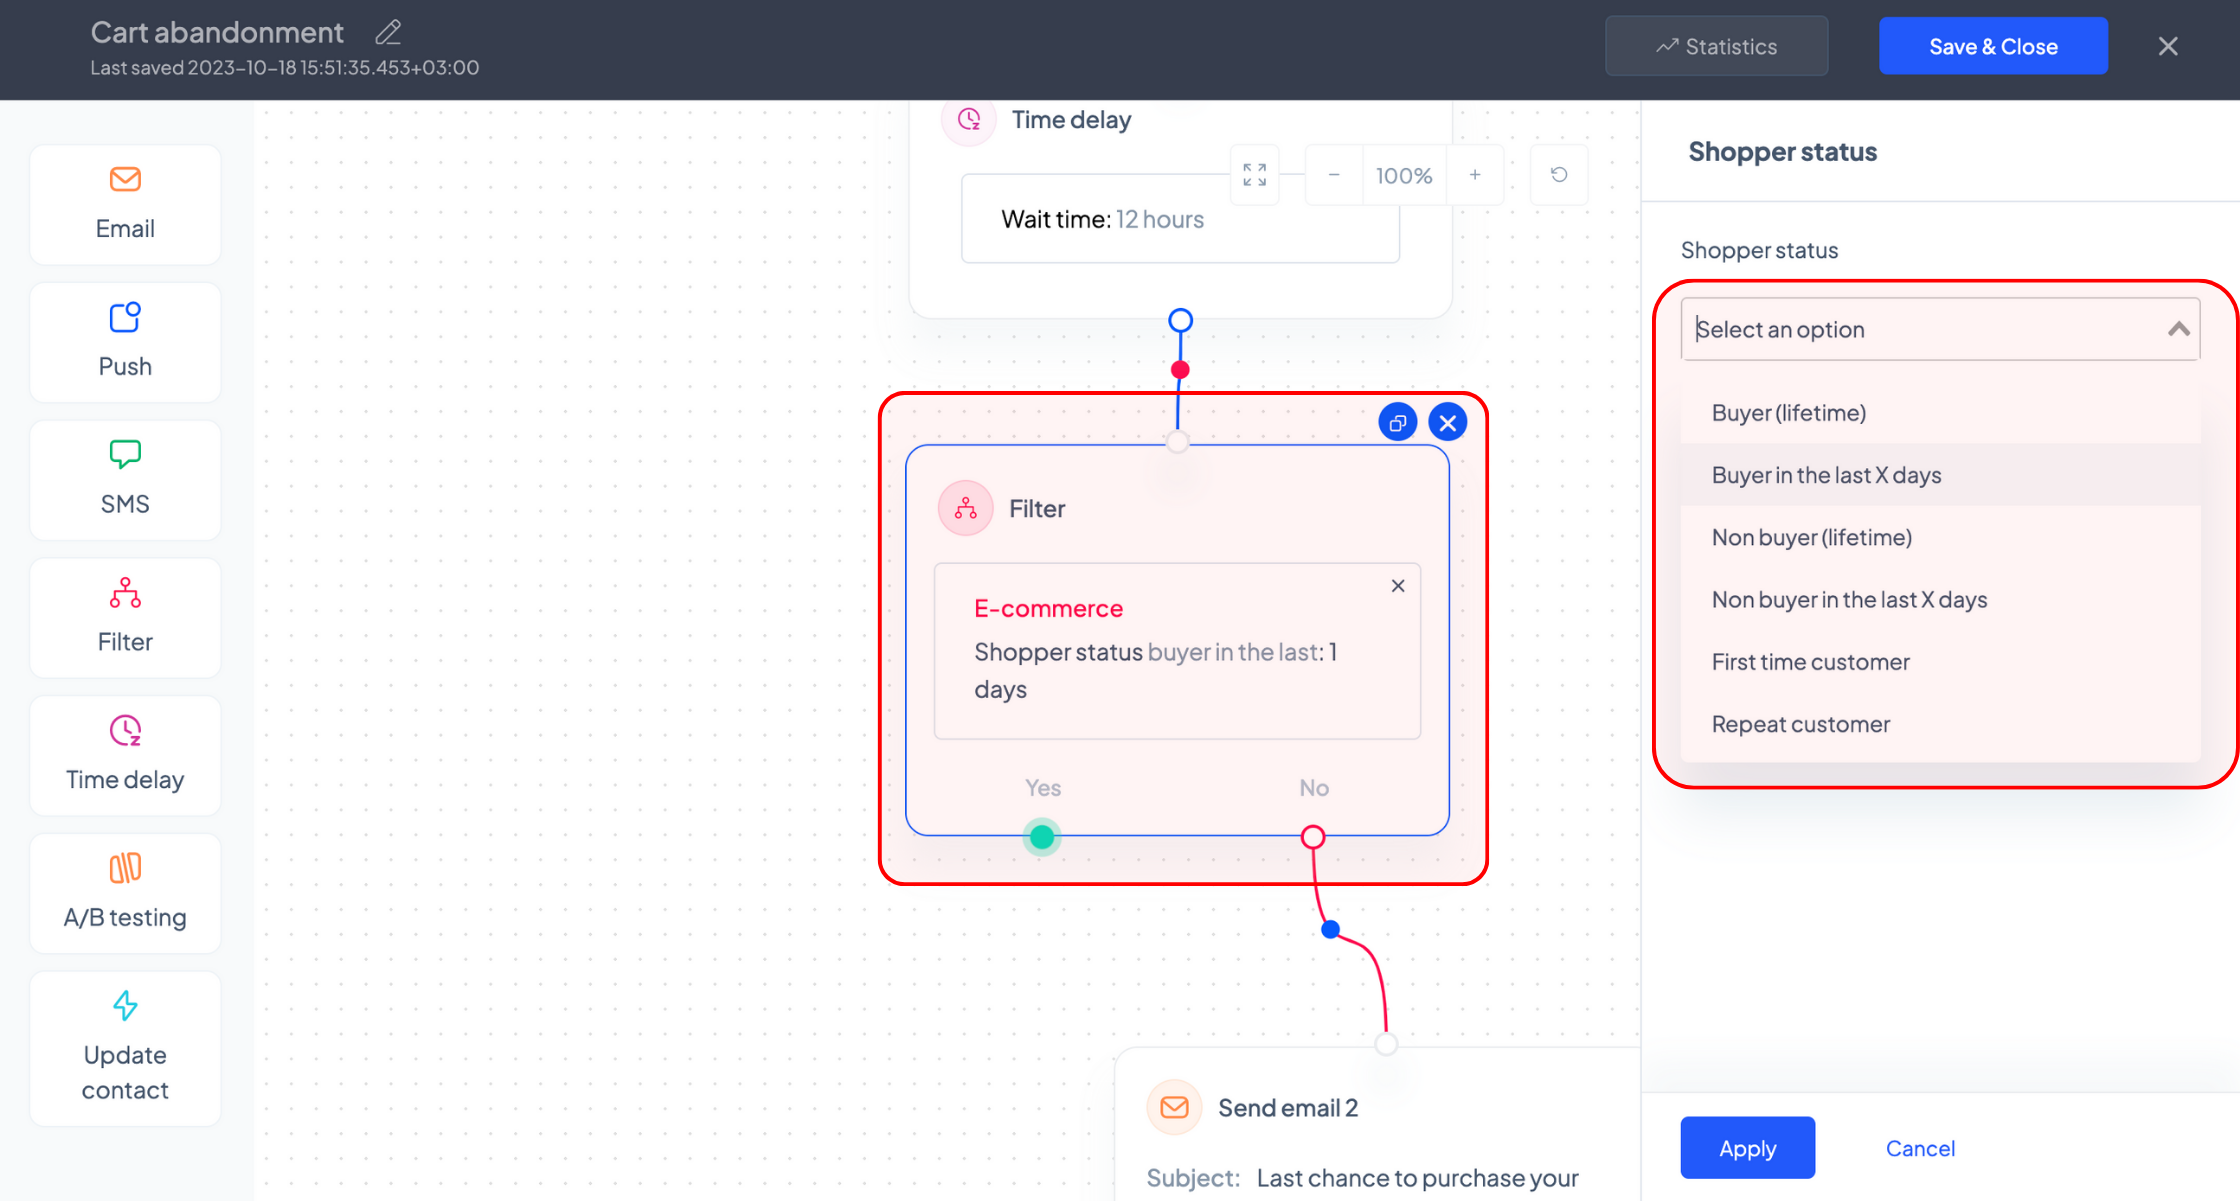
Once that time has passed, you can filter the recipients of the follow-up campaign based on whether they have finalized their purchase or not.
To do so, click on the ‘Filter’ block and on the right side, expand the ‘E-commerce data’ section, scroll down, click on ‘Shopper status’, select the ‘Buyer in the last X days’ option in the dropdown list, and lastly, specify the time period during which the users should have purchased from your website in order for them to be excluded from receiving the second message.
Once you’ve filtered the recipients for the follow-up campaign, click on the ‘Send email 2’ block to edit the subject line, preview text, and the content of your second campaign in your welcome series.
Repeat the last steps and use a final SMS reminder instead of an email campaign to try your luck one last time.
Once you’re happy with your flow, apply your changes, and click the ‘Save & Close’ button.
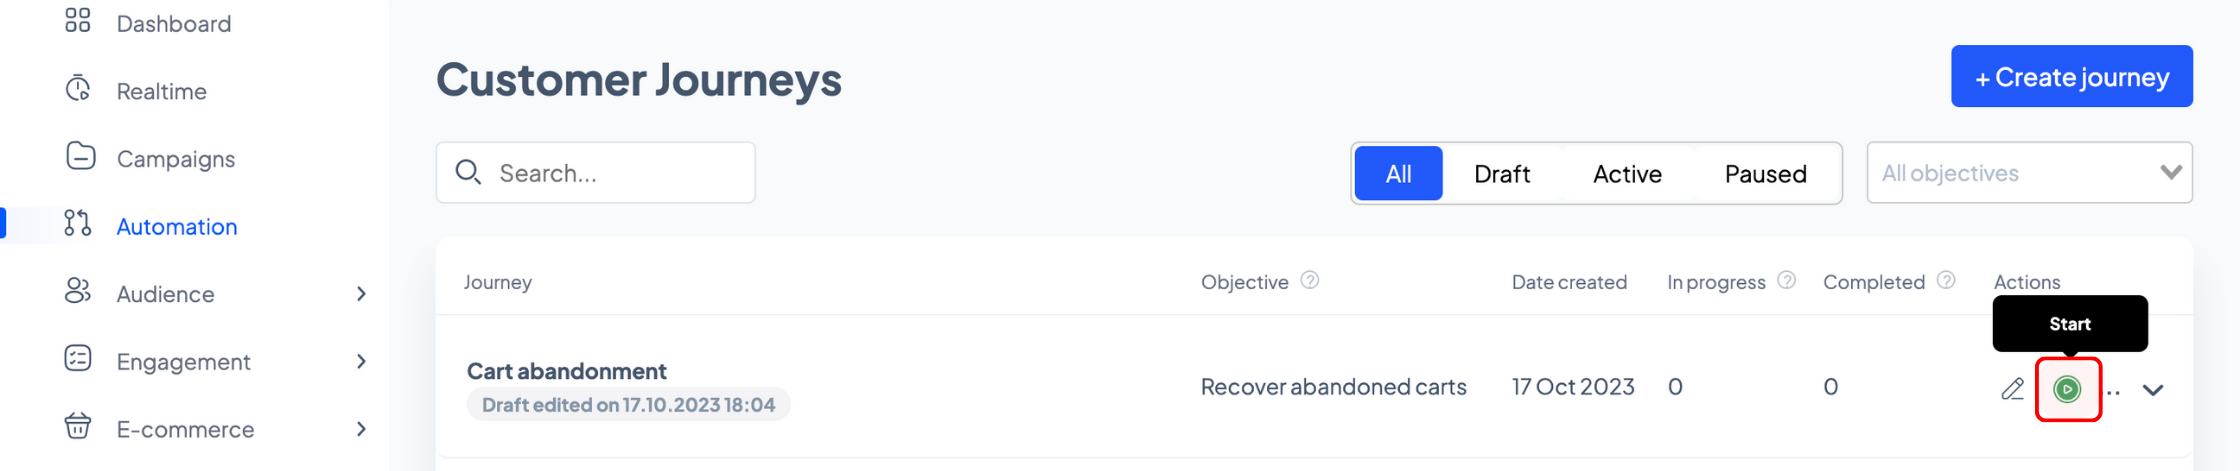
To start your automation, click the corresponding green button on the automation listing page.
Now you’re ready to automatically save thousands of carts from being abandoned, all thanks to theMarketer.
Related articles
STILL HAVE QUESTIONS?