/ Knowledge base /
How to create an embedded form?How to create an embedded form?
Embedded forms seamlessly integrate with your website, offering a smooth experience for your visitors without the sudden interruption of pop-ups. These forms are gently inviting users to subscribe to updates, dive deeper into what you offer, or join you on your journey.
Here's your step-by-step guide to using embedded forms with theMarketer:
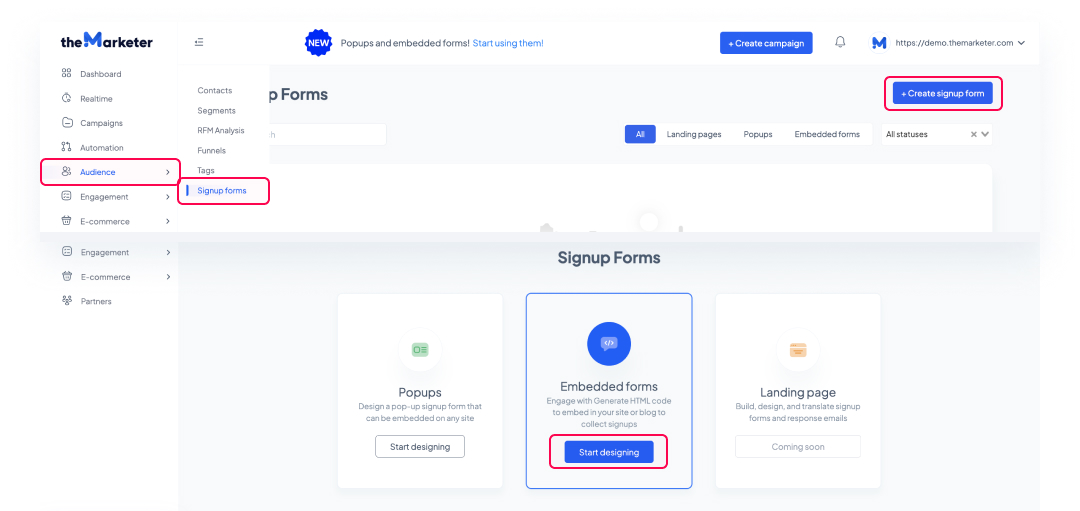
1. Go to ‘Audience > 'Signup forms', click 'Create signup form', and select ‘Embedded forms’.
If you scroll to the bottom, you'll find the ‘Top active reviewers’ section. This area showcases up to 100 subscribers who have left the most product reviews over their lifetime. They're arranged in descending order based on the number of reviews they've left.
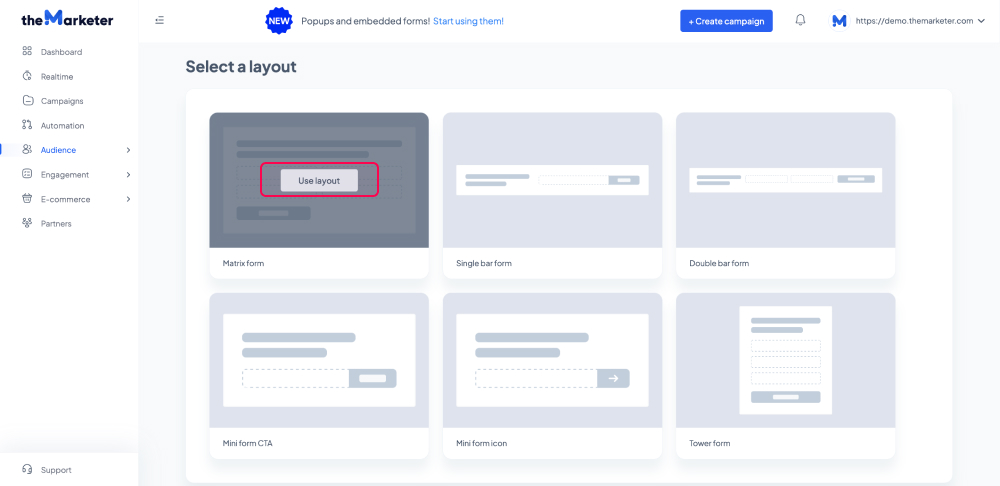
2. Select a layout.
You’ve now reached the layout gallery. Here you will see several options that place the texts, input fields, and buttons in various positions, both horizontally and vertically.
Once you have identified one that matches the area of your website where you’d like to implement it, click ‘Use layout’ to proceed with editing it.
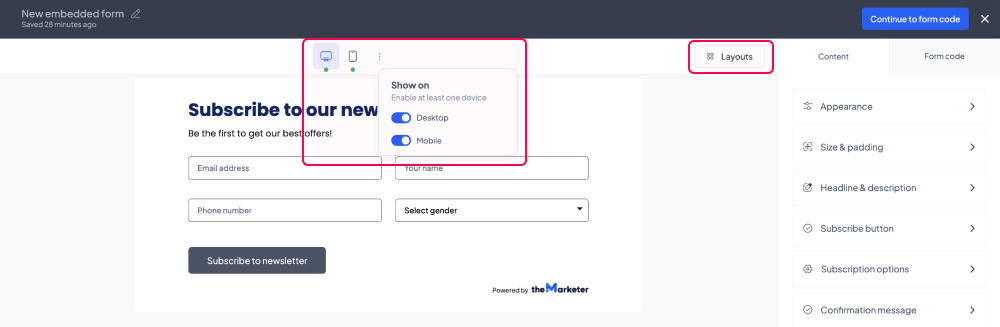
3. Customize the layout.
On the left-hand side of the editor, you can preview how your embedded form will look on desktop and mobile devices by clicking the corresponding icons at the top. If you’d like to limit the visibility of your form to certain types of devices, you can click the three vertical dots next to the preview icons and disable either option by clicking the toggle button (turning it grey).
The 'Layouts' button allows you to return to the gallery and change the layout you are currently editing.
On the right-hand side of the editor, you will see the tabs and the options which you can use to customize the form.
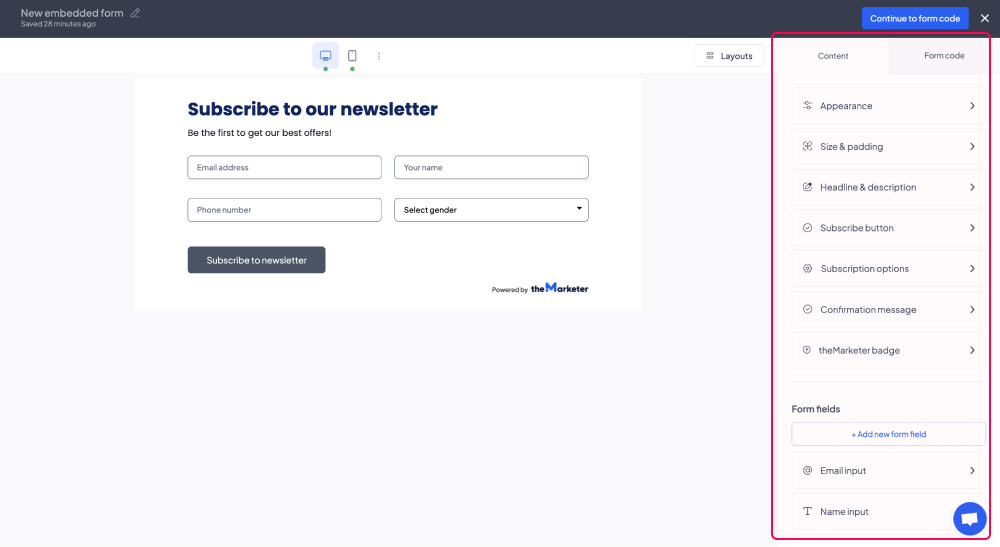
By clicking the 'Appearance' menu item under the ‘Content’ tab, you can edit the design of your form, including the body background color and the appearance of the field(s) where users will type their personal information.
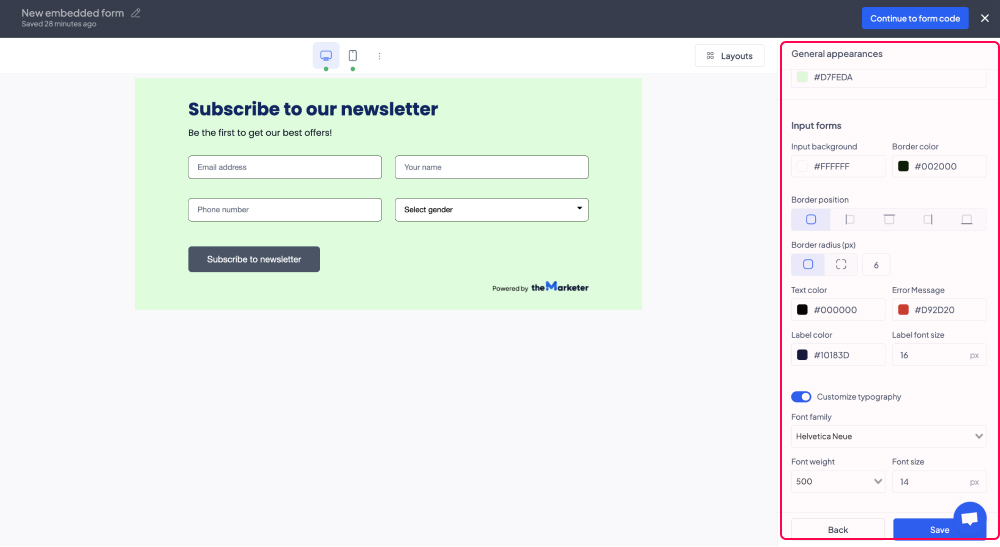
When clicking the ‘Size & padding’ menu item you will be able to adjust the maximum width, the alignment, the padding, and the margins of your form.
If you’ve checked the ‘Adjust form width to the area where it's placed’ option, the embedded form will take the full width of the page or section it will be implemented into. Alternatively, it will take the width mentioned in the ‘Max-width’ field.
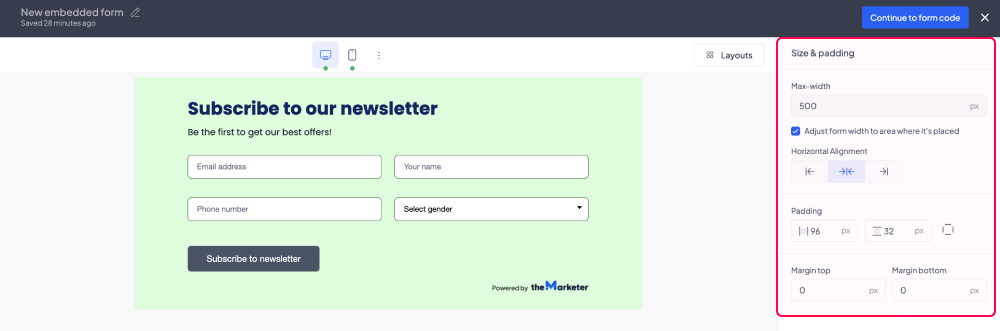
By default, the padding of your form is symmetrical. However, if you’d like to set the top, bottom, left, and right padding individually, you can click the icon on the right and you will see a new set of forms appearing.
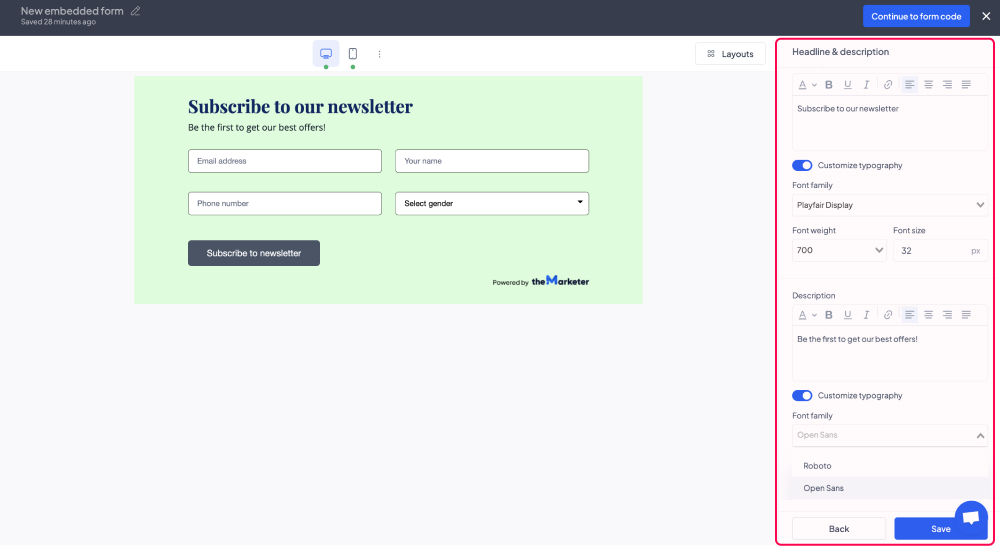
In the ‘Headline & description’ section you will be able to customize the texts displayed on your form including their color, alignment, font, size, etc.
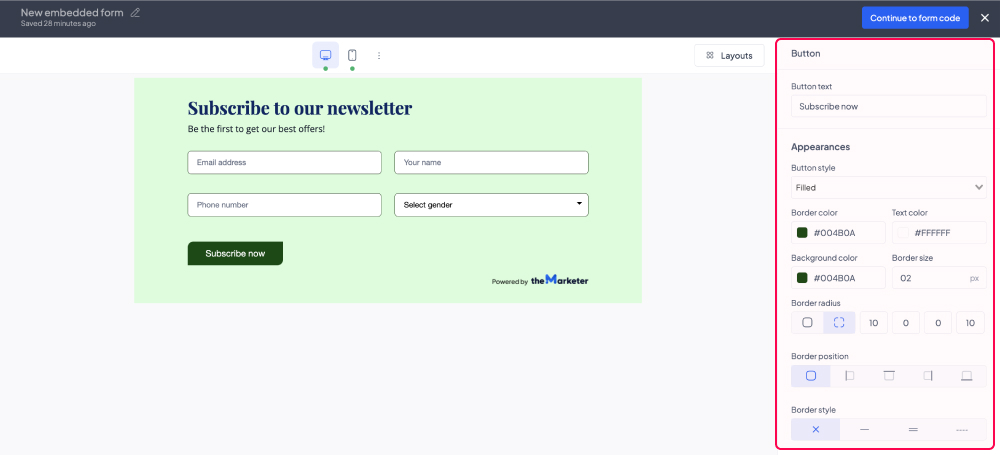
By clicking the ‘Subscribe button’ option you will be able to adjust the appearance of the call-to-action button, as well as the text displayed on it.
To change the shape of your call-to-action button, you can edit the radius of each corner (i.e. how round each corner is). You can set the same radius for each corner if you click the icon to the left or set individual radii by clicking the icon to the right.
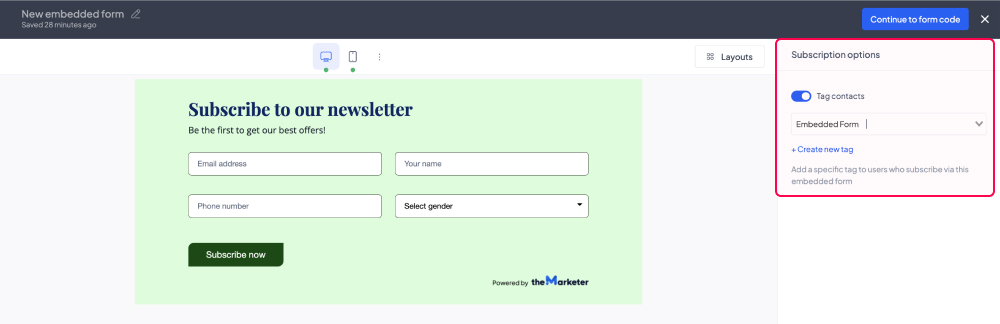
If you would like to tag the users that join your contact list through the embedded form you’re currently building, in the ‘Subscription options’ section you can click the ‘Tag contacts’ toggle button (turn it blue) and select from the drop-down list one of the existing tags.
To create a new custom tag, click ‘Create new tag’, type its name in the dialog box, then go back to the drop-down list and select the newly created tag.
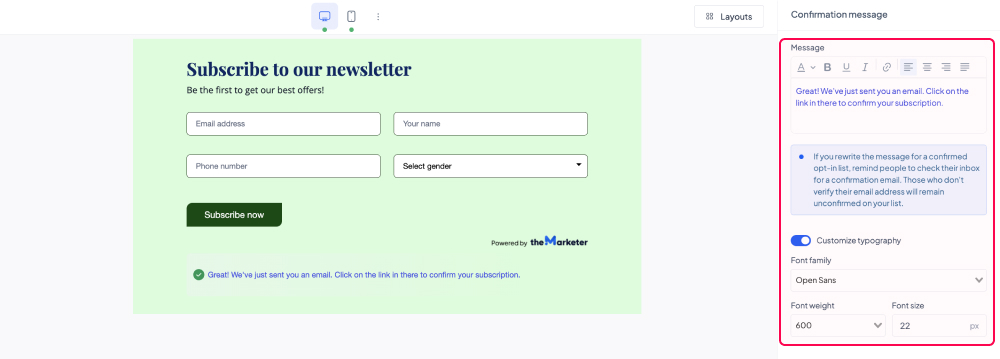
In the ‘Confirmation message’ section you can customize the text users will see after submitting their contact details via the form. If you’re using double opt-in, remind them to check their inboxes and verify their email addresses to complete their subscription process.
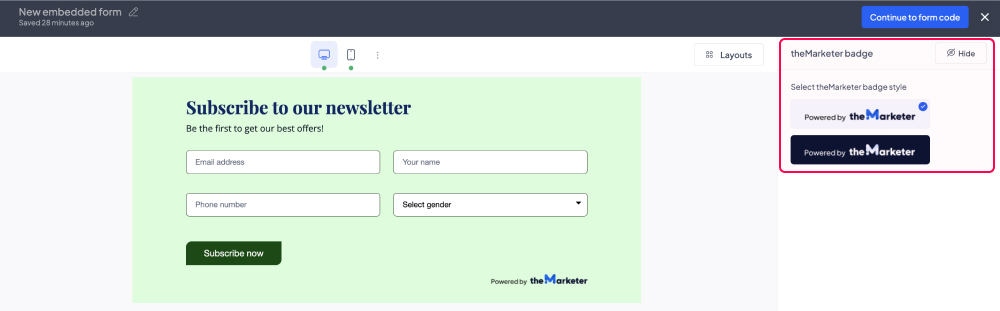
By clicking ‘theMarketer badge’ option, you will be able to change the appearance of theMarketer badge, so that it matches either light or dark themes. Depending on your current plan, you can also choose to hide or show the badge, by clicking the button on the top-right corner.
In the ‘Form fields’ section, you can edit the input fields featured on your form. To add a new field, click ‘Add new form field’, then select the type of element you would like to include. Please note that this option is only available for the Matrix and Tower form layouts.
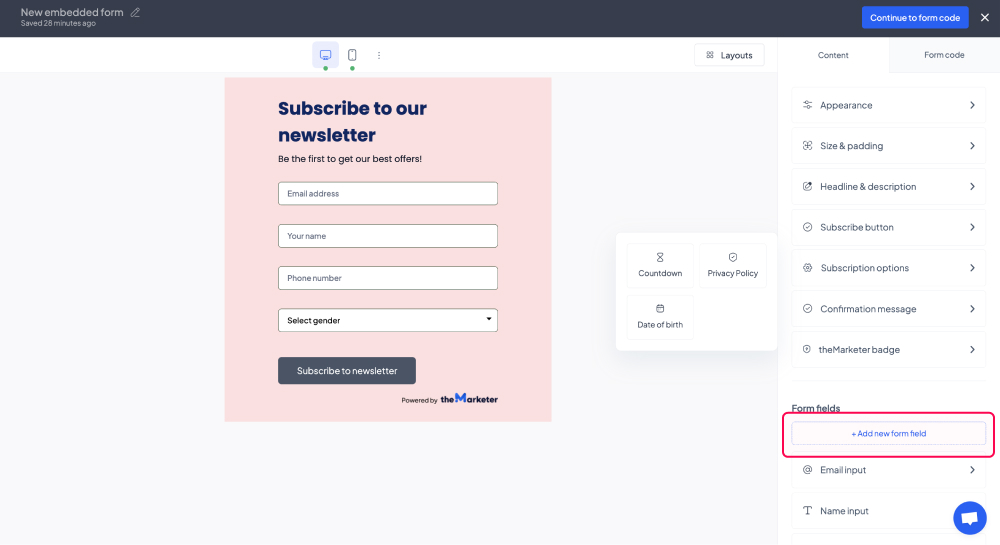
You can change the order of the fields on your embedded form by dragging and dropping them in the right order in the ‘Form fields’ section.
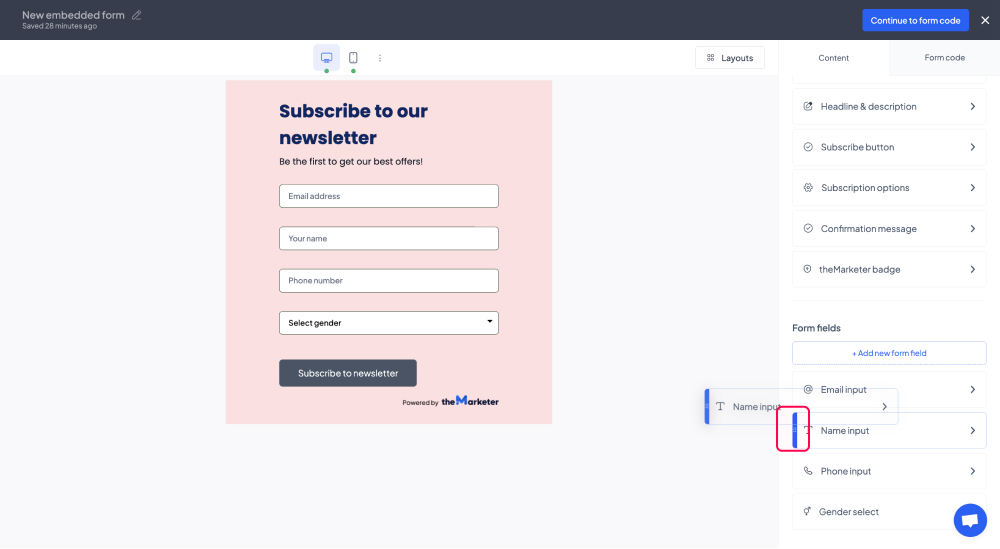
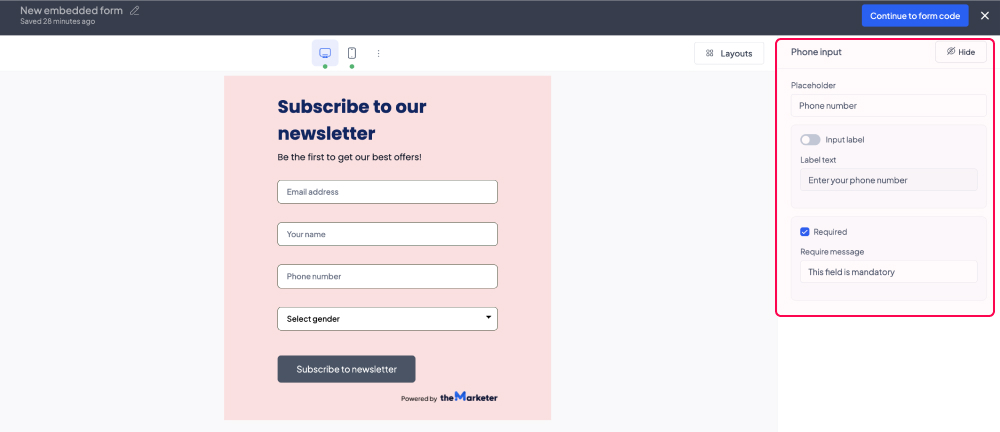
To edit the particularities of a field or remove it from your form, simply click on its name under the ‘Form fields’ section and additional customization options will appear, including the ‘Hide’ button on the top-right corner of the screen.
Under the ‘Form code’ tab you will be able to see and copy the HTML snippet of the embedded form you’ve just created. You will need to add this code to the section(s) of your website where you’d like it to be displayed.
For example, if you’d like it to be part of your website’s footer, you will need to add this snippet to the footer container.
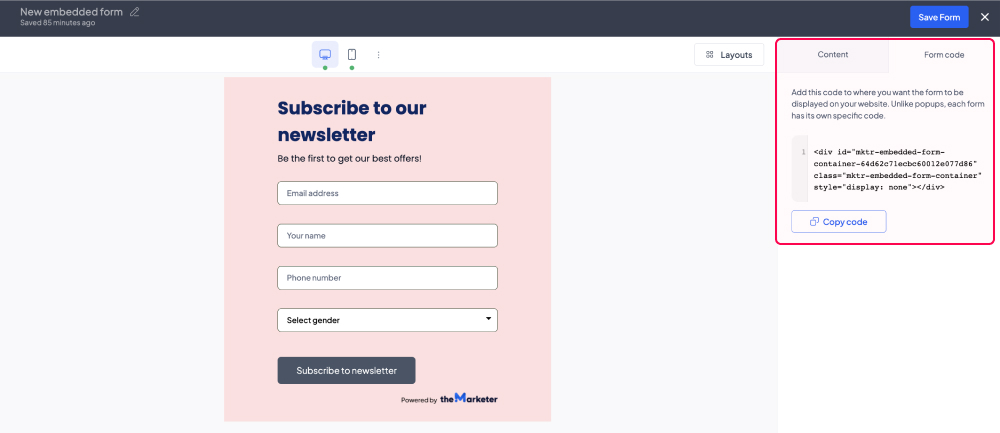
Click the ‘Save’ button and… you’re done!
You now have an embedded form ready to help you collect email addresses and other personal details effectively and automatically.
Related articles
STILL HAVE QUESTIONS?