/ Knowledge base /
How to set up a “remind customer to reorder” email?How to set up a “remind customer to reorder” email?
Replenishment emails are automated messages sent to customers to remind them to reorder those recurring products that are about to run out. They are incredibly useful for businesses selling goods that require regular replacement or renewal, such as detergent, pet food, cosmetics, or even subscription-based items.
For instance, let's imagine you are running an online pet shop. Your customers will likely need a fresh bag of pet food every month. With replenishment emails, you can automatically send a friendly reminder when it's time to restock, making their lives easier and ensuring steady sales for your business.
Now, here’s how to set up such a flow in theMarketer:
1. Set the recurrence interval
Go to ‘E-commerce’ > ‘Products’. Here you will see the listing of all products in your store.
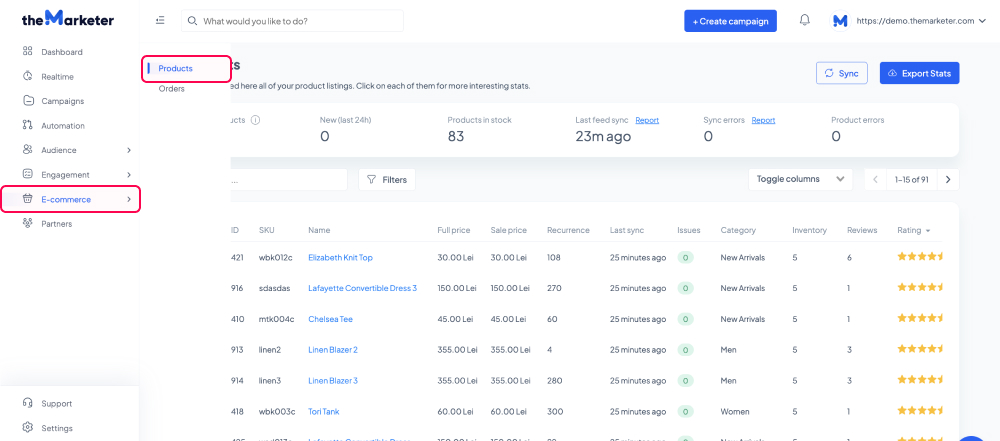
You can filter them by clicking the ‘Filters’ button, selecting the desired availability, price, category, brand, inventory level, etc. in the dropdown menu, and clicking the ‘Apply filters’ button. You can also sort out the products in ascending or descending order by clicking the column headers.
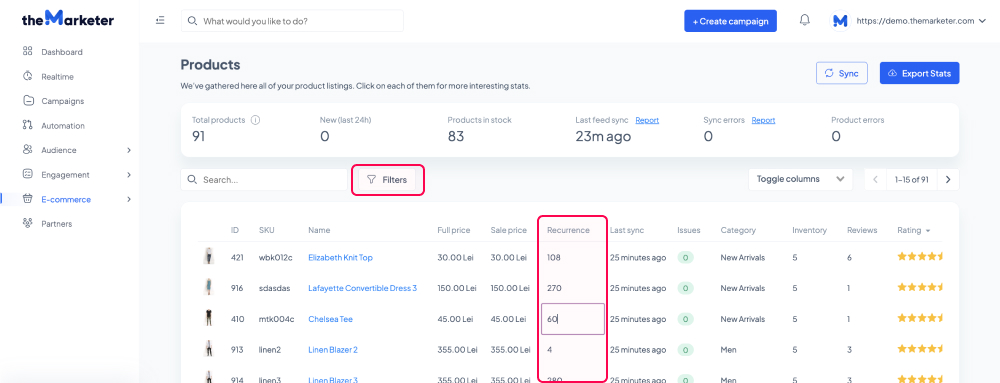
Once you’ve identified the products that require frequent replacement, click the corresponding field in the ‘Recurrence’ column and set the length of the interval for each product, in days. For example, if you’ve spotted an item that would normally need to be repurchased every 60 days, type ‘60’.
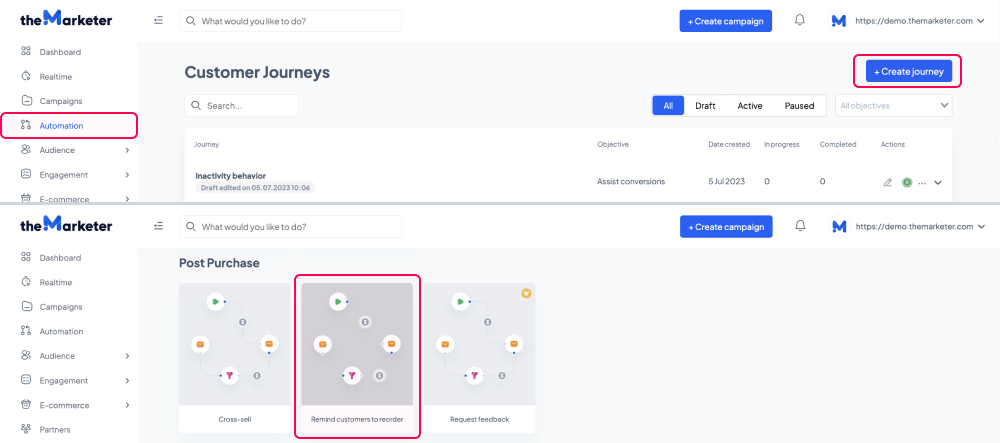
2. Go to ‘Automation’ and set up a ‘Remind customers to reorder’ journey
Click the ‘+ Create journey’ button on the top right of the screen, scroll down to ‘Post Purchase’ template section, select the ‘Remind customers to reorder’ template, and click the ‘Setup journey’ button.
Use the editor to customize your replenishment automation flow.
a. Determine the starting point of the automation
Click the ‘Start of automation’ block and use the options on the right to decide which status an order needs to have in order to trigger your journey. In other words, when you would like the recurrence interval to begin.
For example, if in the topmost field, you select the ‘Delivered’ status (or the term used in your eCommerce platform to indicate that the order was delivered to the customer), the automation flow will begin as soon as an order changes its status to ‘Delivered’.
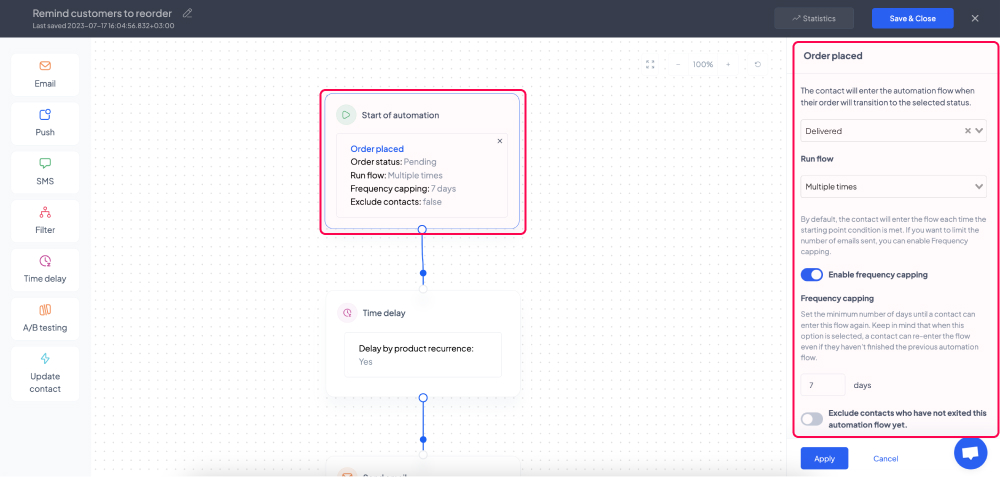
In the ‘Run flow’ section, you can choose how often you would like to remind your customers to reorder products by running this automation flow.
If you select the ‘Only once’ option, they will only be reminded to restock following their first order.
If you select the ‘Multiple times’ option, they will be reminded to order a replacement following each order they place, even though they haven’t restocked on other products from their previous orders.
However, if you are concerned about sending too many emails to your customers, you can click the ‘Enable frequency capping’ toggle button. When on (blue), this option will not allow a contact to re-enter the automation flow unless the number of days you mention in the ‘days’ field has passed.
Similarly, if you click the ‘Exclude contacts who have not exited this automation flow yet.’ toggle button you will prevent contacts from re-entering the automation flow unless they have repurchased the initial or least recent recurring product.
For example, let’s suppose a customer places an order on Monday (08.08.YYYY), another one Saturday (20.08.YYYY), and a third on Thursday (25.08.YYYY), each time ordering a different product, each with a 30-day long recurrence interval.
If you have selected the ‘Only once’ option, they will only be reminded to reorder the product they purchased on Monday.
If you have selected the ‘Multiple times’ option with both frequency capping and flow exit exclusion disabled, they will be reminded to repurchase every product they ordered.
However, if you’ve enabled only frequency capping and set it to 7 days, for example, they will be reminded to reorder the products they bought on Monday and Saturday.
If you’ve enabled flow exit exclusion, they won’t be reminded to repurchase any product until they have reordered the product they purchased on Monday.
b. Set a time delay
The next box in the editor indicates how much time should pass between triggering the start of your automation and sending the email campaign reminding your customers to reorder.
Click the ‘Time delay’ block and make sure the ‘Delay by product recurrence’ option is enabled (blue) to delay the sending of the replenishment campaigns until the specific product recurrence interval you’ve previously set in the ‘E-commerce’ > ‘Products’ section is met.
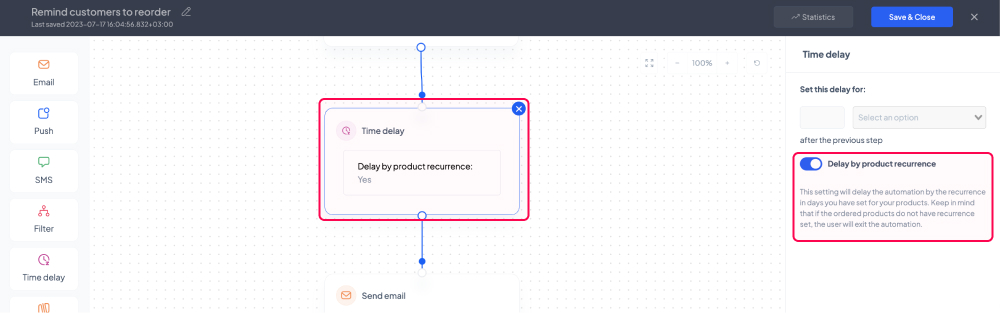
For example, let’s suppose you are retailing cleaning products and you set the product recurrence for all your laundry detergents to 60 days. If a customer purchased one pack of detergent, by having the ‘Delay by product recurrence’ option on (blue), your email reminding them to repurchase will be sent 60 days after the order was delivered.
Keep in mind that if you enable this option and your products do not have a set recurrence interval, your customers will not receive any replenishment campaign.
c. Design your email campaign
The next box in the editor allows you to edit the email campaign which will be sent to every contact that enters the automation flow.
Click the ‘Send email’ block and use the options on the right to edit the subject line and the preview text of your campaign. By clicking the ‘<%>’ icon, you can also insert various personalization tags, such as your customer’s full / first / last name or your website link.
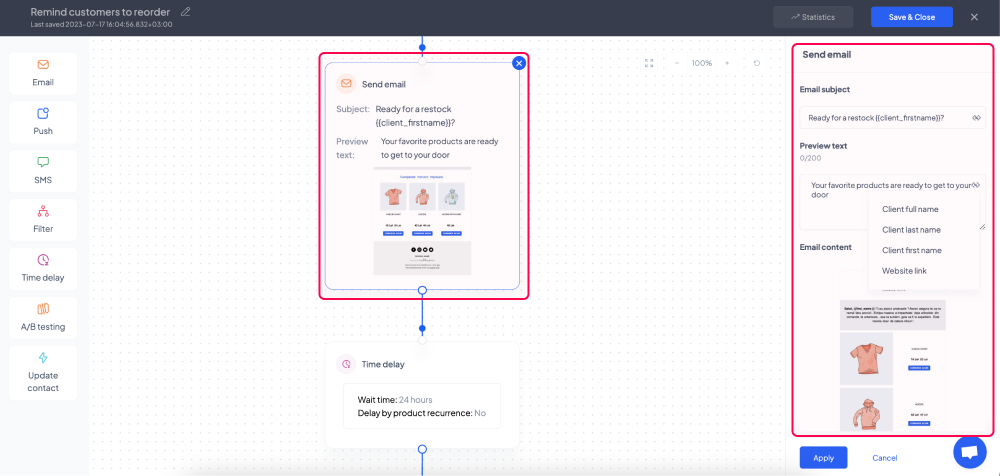
To edit or preview the content of your email, hover your cursor over the ‘Email content’ section and click on one of the two dark grey buttons that will appear (the left one to edit your campaign and the right one to preview it).
If you choose to edit your campaign, you will be redirected to the newsletter builder. Once you’re done editing your campaign, press the ‘Save & Close’ button and you will be redirected back to the automation builder.
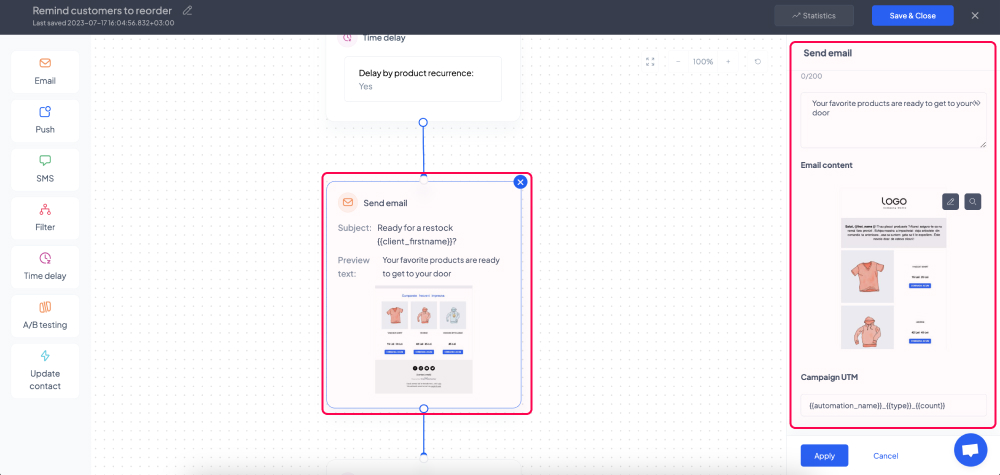
Under the ‘Campaign UTM’ section you will see the default UTM structure for your replenishment campaigns, which you can customize if you wish.
d. Maximize your chances
Your customers may not always engage with your initial reorder reminder campaign. As a result, you could send them a second automated reminder.
Click the ‘Time delay’ block to determine how long you should wait until sending that second campaign to your customers. Use the dropdown to select the unit of time, and indicate the desired duration in the field preceding it.
You can also delay the email until a specific time of the day by turning on (blue) the ‘Delay until a specific time of the day’ toggle button and using the dropdown to select the exact time (AM or PM).
Similarly, you can opt to delay the campaign until specific days of the week by turning on (blue) the ‘Delay until a specific day(s) of the week’ toggle button and clicking the desired days.
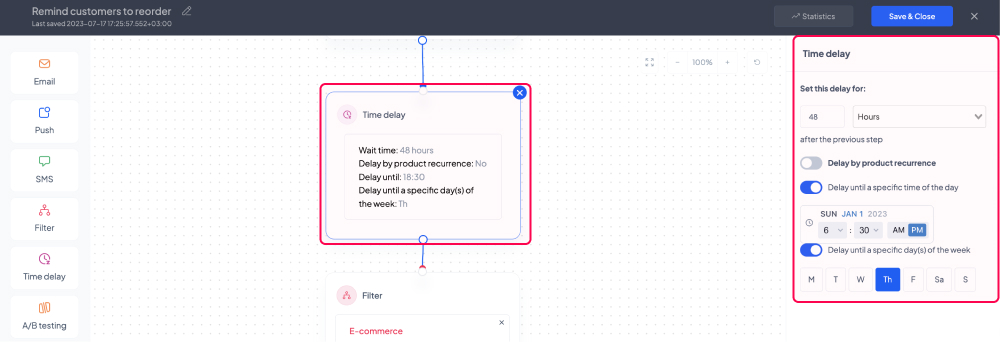
For example, if you’d like to send your second replenishment reminder 48 hours after the initial email was delivered, simply type ‘48’ and select the ‘Hours’ option from the dropdown list, keeping every other option disabled.
If you’d like your follow-up email to be sent out at 6:30 PM 48 hours after the initial campaign was delivered, you would need to also enable the specific time option and select ‘6’ in the first dropdown list, ‘30’ in the second one, and click ‘PM’.
However, if you’d like your second replenishment email to be sent on a Thursday as soon as 48 hours have passed since the initial reminder was delivered, you would need to enable the specific day of the week option and click on ‘Th’. To add the time of day on Thursdays that your campaigns will be sent out, enable the specific time option and select the desired time.
Once that time has passed, you can filter the recipients of the follow-up campaign based on whether they repurchased from your online shop or not.
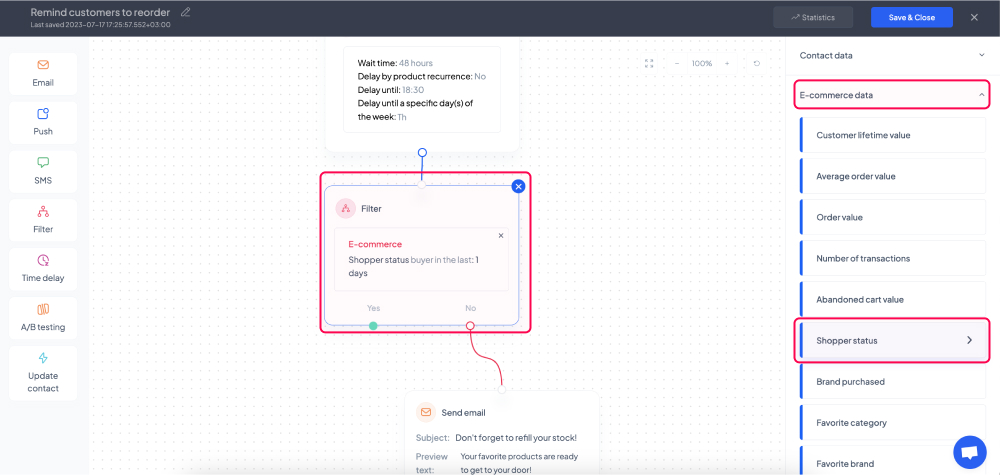
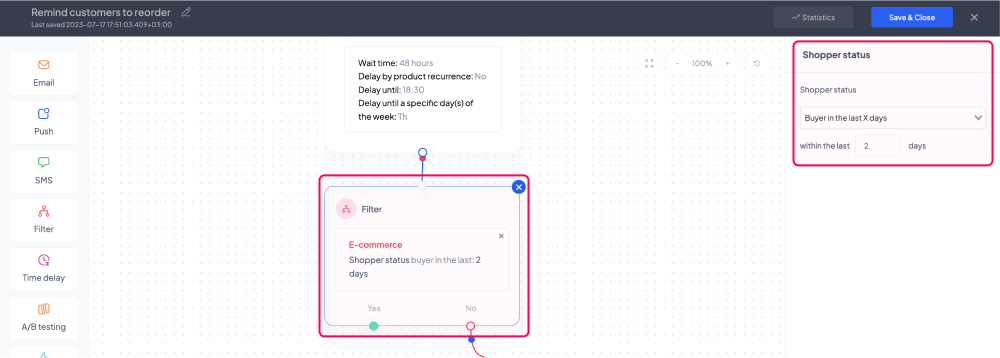
To do so, click on the ‘Filter’ block and on the right side, expand the ‘E-commerce data’ section, click on ‘Shopper status’, select the ‘Buyer in the last X days’ option in the dropdown list, and lastly, type in the field below the time period during which the customers should have reordered from your website in order to be excluded from the second replenishment campaign.
For example, if you’re setting your ‘Time delay’ wait time to 48h, your customers would have 2 days to engage with the initial email.
Once you’ve filtered the recipients for the follow-up campaign, click on the second ‘Send email’ block to edit the subject line, preview text, and the content of your second reorder reminder campaign.
Apply your changes, click the ‘Save & Close’ button, sit back, relax, and watch your recurring sales increase automatically thanks to theMarketer.
Related articles
STILL HAVE QUESTIONS?