/ Knowledge base /
How to use variables in newsletters and automationsHow to use variables in newsletters and automations
Personalized communication feels more relevant, captures attention more effectively, and helps you build stronger relationships with your audience. But creating a separate message for every contact would be nearly impossible.
That’s where theMarketer’s variables come in.
Variables allow you to add dynamic content to newsletters and automated emails. Instead of displaying the same information to everyone, theMarketer automatically replaces each variable with the data available for the individual contact receiving the message. If no data is available, the variable will be replaced with a blank space.
Now, let’s see where you can use variables, how you can insert them, and what happens when the necessary contact information isn’t available
1. Adding variables to the subject line and preview text
You can personalize both the subject line and preview text of newsletters and automated emails using four main variables:
- Client full name
- Client last name
- Client first name
- Website link
When creating a newsletter, this can be done once you reach the ‘Subject’ step of the campaign setup. For automated emails, click the email block in the automation editor, then use the settings panel on the right-hand side.
To add a variable, click the <%> icon in the top-right corner of the corresponding field, and select the variable you want to use from the list.
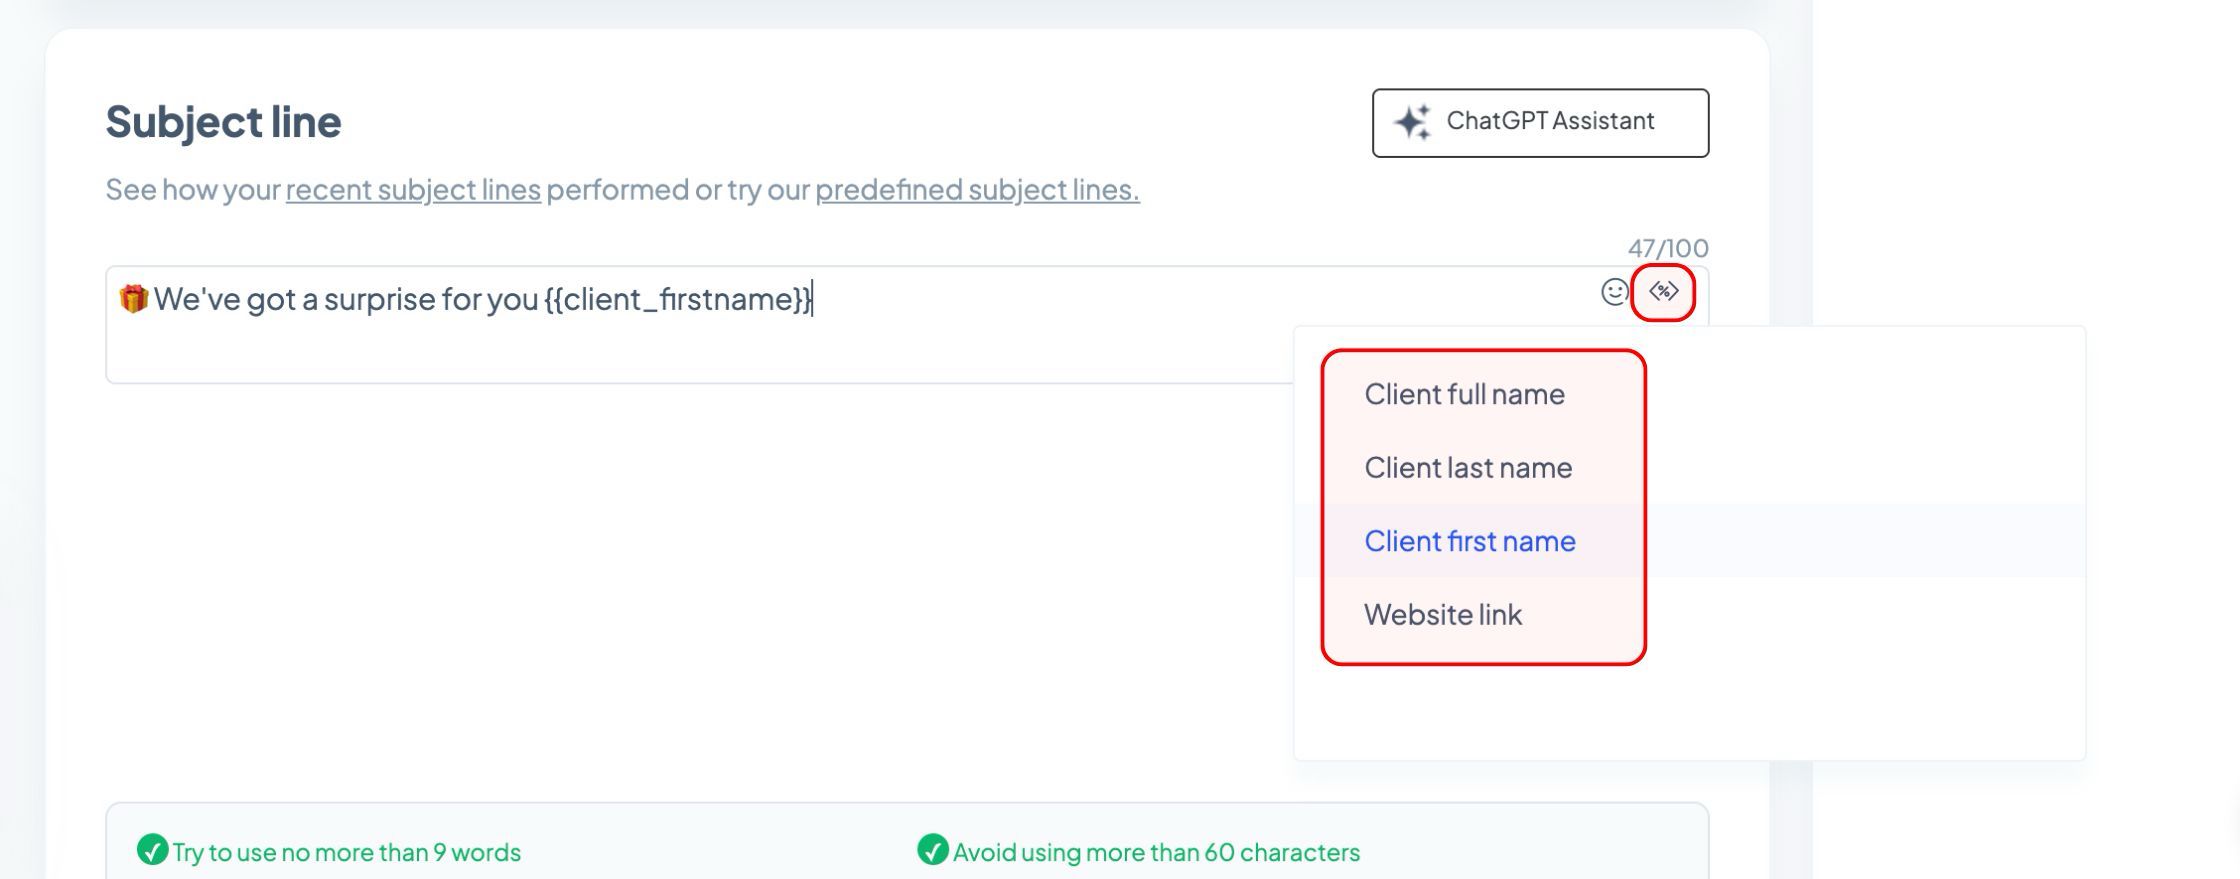
Once the newsletter or automated email is sent, theMarketer will automatically replace the variable with the information available for each recipient. For example, a subject line such as:
Welcome to the club, {{client_first_name}}!
could be displayed as:
Welcome to the club, Marie!
When adding variables, make sure the subject line and preview text still read naturally when the variable defaults to a blank space. Avoid structures in which an empty value could leave behind unnecessary punctuation or make the message feel incomplete.
For example:
{{client_first_name}}, your favorites are waiting
may be displayed as:
, your favorites are waiting
2. Adding variables to the newsletter body
You can also add variables to the body of your newsletters, using the text block settings. Click where you want the personalized information to appear, and select ‘Insert variable’ from the inline text menu.
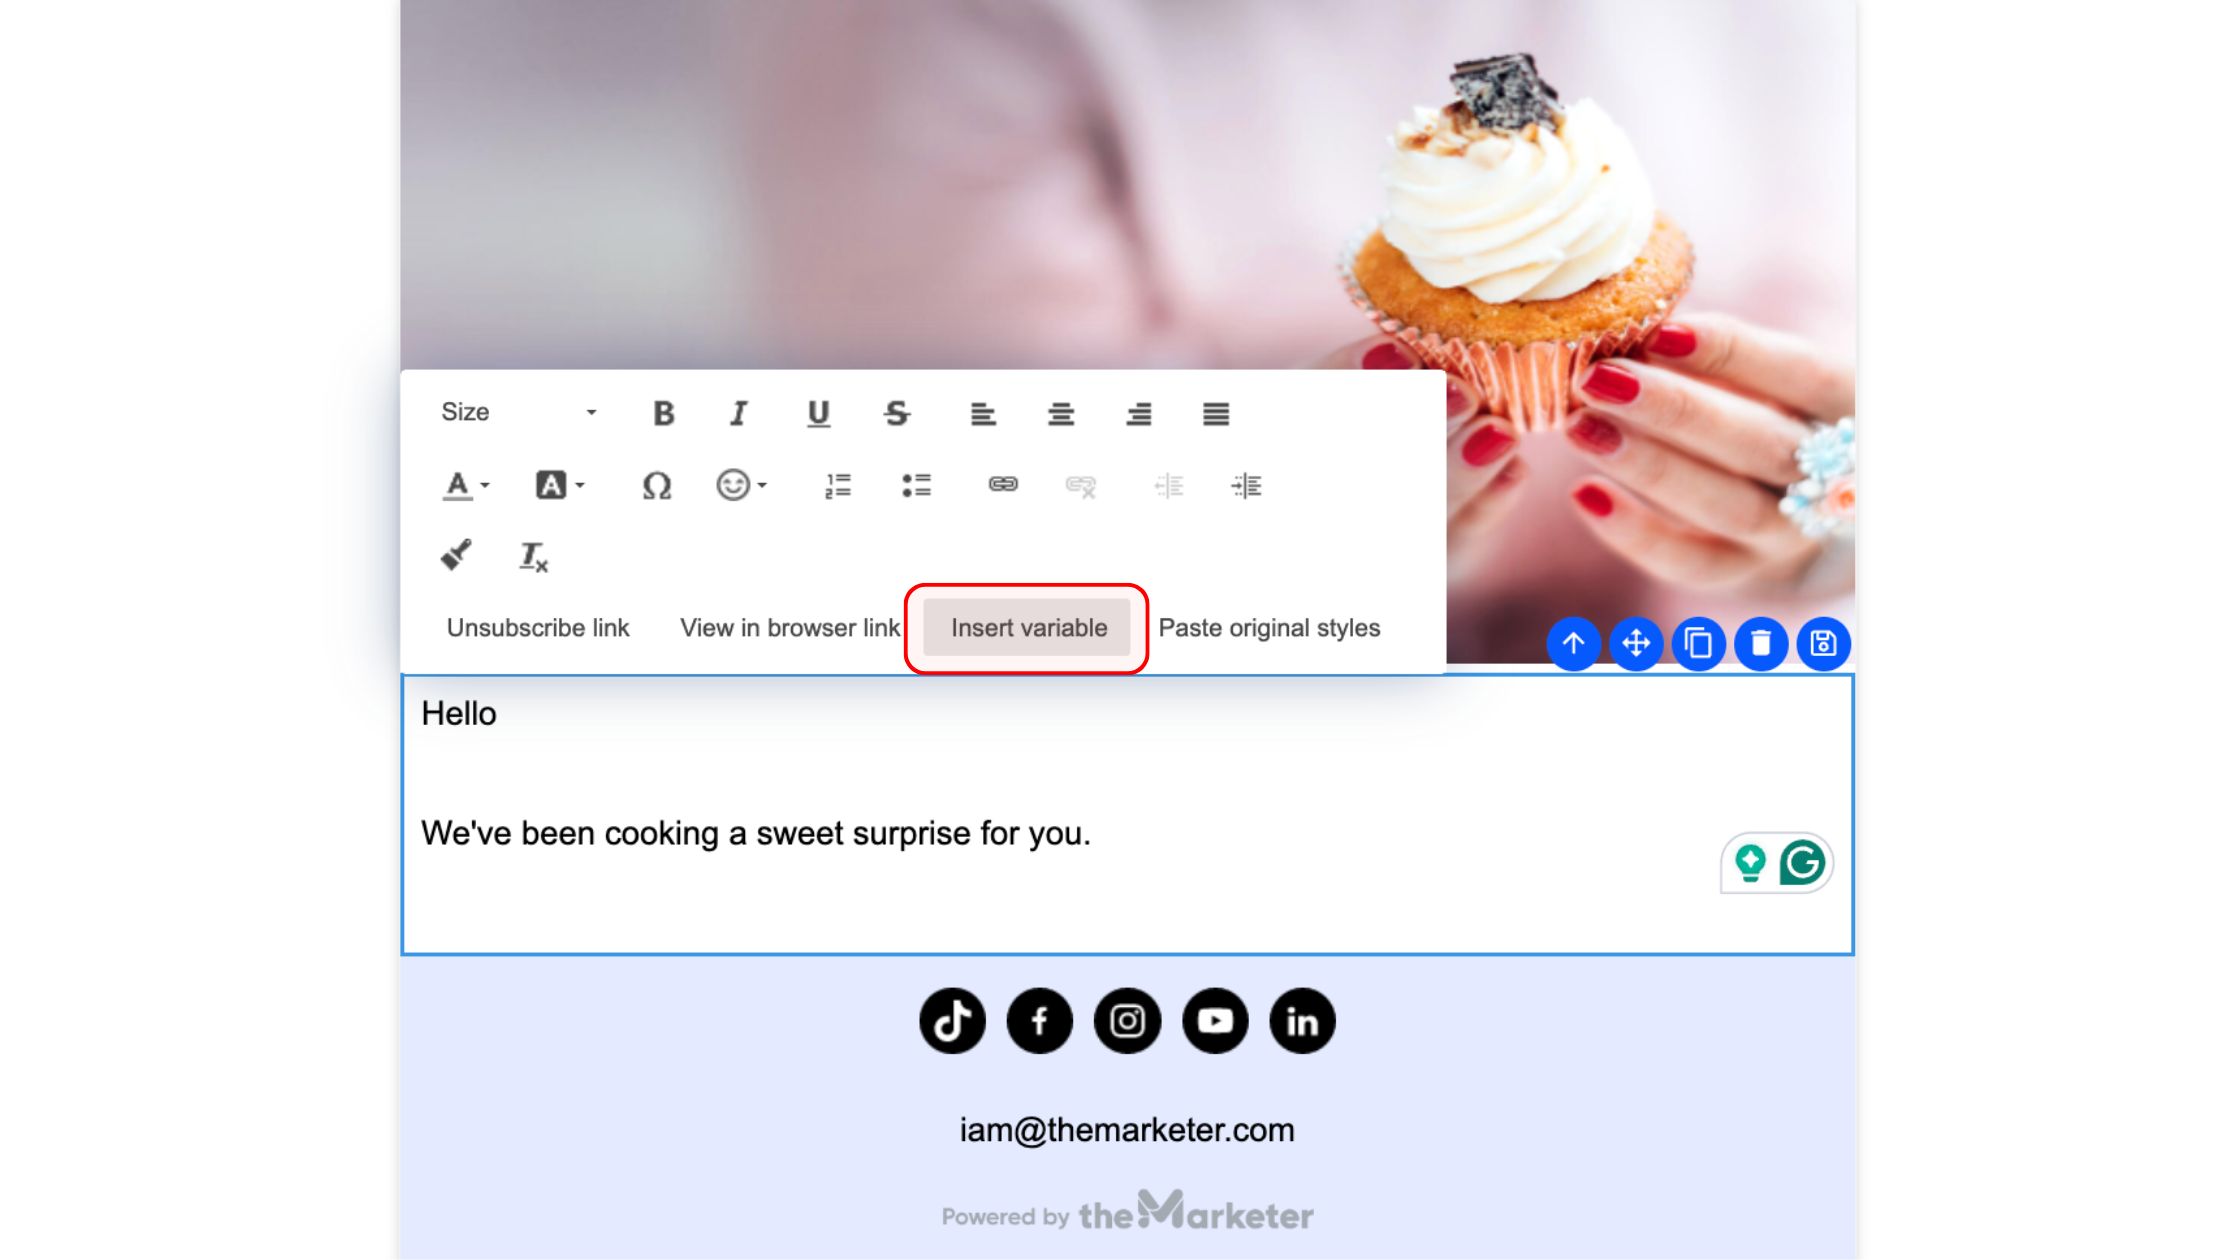
Using the drop-down menu, choose the variable you want to insert.
Besides full name, last name, first name, and website link, the email editor gives you access to additional contact information, including email address, phone number, city, or custom contact variables. The available custom variables correspond to the contact attributes and columns displayed under ‘Audience’ > ‘Contacts’.
This means that, when the relevant information is available in your audience database, you can personalize messages using data that is specific to your business and customers. For example, you could use a custom contact attribute to reference a customer’s account type, location, or another detail collected through your forms, integrations, or API, or mapped during a contact import.
3. Adding a default value when contact data is missing
When inserting full name, last name, or first name into the body of a newsletter or automated email, you can also enter a default value in the ‘Enter default value’ field.
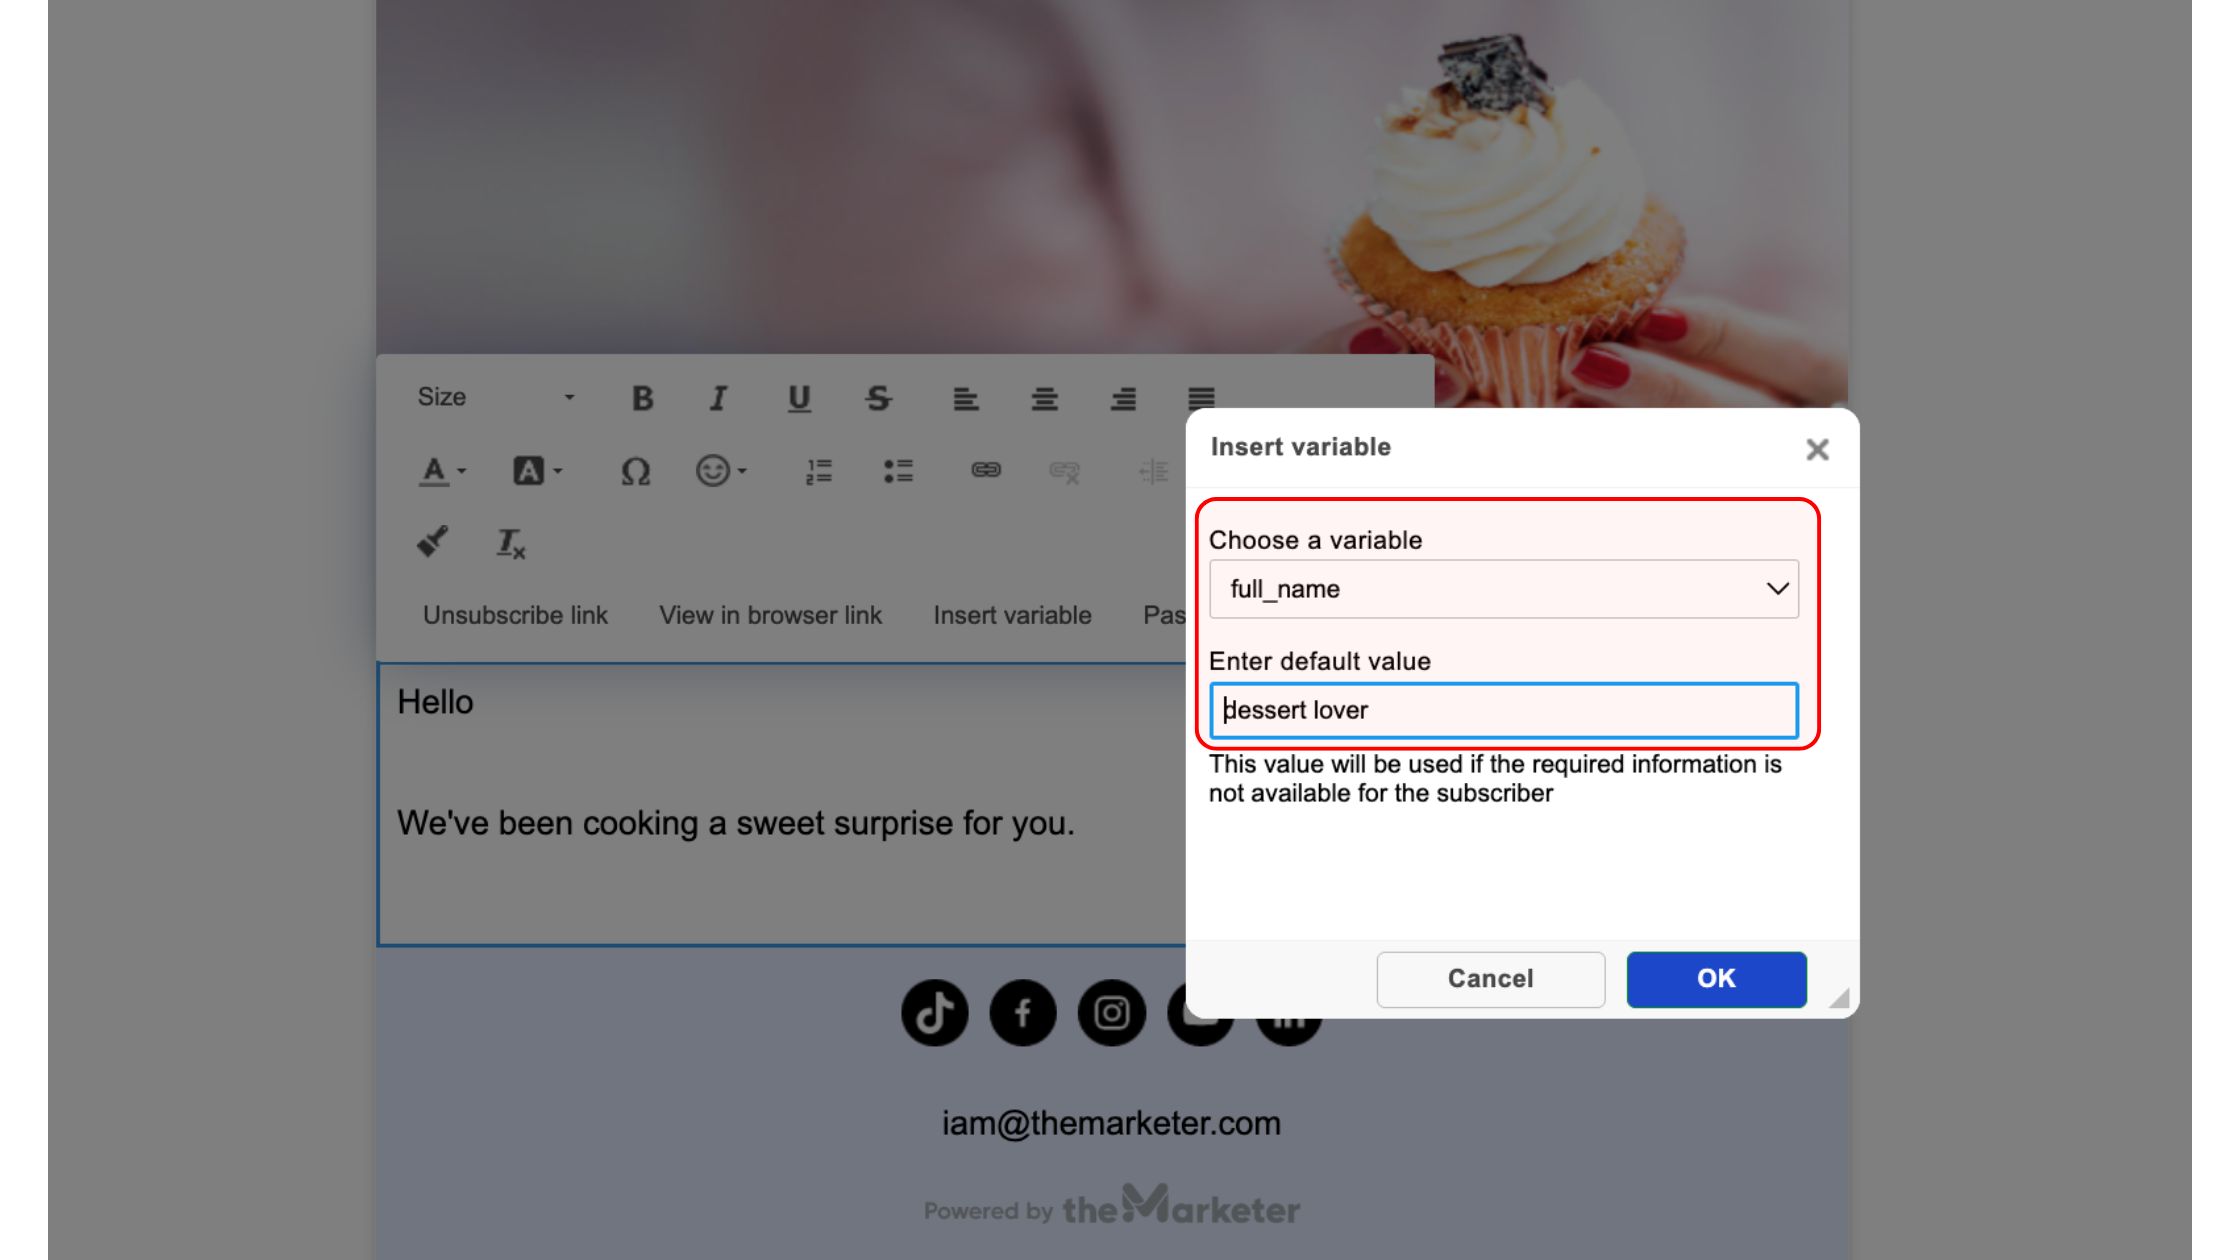
This default value will be displayed whenever the corresponding information is missing from the contact’s profile. For example, you could create the following greeting:
Hi, {{client_first_name}}!
and enter “there” as the default value. Contacts whose first name is available might see:
Hi, Marie!
While contacts whose first name is unavailable will see:
Hi there!
Remember to always choose the default value based on the complete sentence in which the variable appears to ensure that both the version using an actual contact value and the one using the fallback sound natural and are grammatically correct.
4. Using variables in automated emails
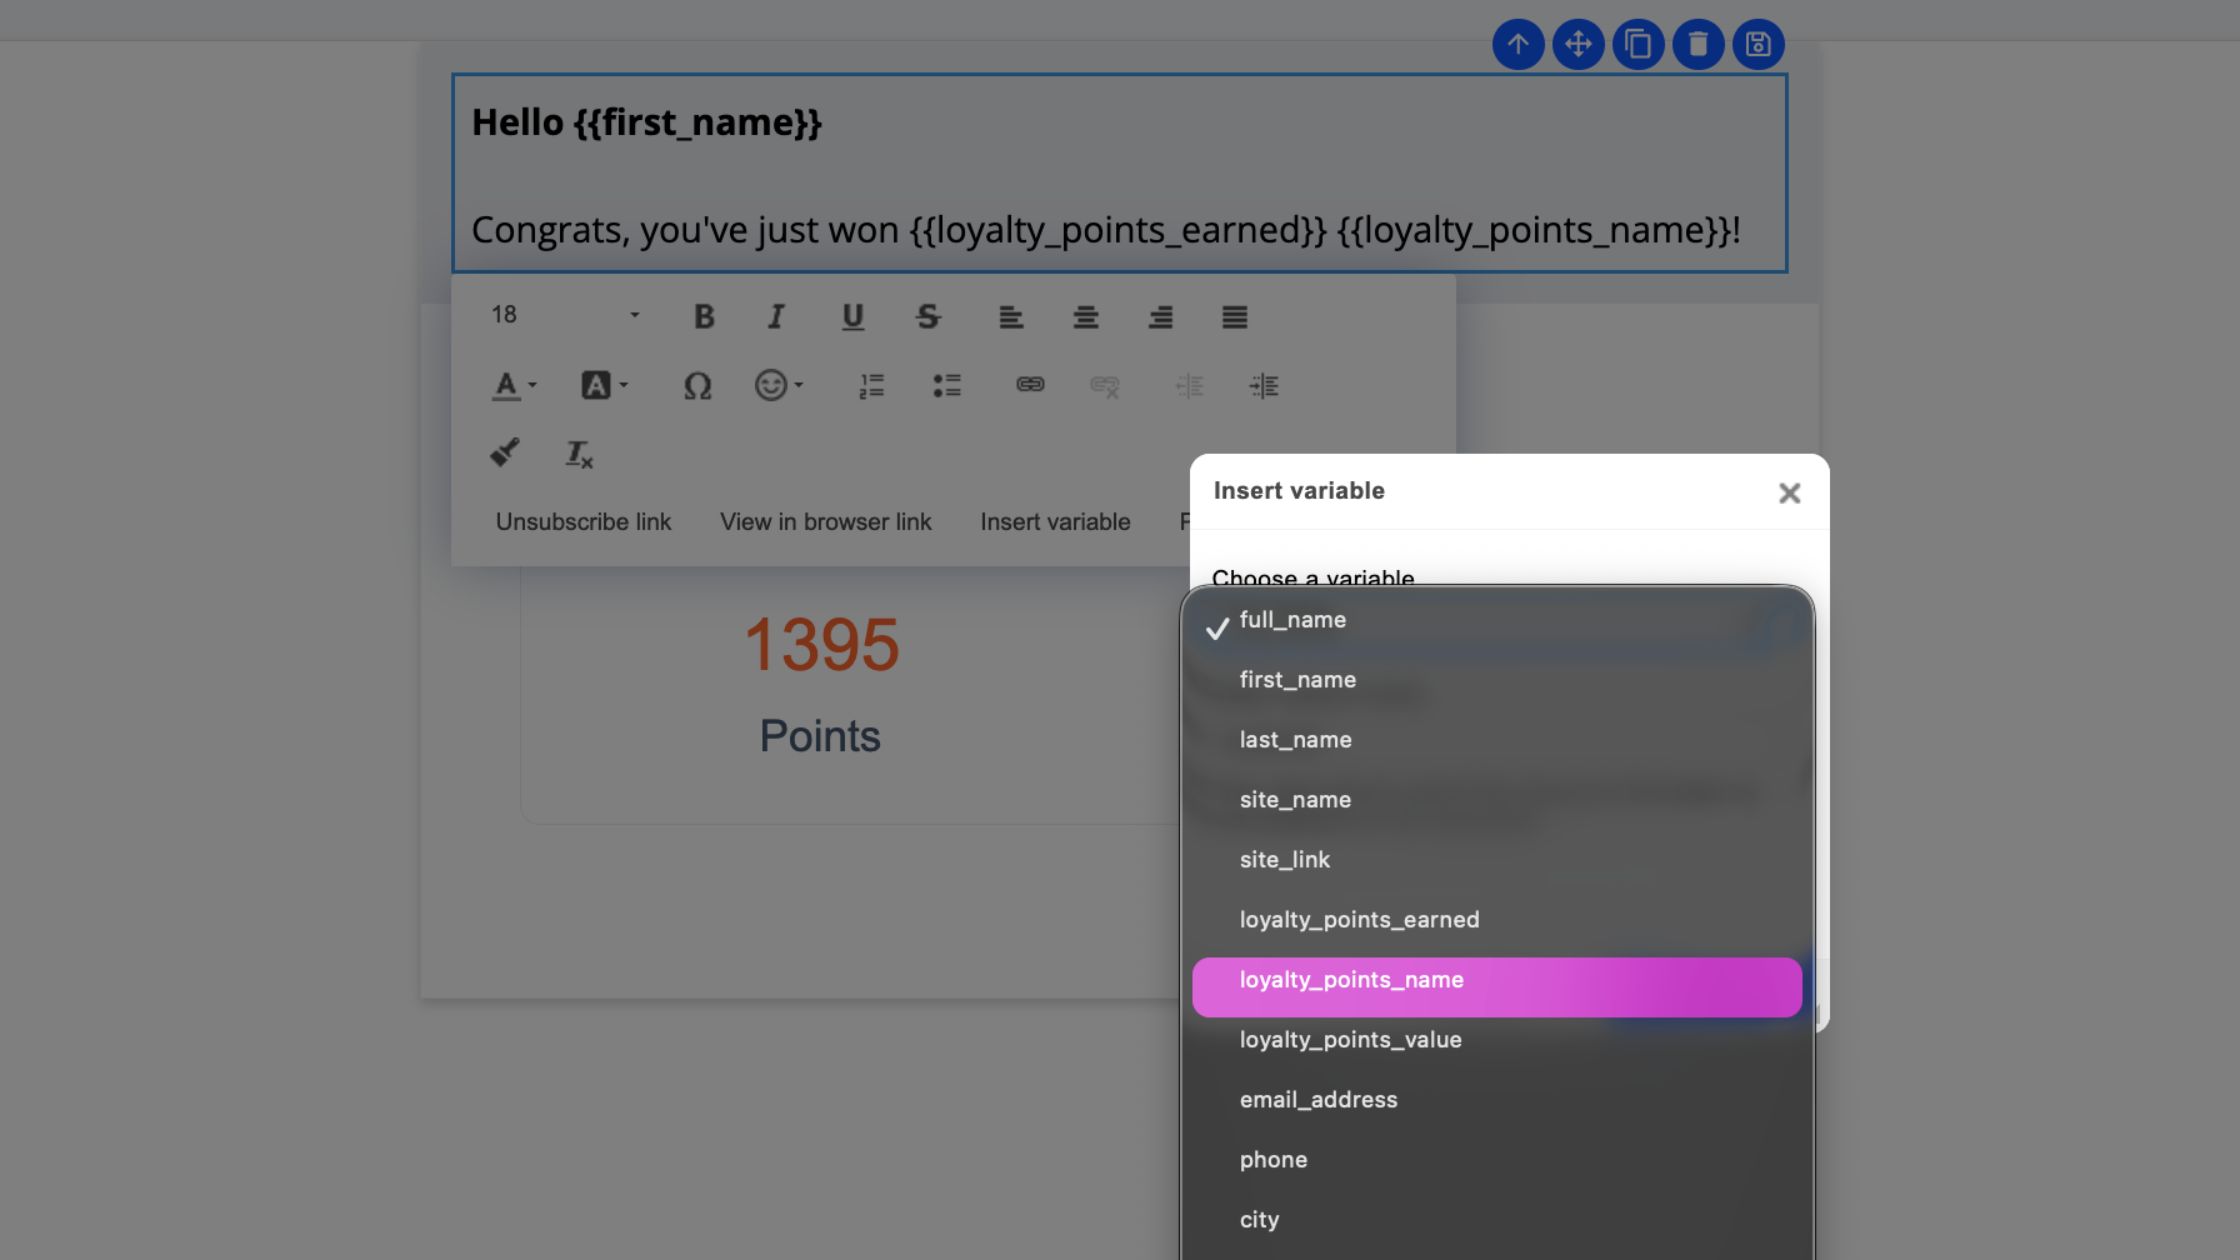
The same rules and principles apply to emails included in automated journeys. When editing the content of an automated email, click ‘Insert variable’ in the inline menu of a text block, and choose the relevant variable from the drop-down list.
The variable will be populated separately for each contact who reaches that step of the automation, allowing you to create personalized communication at scale across journeys such as welcome series, abandoned cart reminders, post-purchase messages, reactivation flows, and other automated customer experiences.
Just like with newsletters, the information displayed depends on the contact data available in theMarketer. Where supported, add a suitable default value to make sure the message remains clear and natural even when a contact attribute is missing.
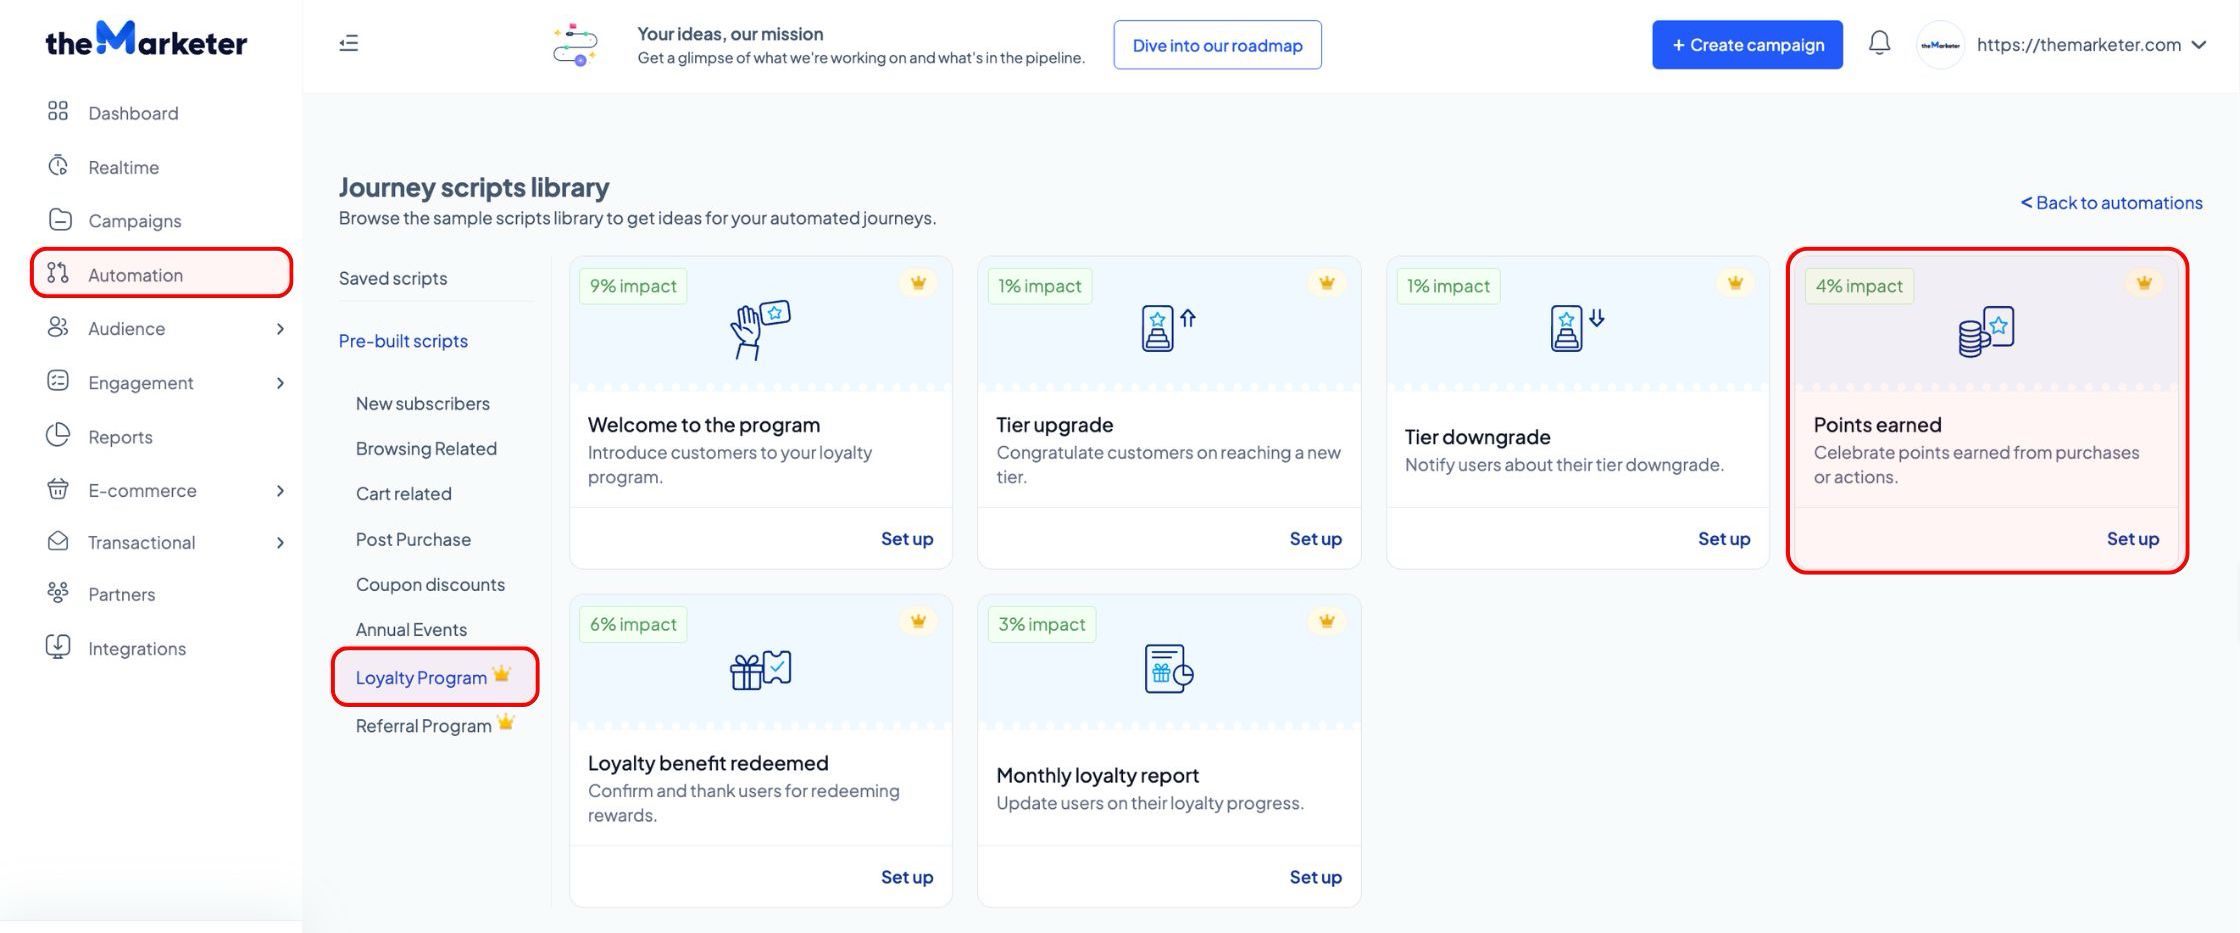
5. Using loyalty variables in the ‘Points earned’ automation
If you have a PRO theMarketer plan and have configured your loyalty program, you’ll also have access to three dedicated variables:
- {{loyalty_points_name}}
- {{loyalty_points_earned}}
- {{loyalty_points_value}}
These are system variables created specifically for the ‘Points earned’ automated flow, allowing you to dynamically display information about the points a customer has earned or their current point balance. Using any of them in a newsletter or another automated flow will not provide the required loyalty event information.
For example, you can use them in a sentence such as:
Congratulations! You’ve earned {{loyalty_points_earned}} {{loyalty_points_name}}. Your new balance is {{loyalty_points_value}} {{loyalty_points_name}}.
If a customer has earned 100 points, the message could be displayed as:
Congratulations! You’ve earned 100 points. Your new balance is 500 points.
If you have created a custom name for your loyalty points, {{loyalty_points_name}} will display that name instead.
For example, if your points are called Tokens, the customer could see:
Congratulations! You’ve earned 100 Tokens.
If you haven’t selected a custom name, {{loyalty_points_name}} will display points by default.
You can insert all three variables using the same inline ‘Insert variable’ menu used for standard contact variables, making it easy to add them back if they are accidentally removed while editing the default ‘Points earned’ email.
6. Reviewing the complete message before sending
Before activating an automation or scheduling your newsletter, send a test email and check every sentence that contains a variable. We recommend sending test emails to contacts with different levels of information available; for example, one contact whose first and last names are complete, and another whose name fields are empty. This will help you identify blank spaces, unnecessary punctuation, or sentences that become unclear when information is missing.
And… that’s all!
You’re now ready to use variables, move beyond one-size-fits-all communication, and deliver personalized experiences without manually creating separate messages for every contact.
Once your contact information is correctly collected and mapped, theMarketer handles the rest, automatically adapting each newsletter and automated email to the person receiving it.
Related articles
STILL HAVE QUESTIONS?