/ Knowledge base /
How to import contactsHow to import contacts
To start your journey with theMarketer on the right foot, you need an audience you can communicate with. Whether you’re transitioning from another platform or just getting started with email marketing, importing contacts into theMarketer is a streamlined process.
If you already have email and/or SMS subscribers, there are three easy ways to import your contacts:
1. Import from other platforms
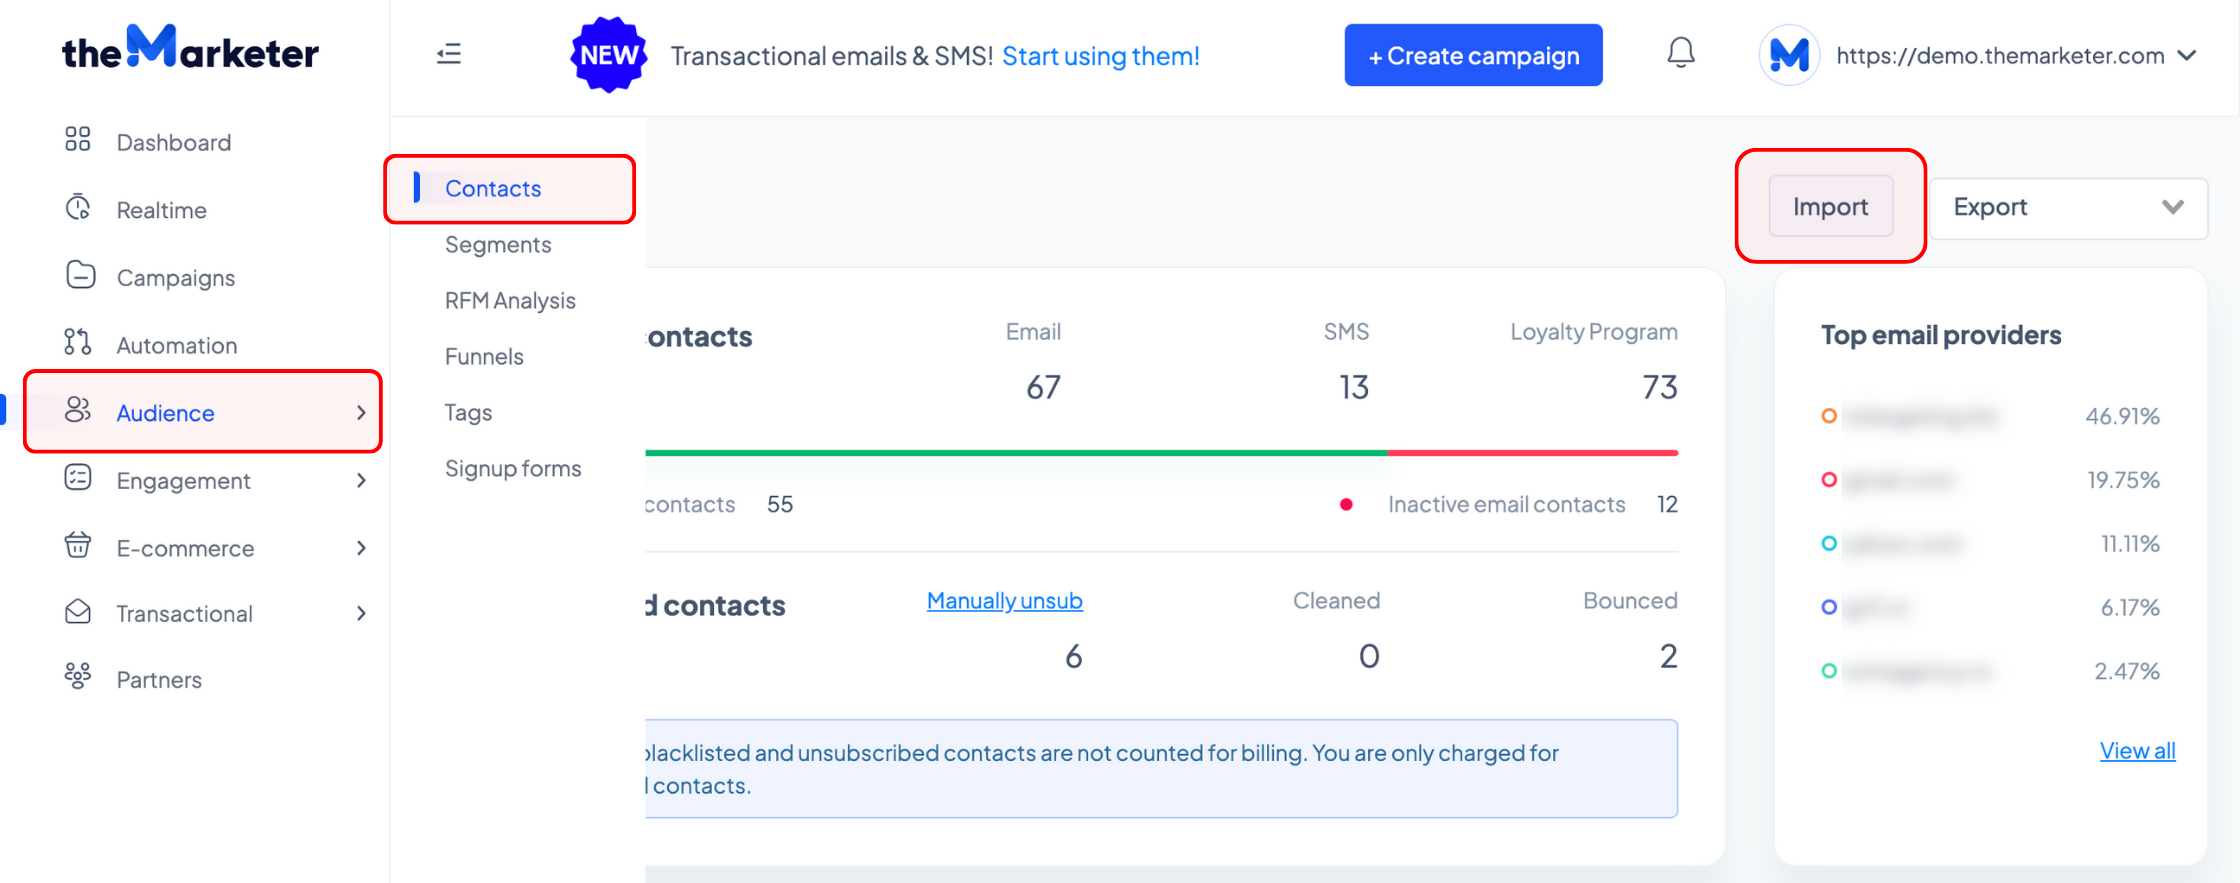
Head to ‘Audience’ > ‘Contacts’ and click the ‘Import’ button.
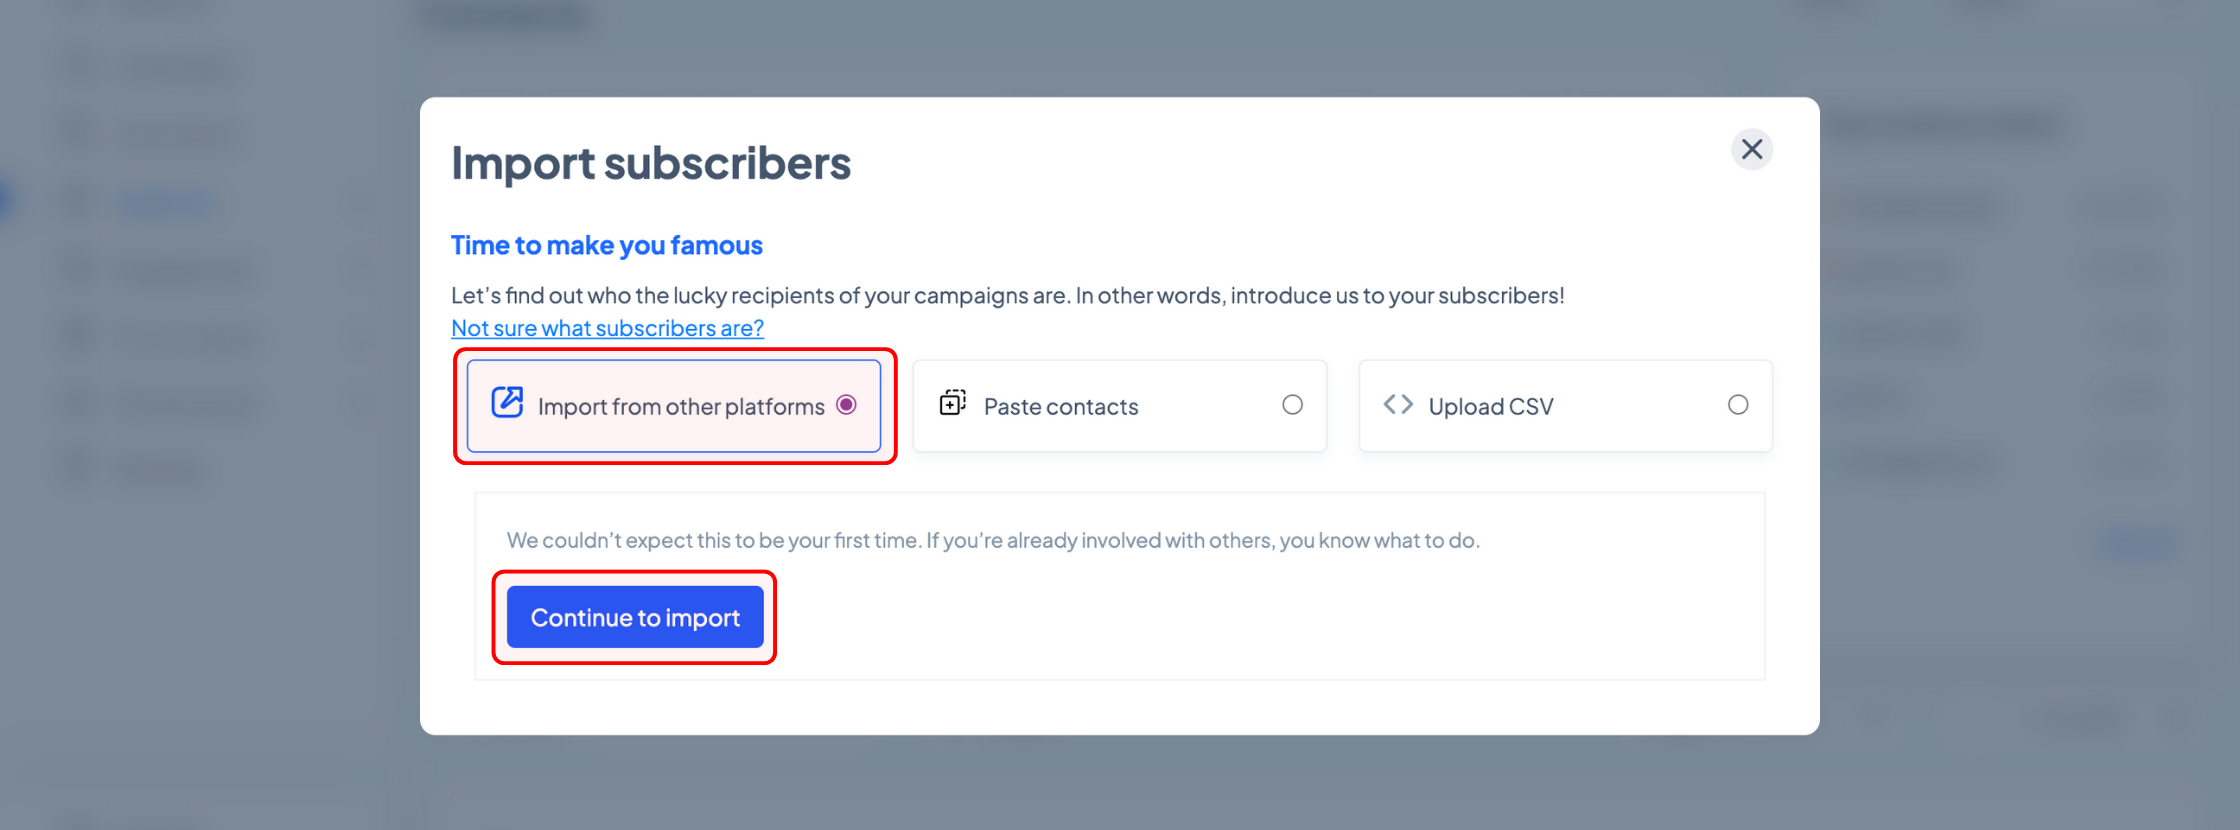
In the new pop-up, select ‘Import from other platforms’ and click ‘Continue to import’.
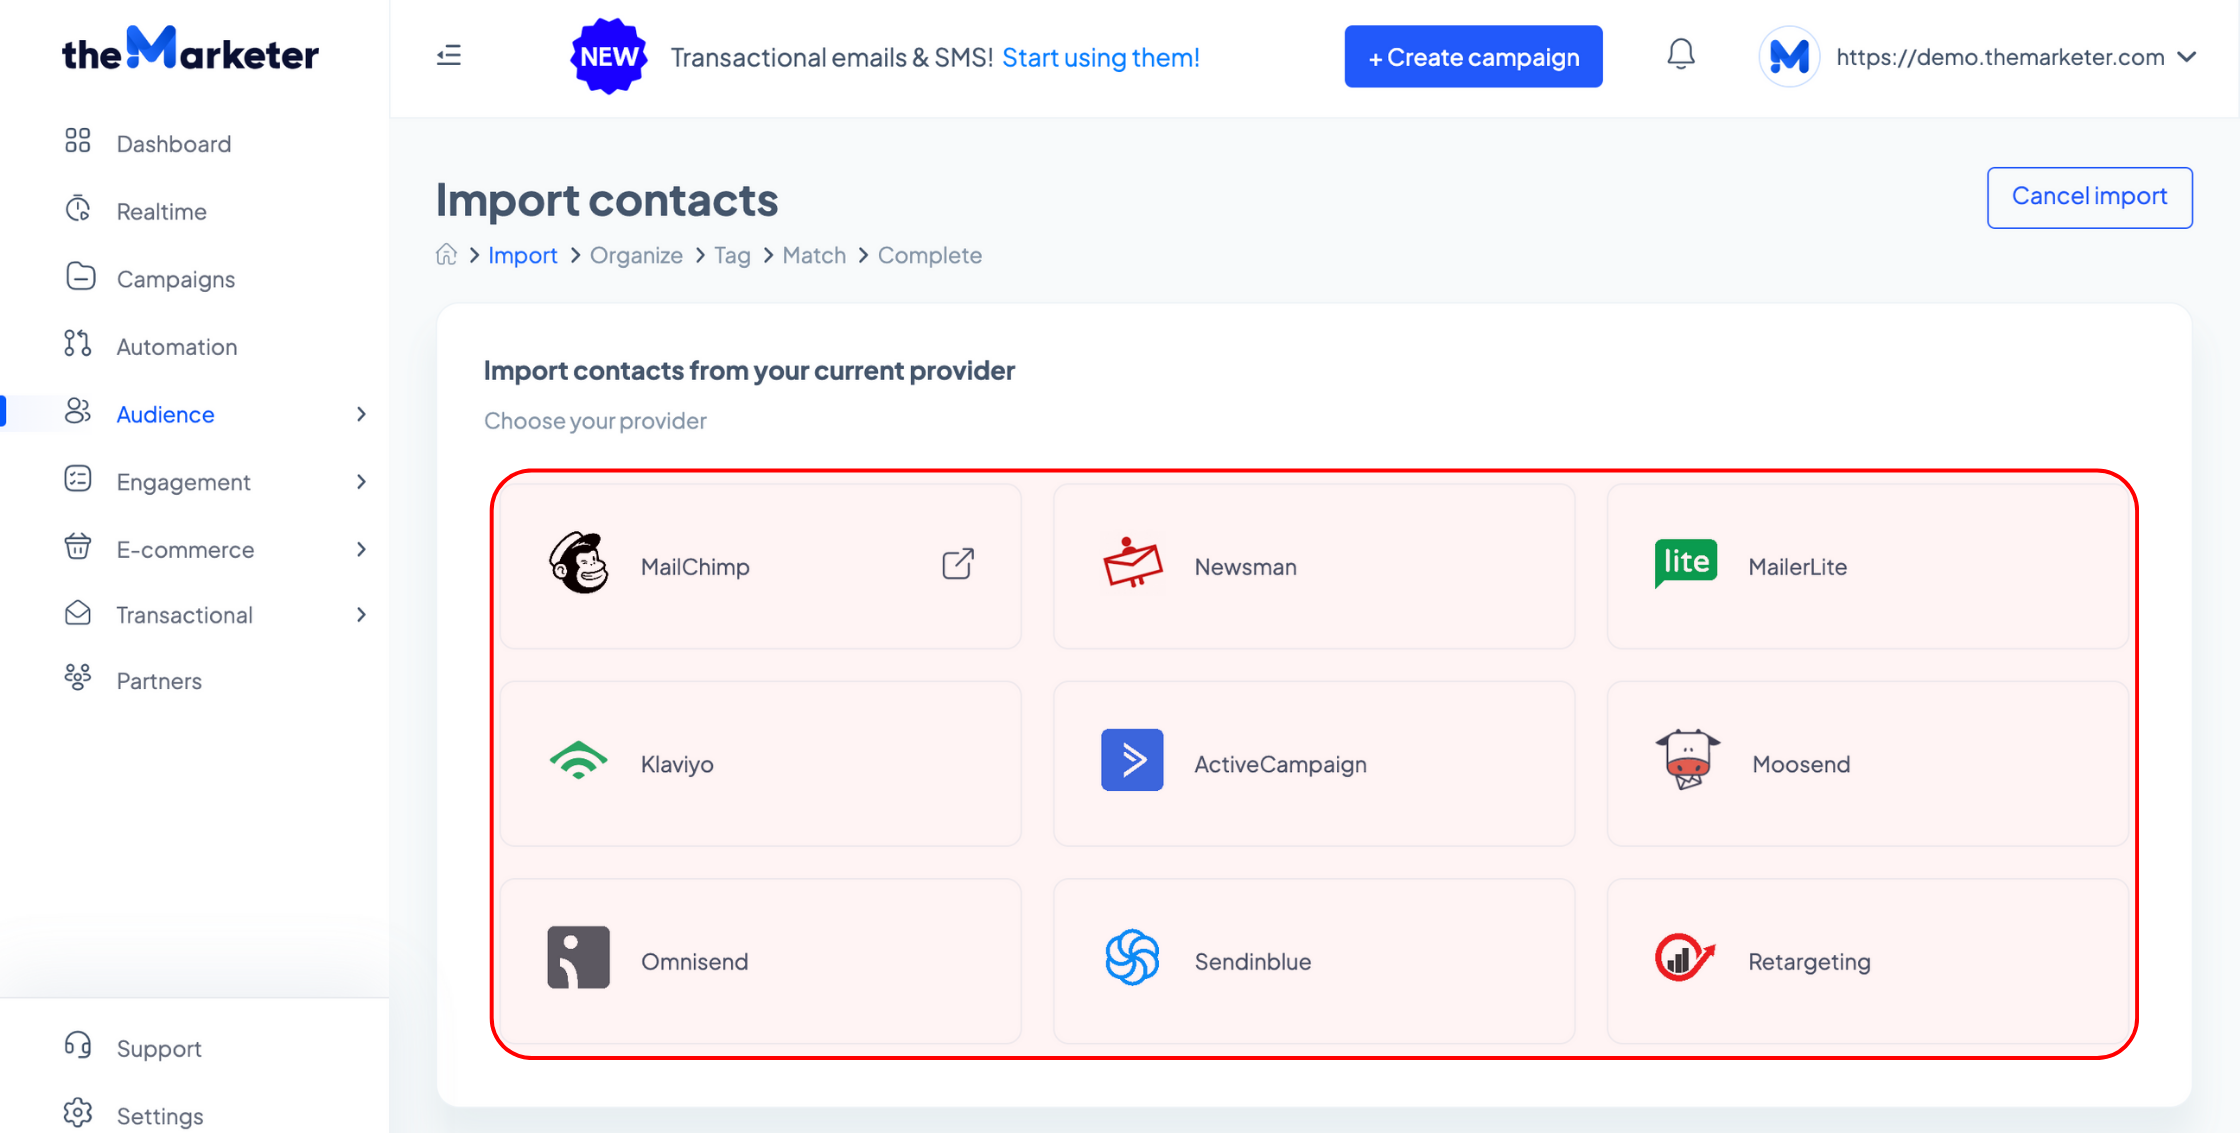
To make your transition as smooth as possible, we have implemented mechanisms for transferring contacts from Mailchimp, MailerLite, Klavyio, Active Campaign, Moosend, Omnisend, Sendinblue, Retargeting, and Newsman.
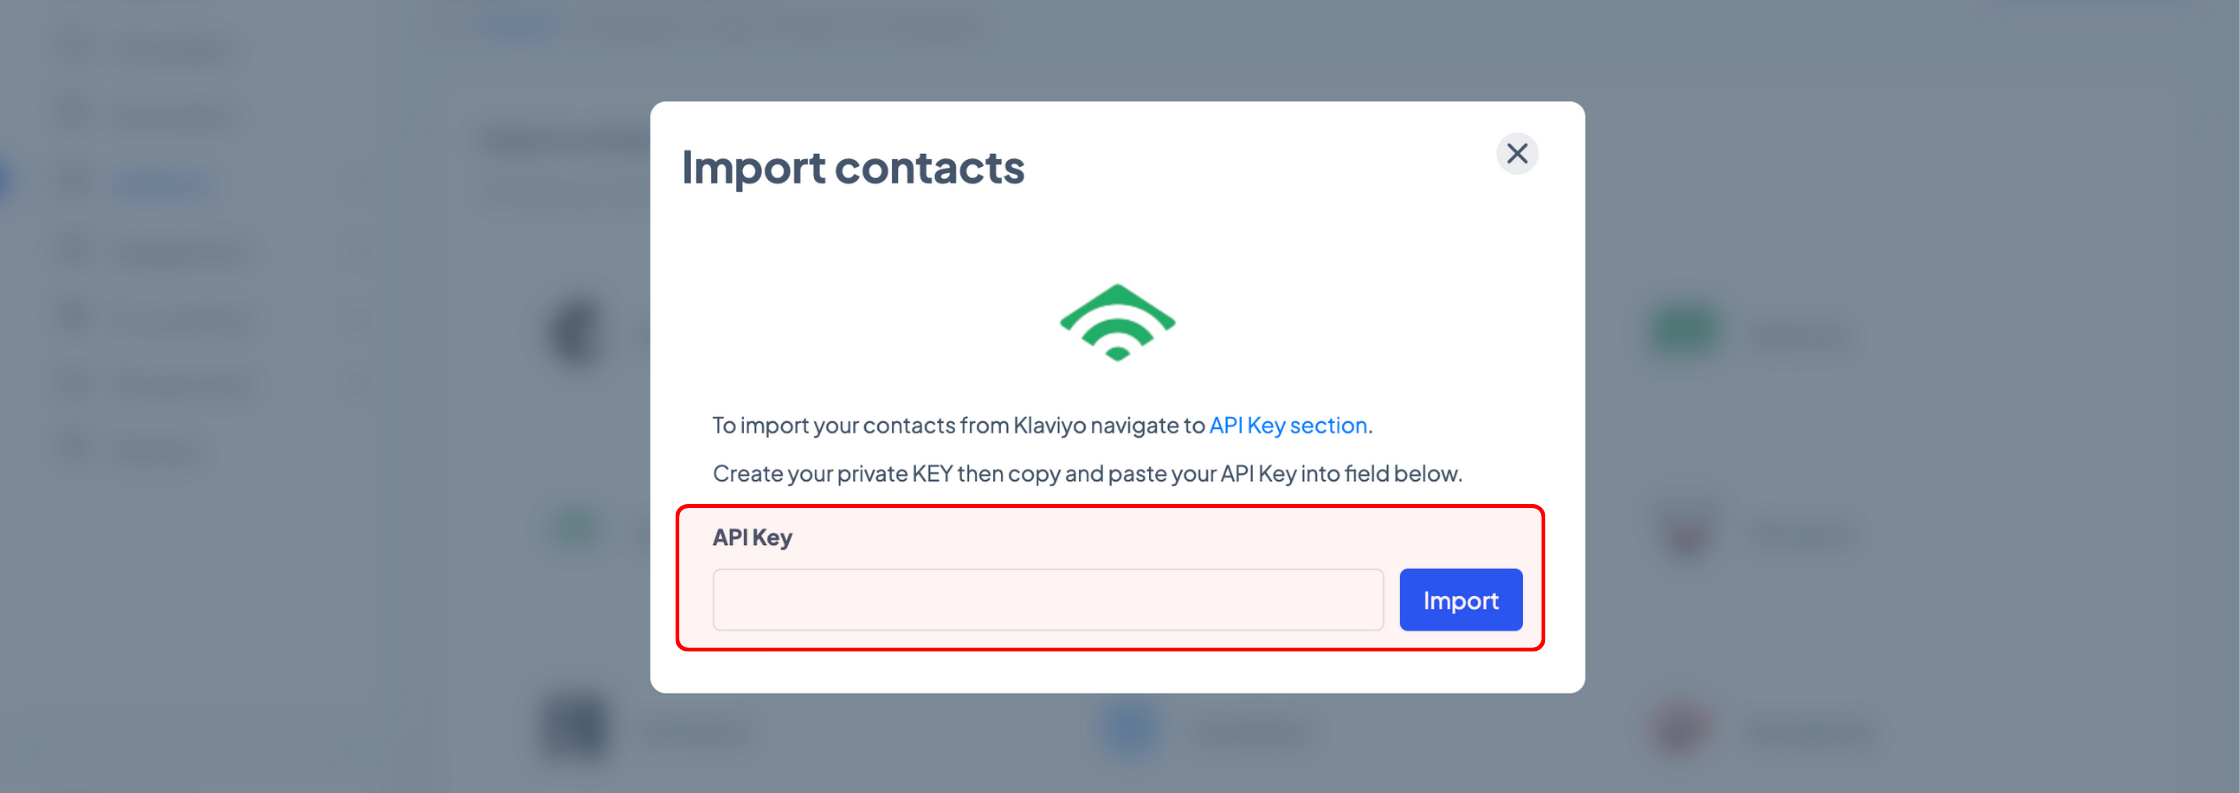
All you have to do is click the platform where your contacts are currently stored, insert the API key, which is needed for the contact export, then click the ‘Import’ button. Some platforms might require additional information, such as an URL or user ID.
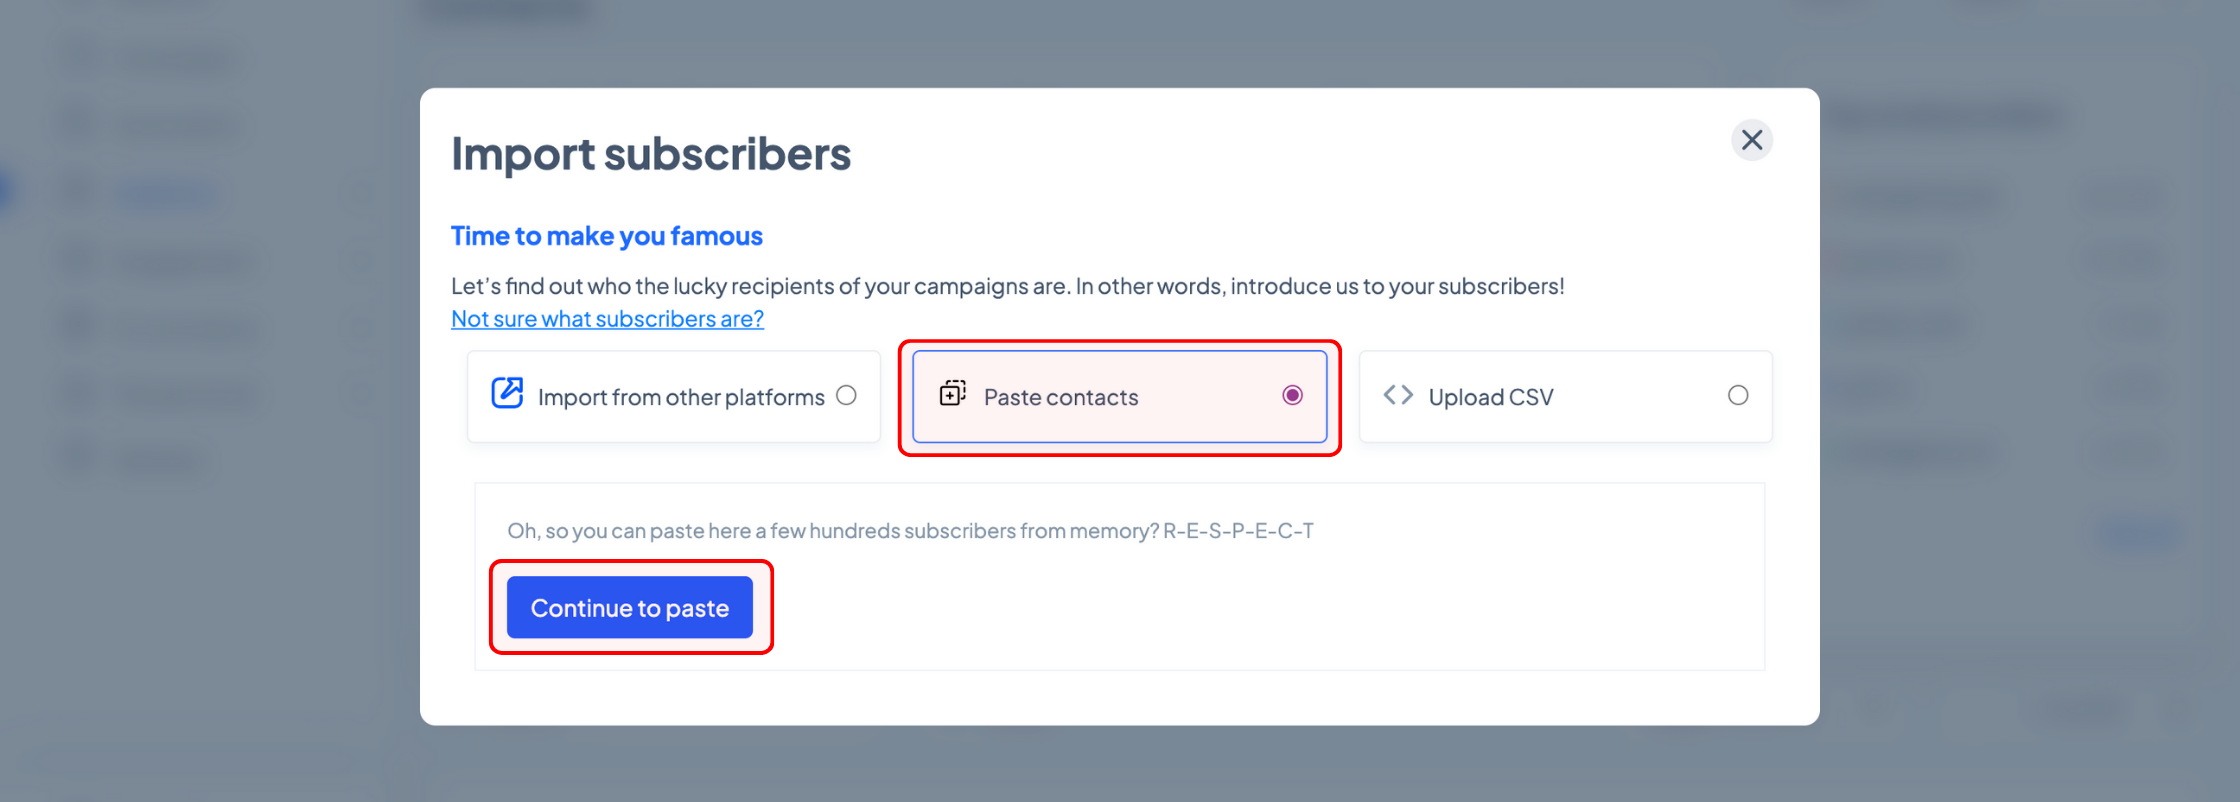
2. Paste contacts
If you don’t have too many contacts, you can also use our copy & paste import tool.
Head to ‘Audience’ > ‘Contacts’ and click the ‘Import’ button.
In the new pop-up, select ‘Paste contacts’ and click ‘Continue to paste’.
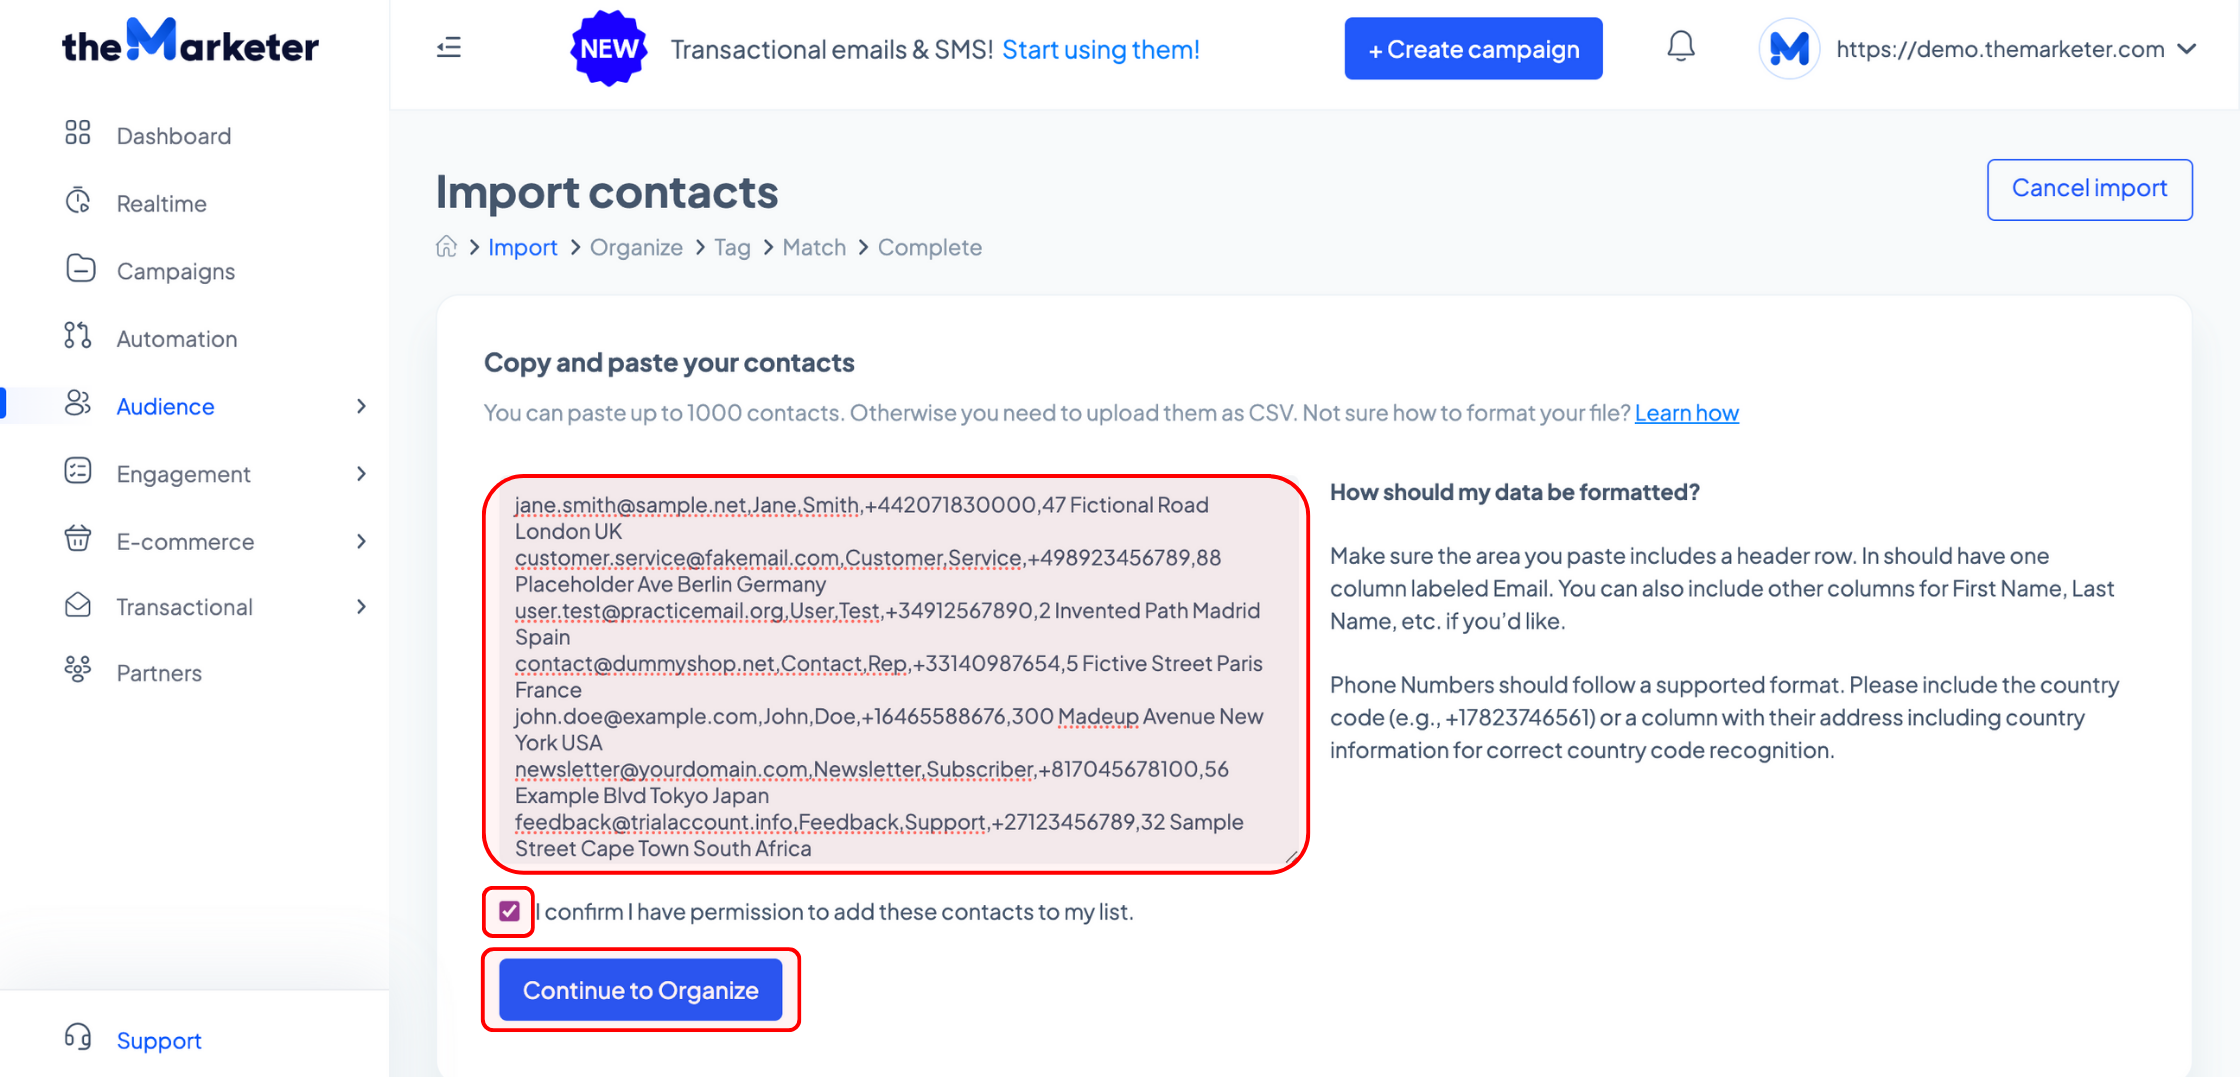
In the field on the left-hand side, you can paste your list of contacts. The only mandatory field is email, but you can also include the contacts’ first names, last names, and phone numbers. Keep in mind that the values need to be separated by a comma, and each contact needs to be on a separate row.
Once you’ve ticked the box confirming that you have permission to add the contacts to your list, click the ‘Continue to Organize’ button.
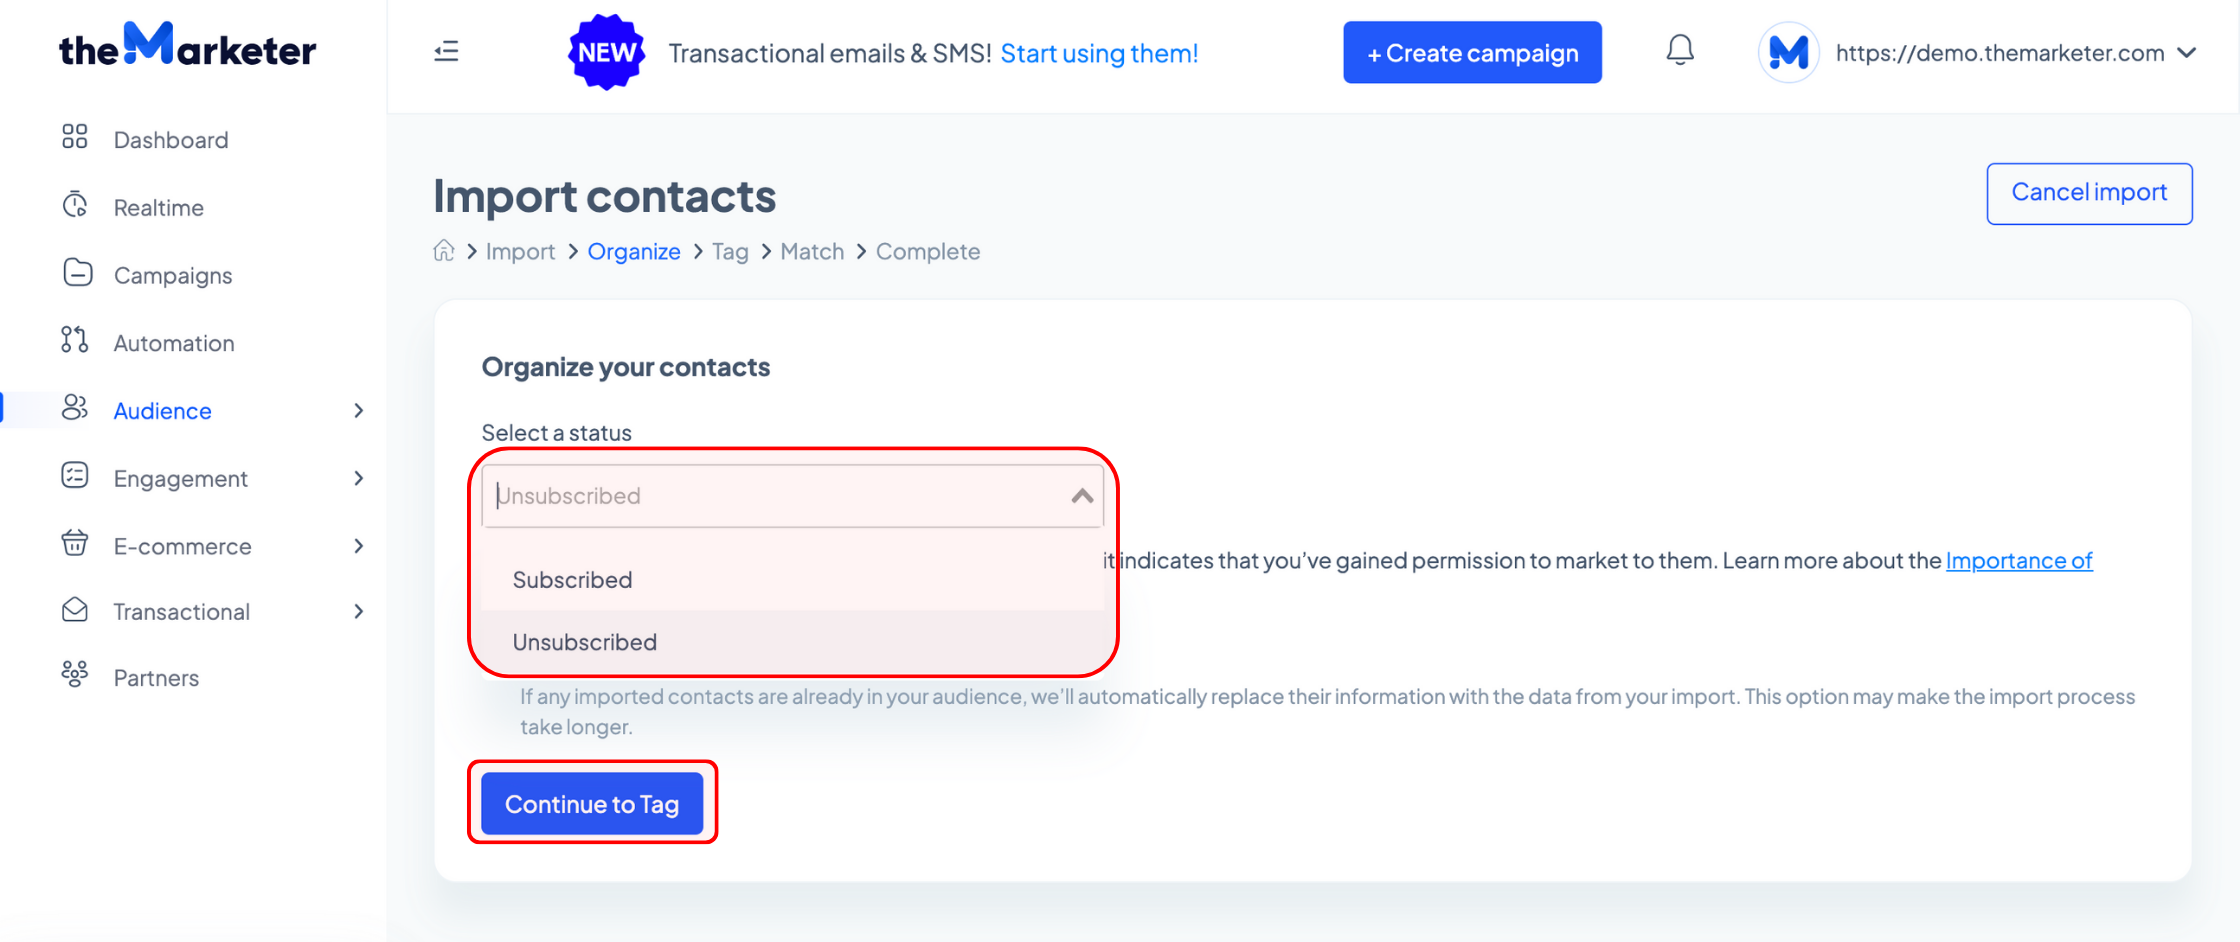
Depending on how you collected your contacts or how long ago you collected them, you might need to re-confirm their subscriber status to comply with Data Protection regulations. As a result, you can use the drop-down options to import your contacts with a ‘Subscribed’ or ‘Unsubscribed’ status. Once you’re ready, click ‘Continue to Tag’.
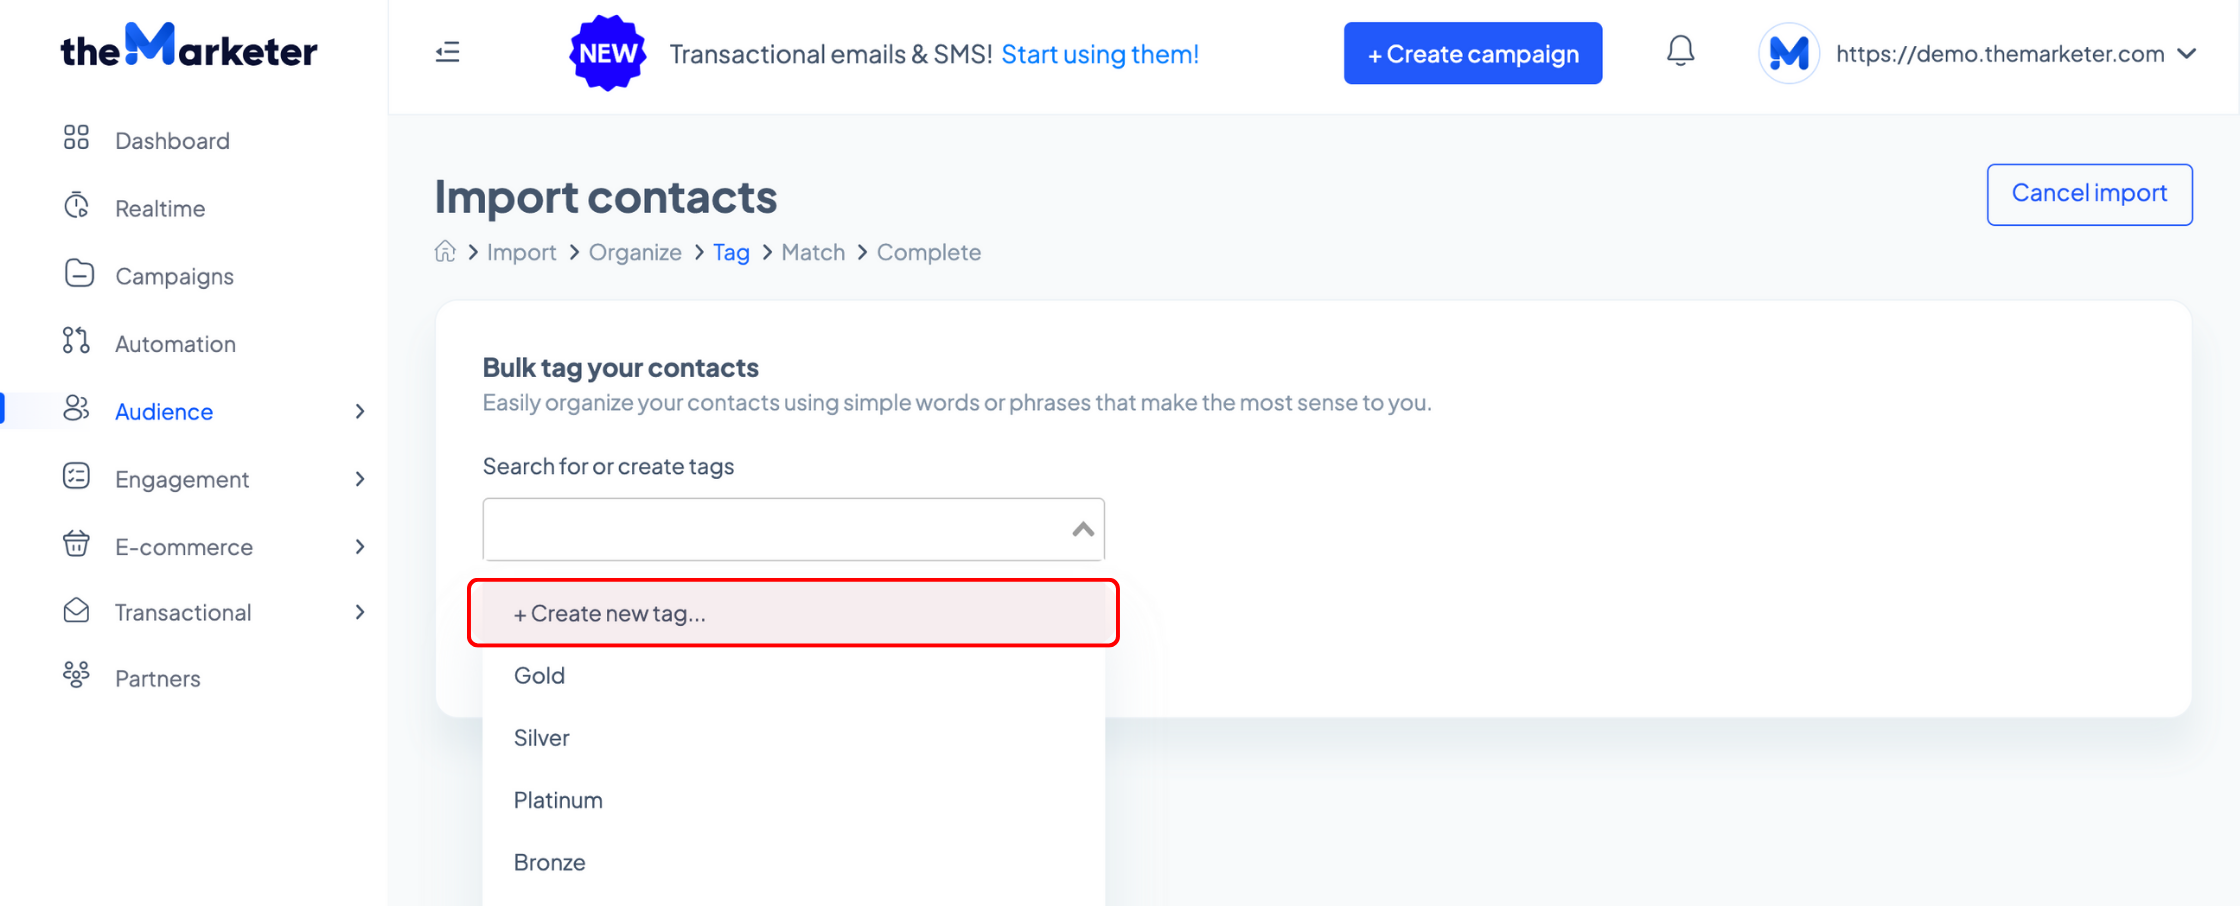
Next up, you can tag the contacts in your imported list with one of the tags you’ve previously created. Click the drop-down menu to browse them or click ‘Create new tag…’ to add a custom tag. Once you’re done, click the ‘Continue to Match’ button.
Next, you should check whether the system has correctly identified the data you pasted during the previous steps. Click ‘Resolve’ next to the headers of the unrecognized data (marked with red).
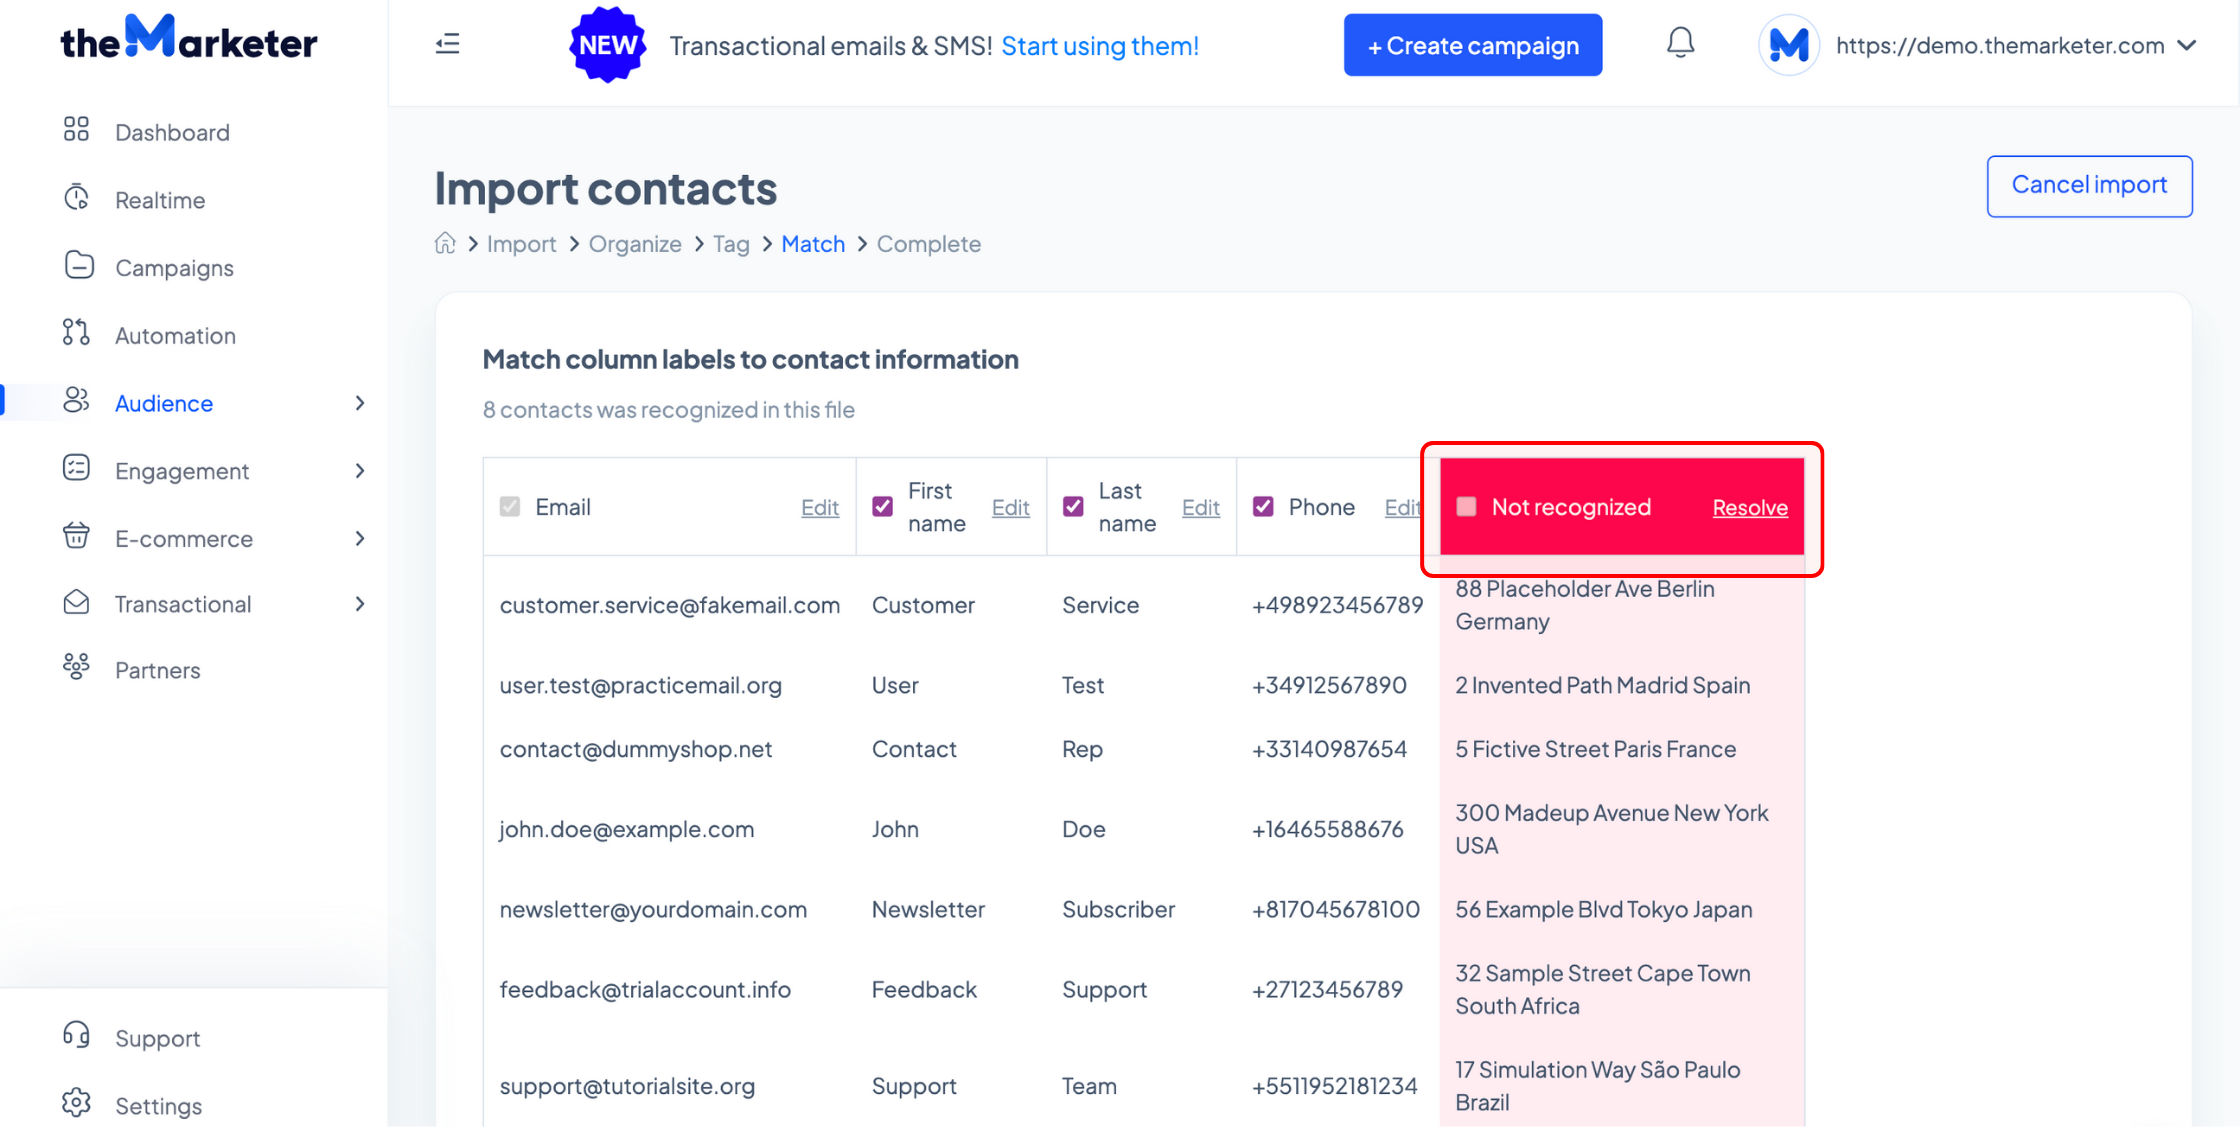
Use the drop-down menu to assign one of the default labels to that column or create a custom one by selecting the ‘Create new column…’ option.

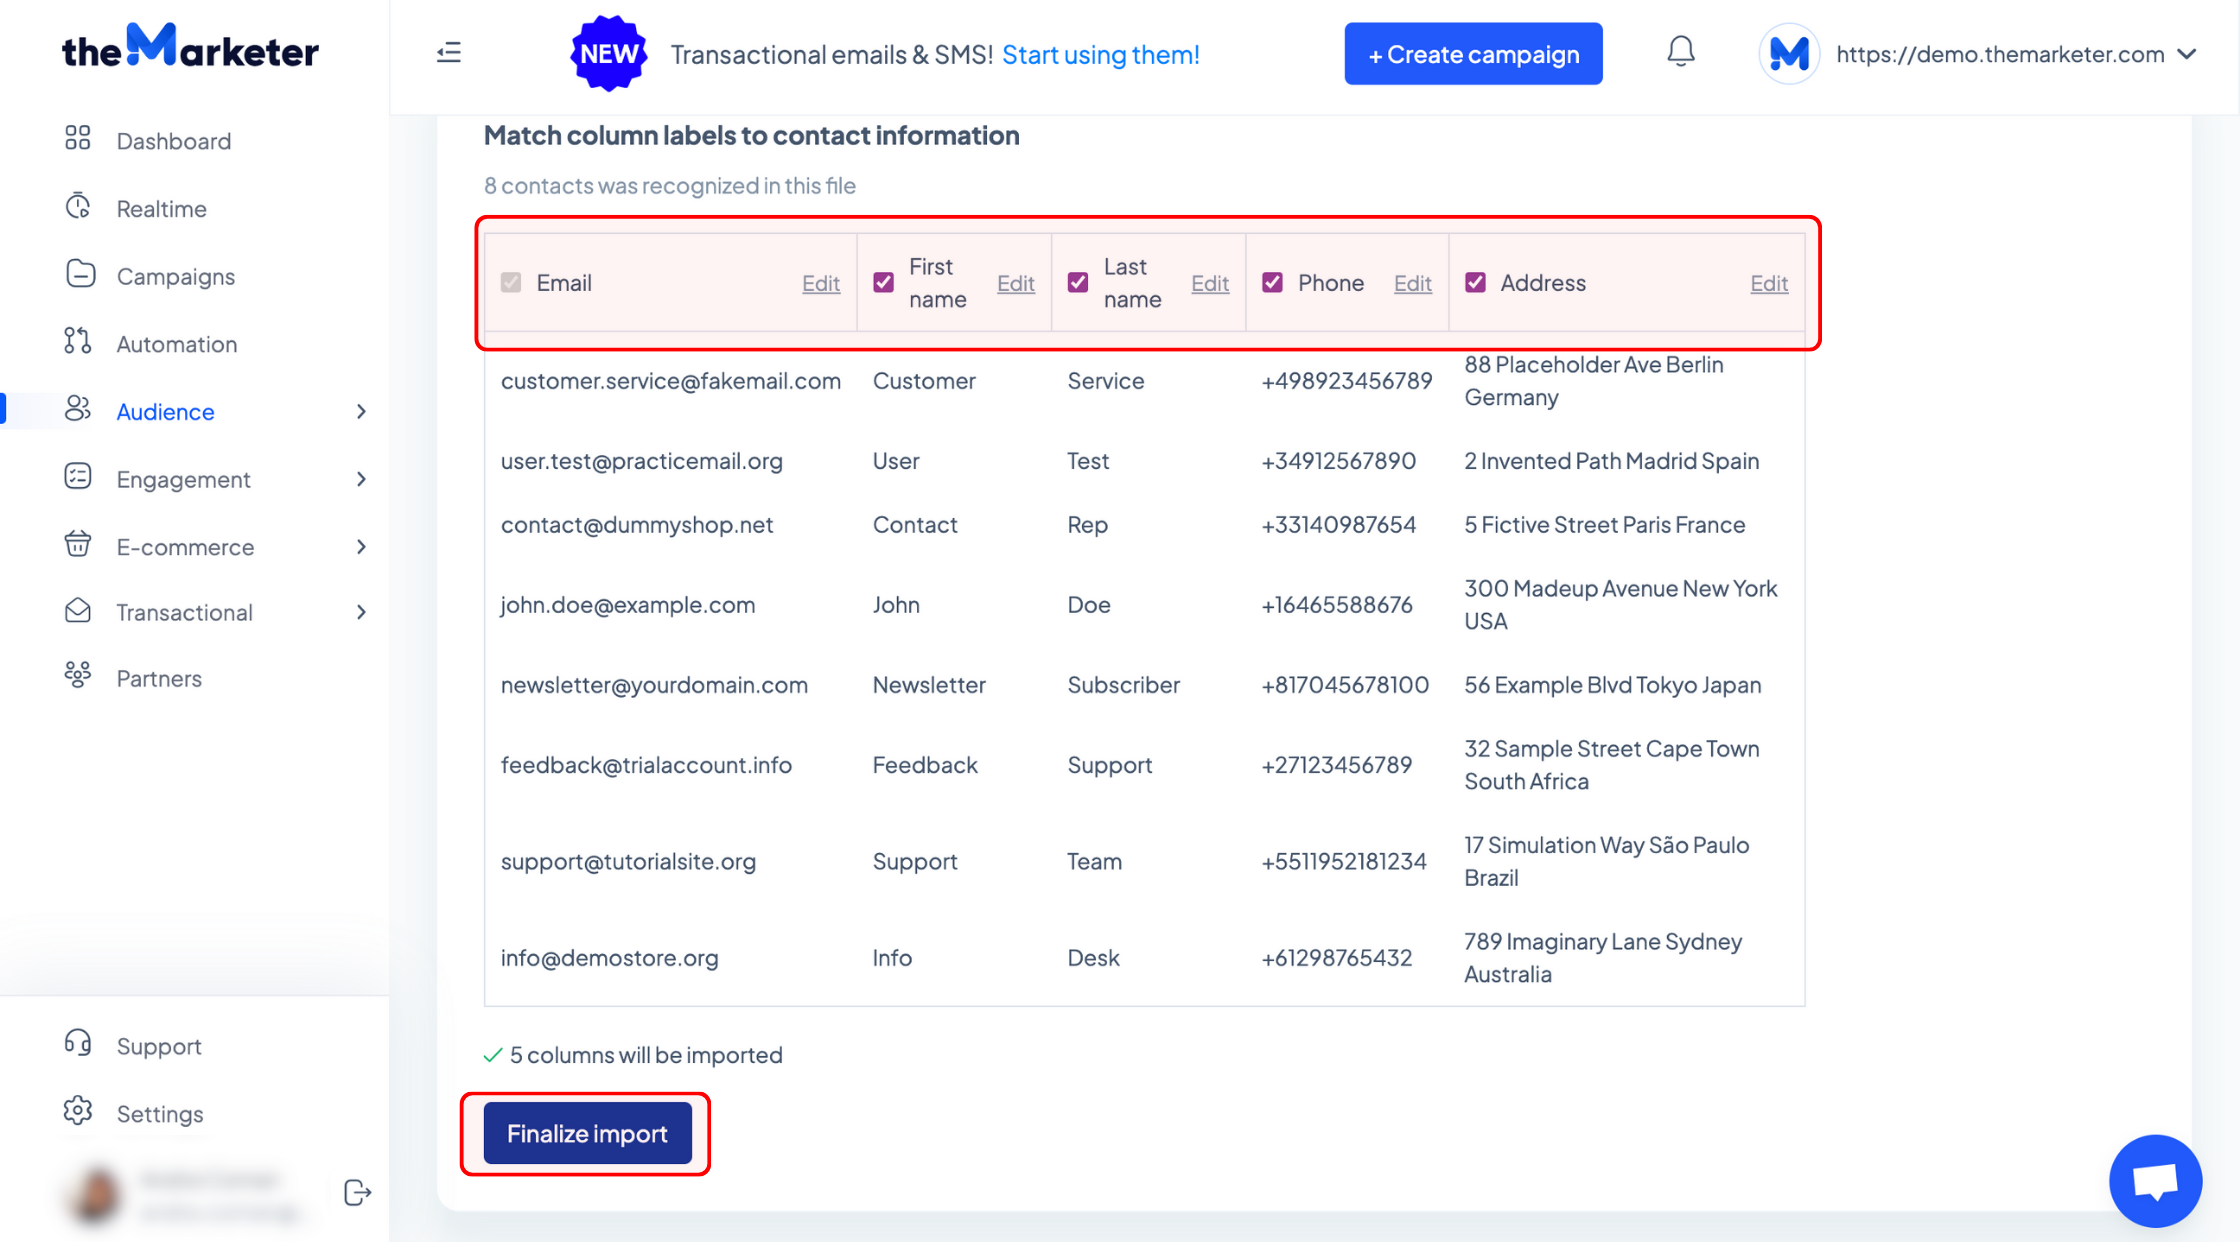
Double-check the headers of the other columns as well and click the ‘Edit’ button to change them. Depending on the data set you copied & pasted, the system might label first name values as ‘Last name’ or ‘City’, for example, without marking them in red. If all the information is correct, click the ‘Finalize import’ button.
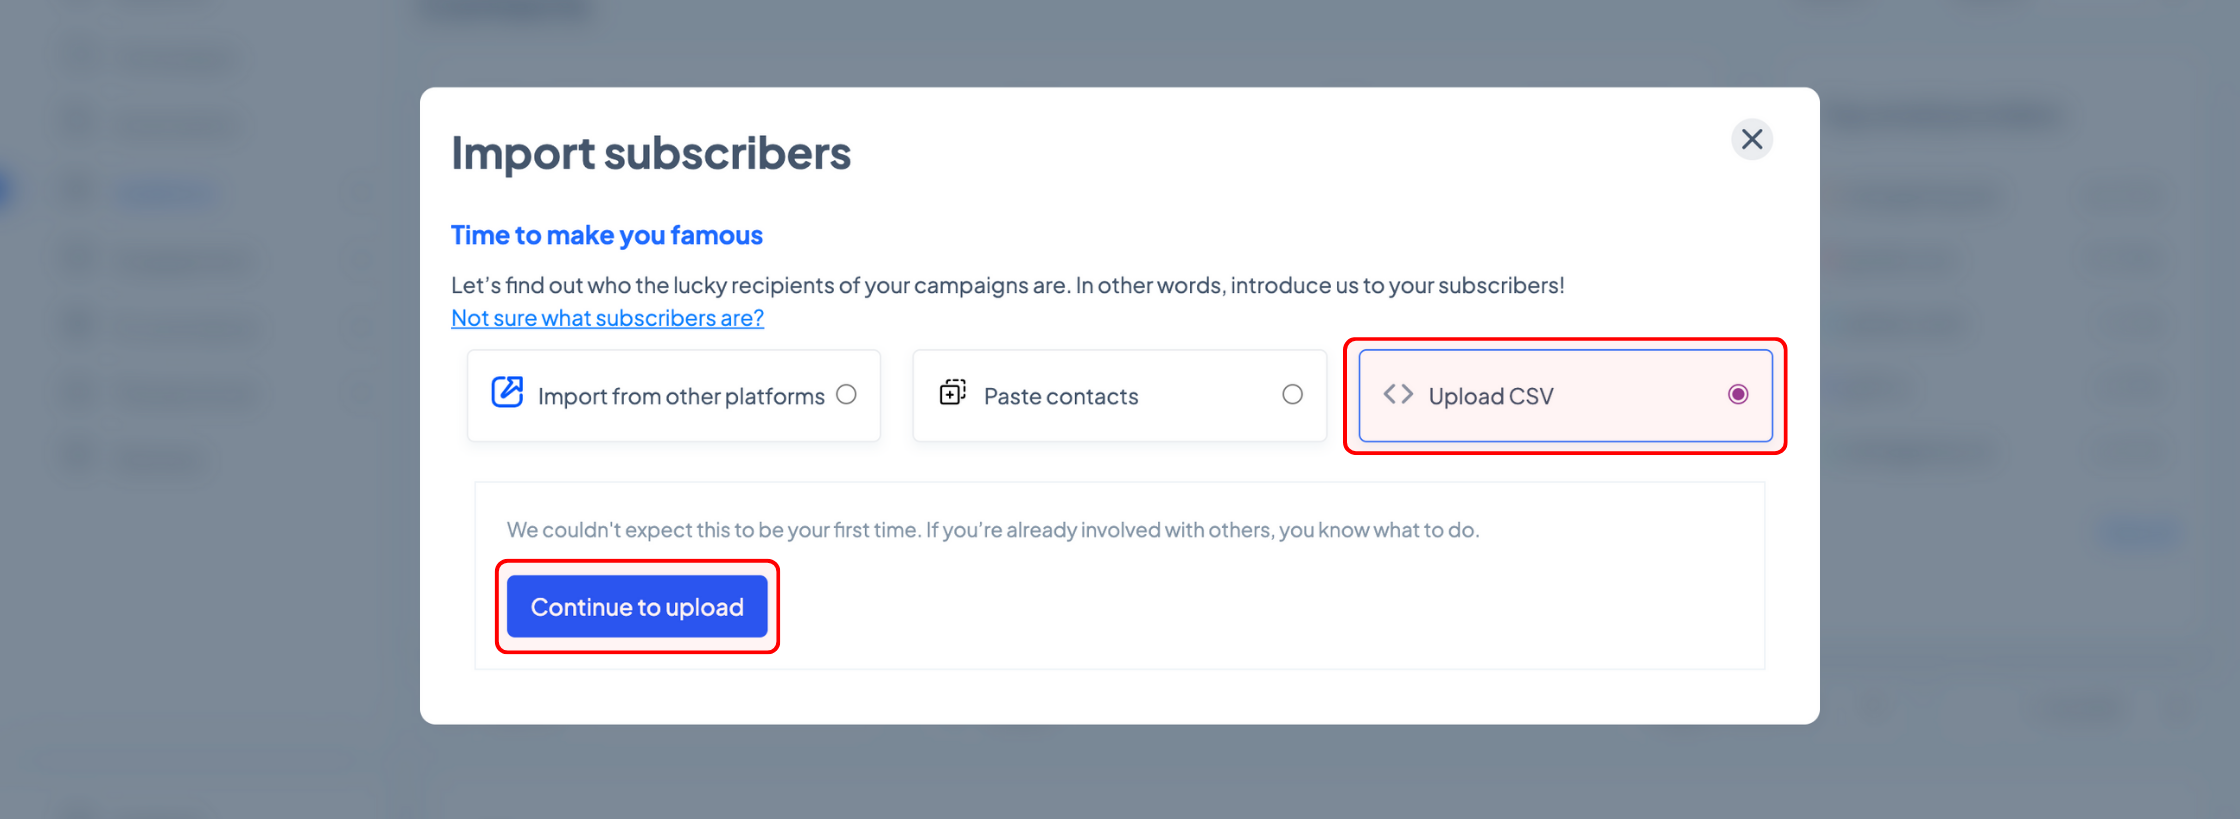
3. Upload a CSV file
If you don’t use one of the platforms which are currently supported for transferring subscribers, you can always upload your lists via CSV files.
Head to ‘Audience’ > ‘Contacts’ and click the ‘Import’ button.
In the new pop-up, select ‘Upload CSV’ and click ‘Continue to upload’.
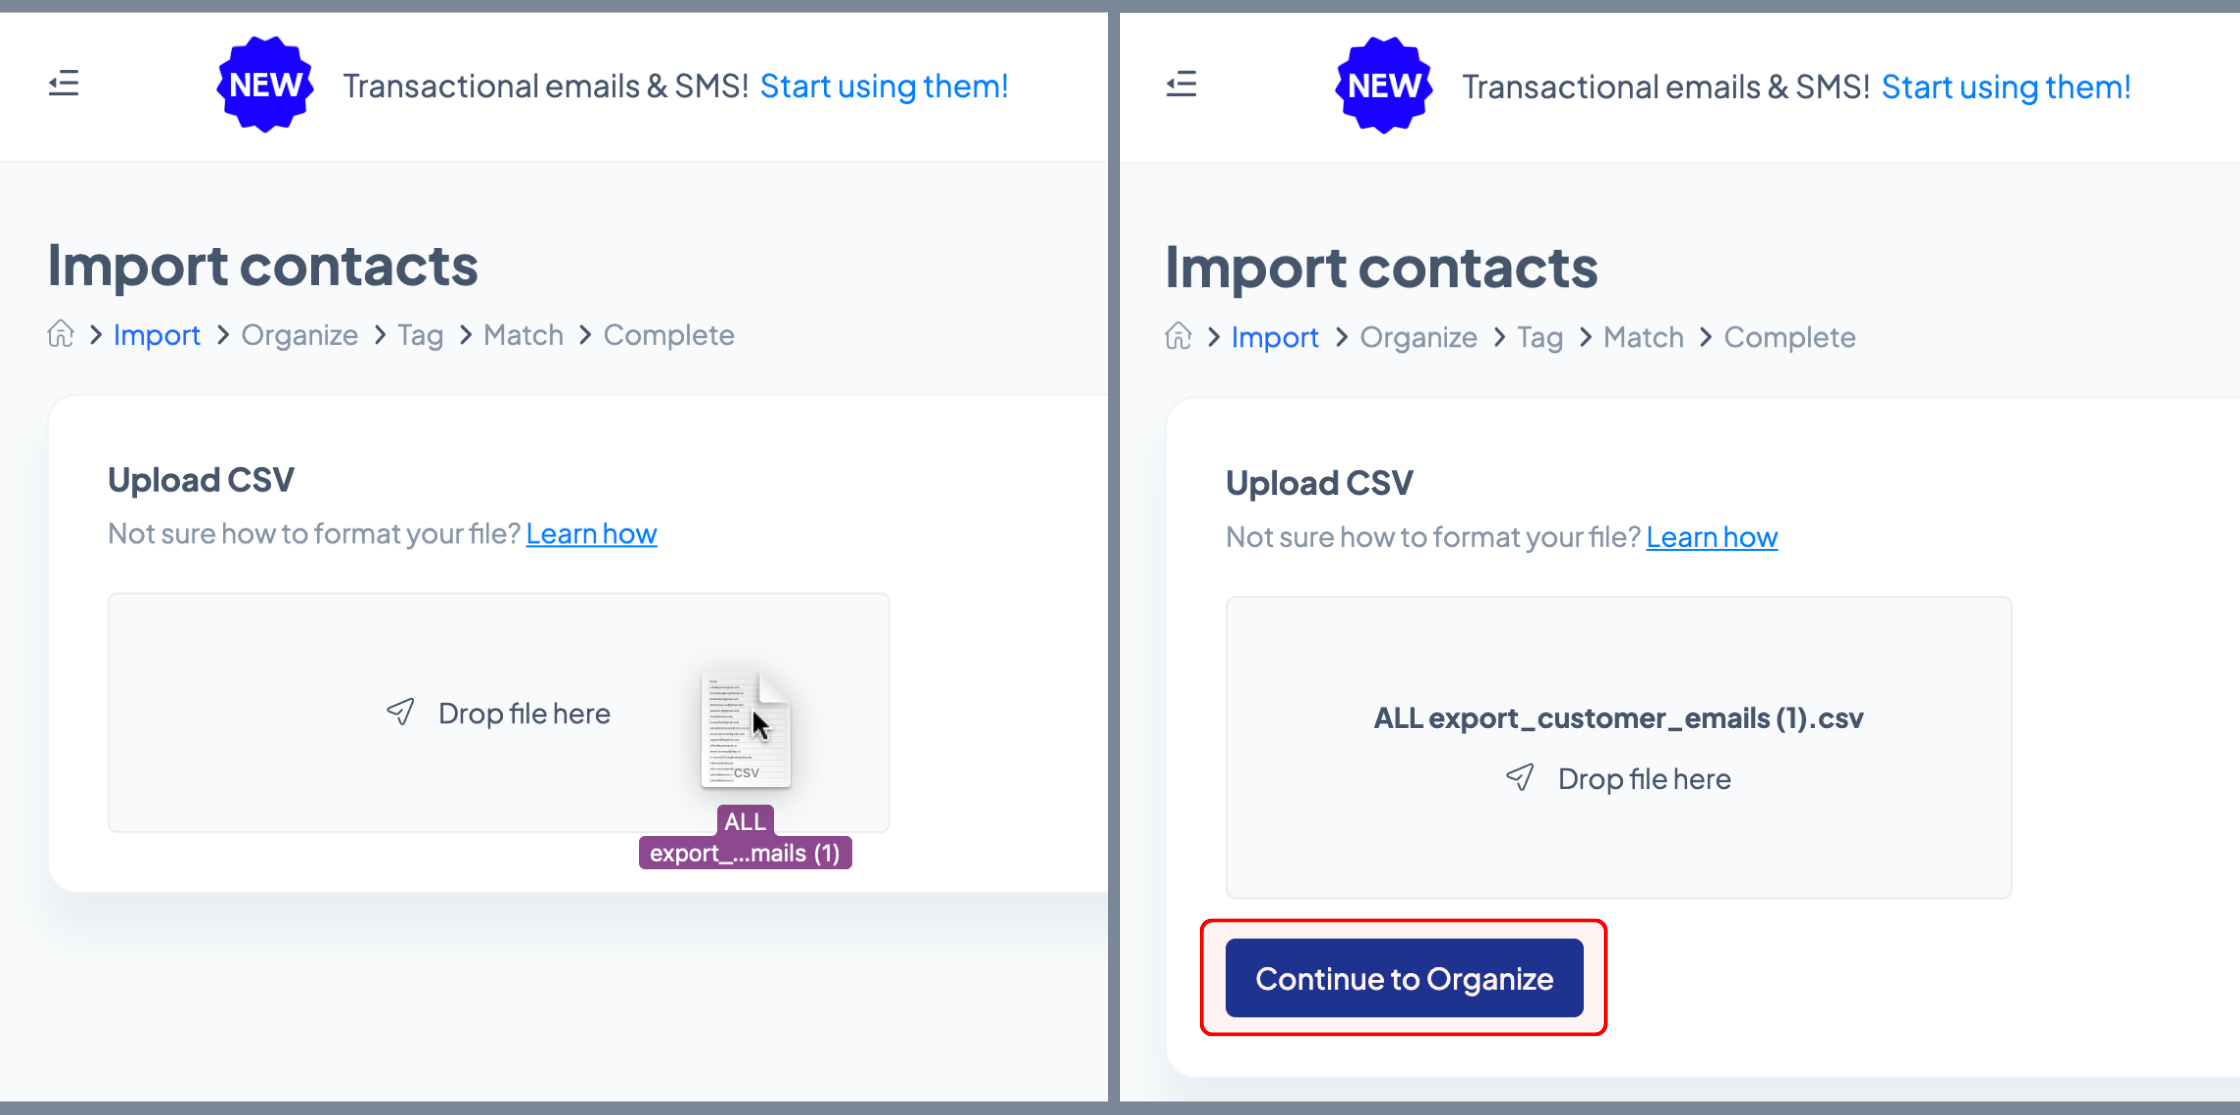
If you’re importing newsletter subscribers, the only field your CSV file must include is ‘Email’. Similarly, if you’re importing SMS subscribers, the file must contain a ‘Phone’ column. You can also import any custom subscriber attributes you might have in your existing tool.
To learn how to format your CSV file for subscriber import, click here
Drag & drop your CSV file in the dedicated area or click the ‘Browse’ button to locate the file on your device then click ‘Continue to Organize’.
Starting this point, the process becomes similar to copying and pasting contacts.
Depending on how you collected your contacts or how long ago you collected them, you might need to re-confirm their subscriber status to comply with Data Protection regulations. You can use the drop-down options to import your contacts with a ‘Subscribed’ or ‘Unsubscribed’ status, then click ‘Continue to Tag’.
Next up, you can tag the contacts in your CSV file with one of the tags you’ve previously created. Click the drop-down menu to browse them or click ‘Create new tag…’ to add a custom tag. Once you’re done, click the ‘Continue to Match’ button.
Next, you should check whether the system has correctly identified the data you pasted during the previous steps. Click ‘Resolve’ next to the headers of the unrecognized data (marked with red) and use the drop-down menu to assign one of the default labels to that column or create a custom one by selecting the ‘Create new column…’ option.
Double-check the headers of the other columns as well and click the ‘Edit’ button to change them. If all the information is correct, click the ‘Finalize import’ button.
Once you’ve imported your contacts, you're ready to engage with them in more meaningful ways and start shaping those lasting connections.
Happy emailing!
Related articles
STILL HAVE QUESTIONS?