/ Knowledge base /
How to set up Automated SchedulingHow to set up Automated Scheduling
Automated Scheduling is the ultimate AI-powered email assistant. It creates, personalizes, and automates your newsletter campaigns with zero effort. Follow this step-by-step guide to enable and customize Automated Scheduling.
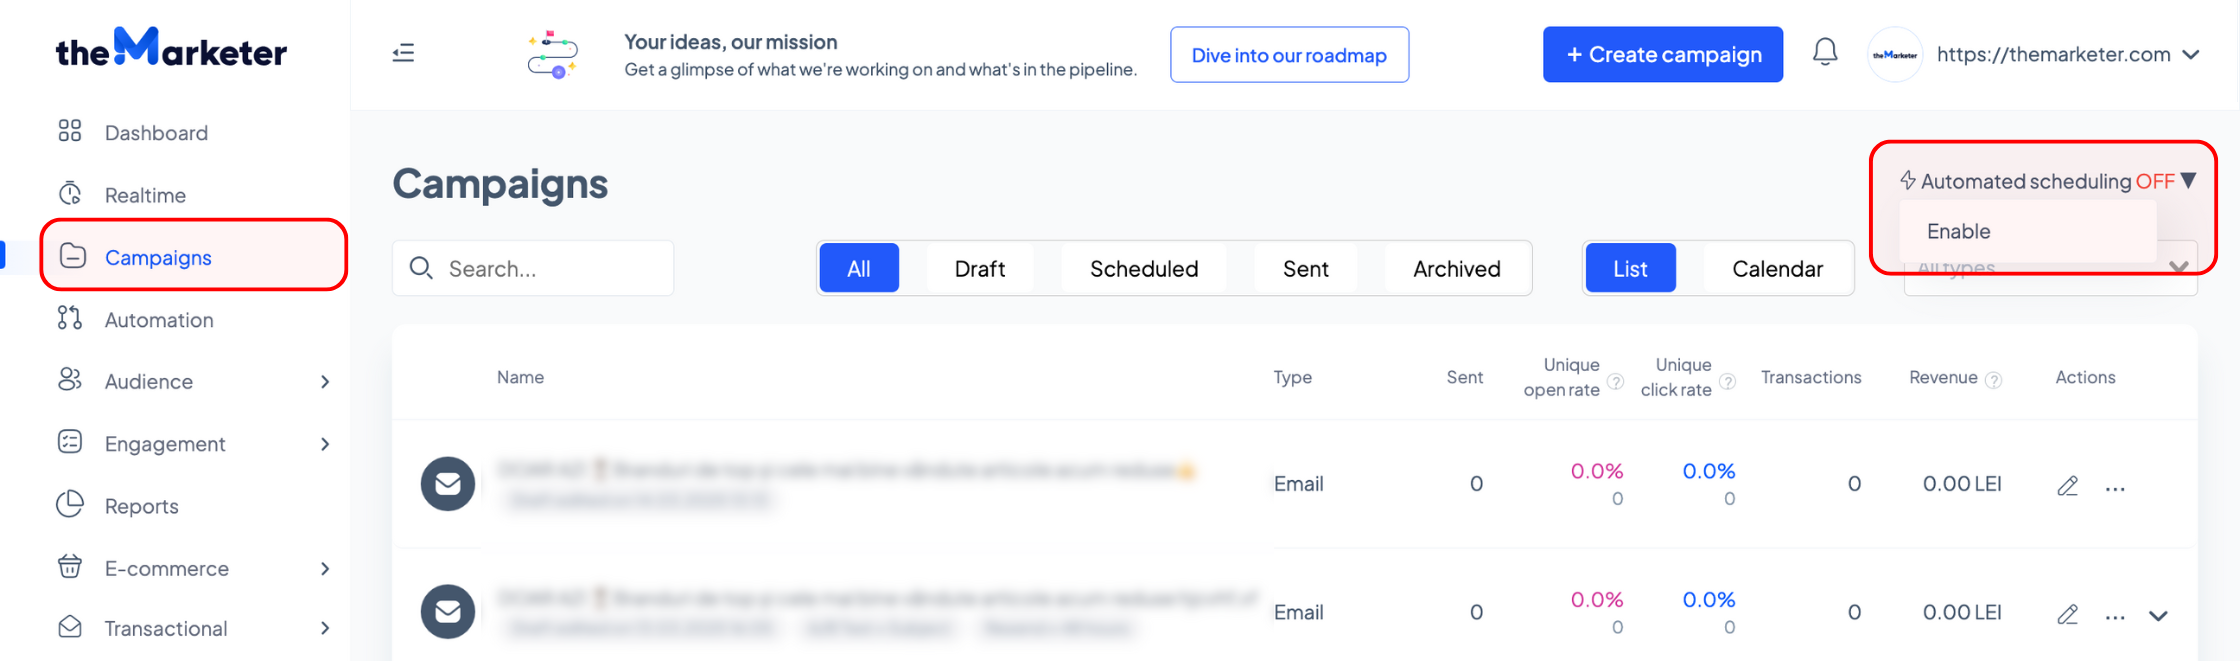
1. Log in to your theMarketer account and go to the Campaigns section
In the top-right corner, you’ll see a new option labeled ‘Automated Scheduling’. Click on it and select ‘Enable’ to get started.
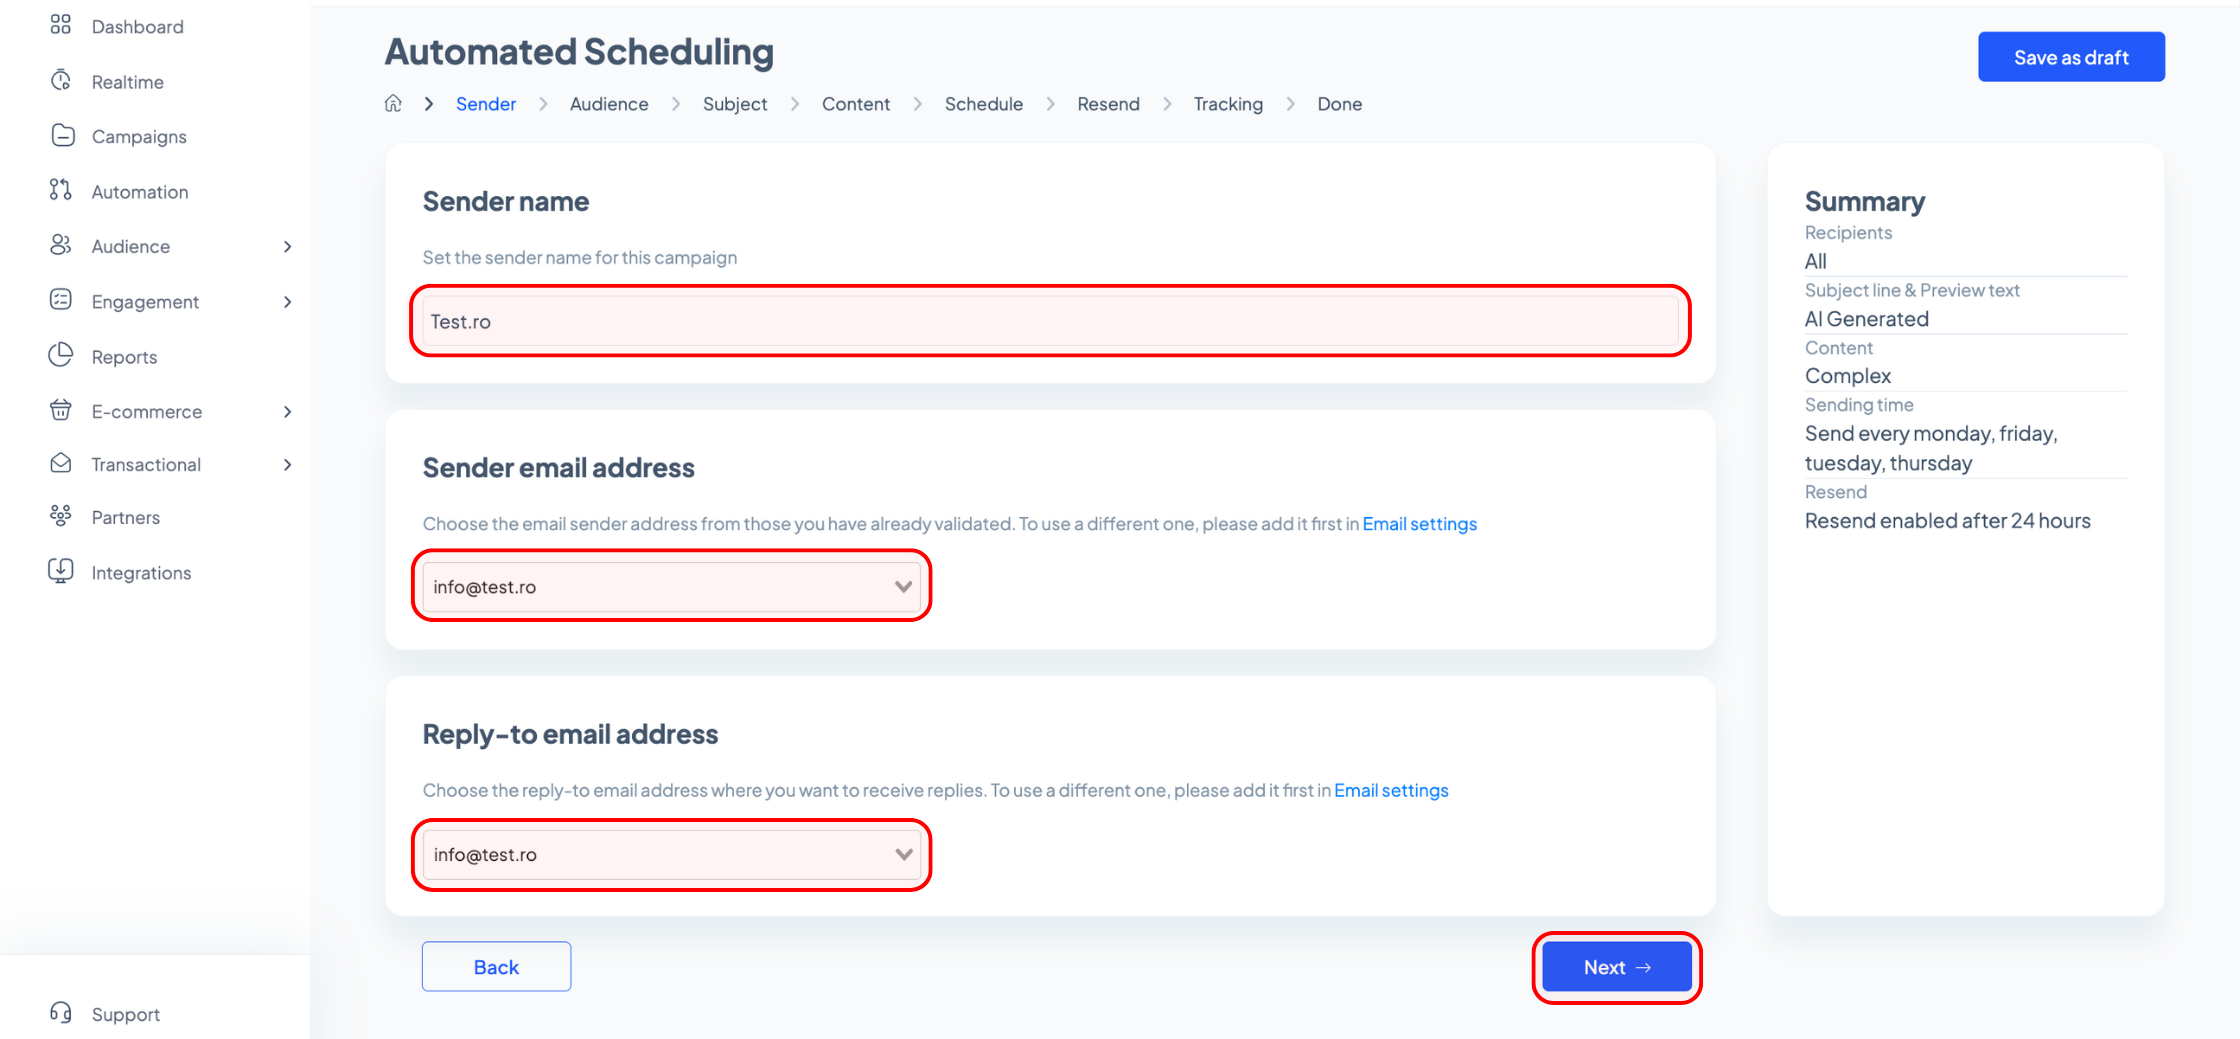
2. Check or edit the sender name, email address, and reply-to address
These must be validated email addresses in your account. To use a different sender address, go to your Email Settings to add and validate it first. Once you’re done, click ‘Next’.
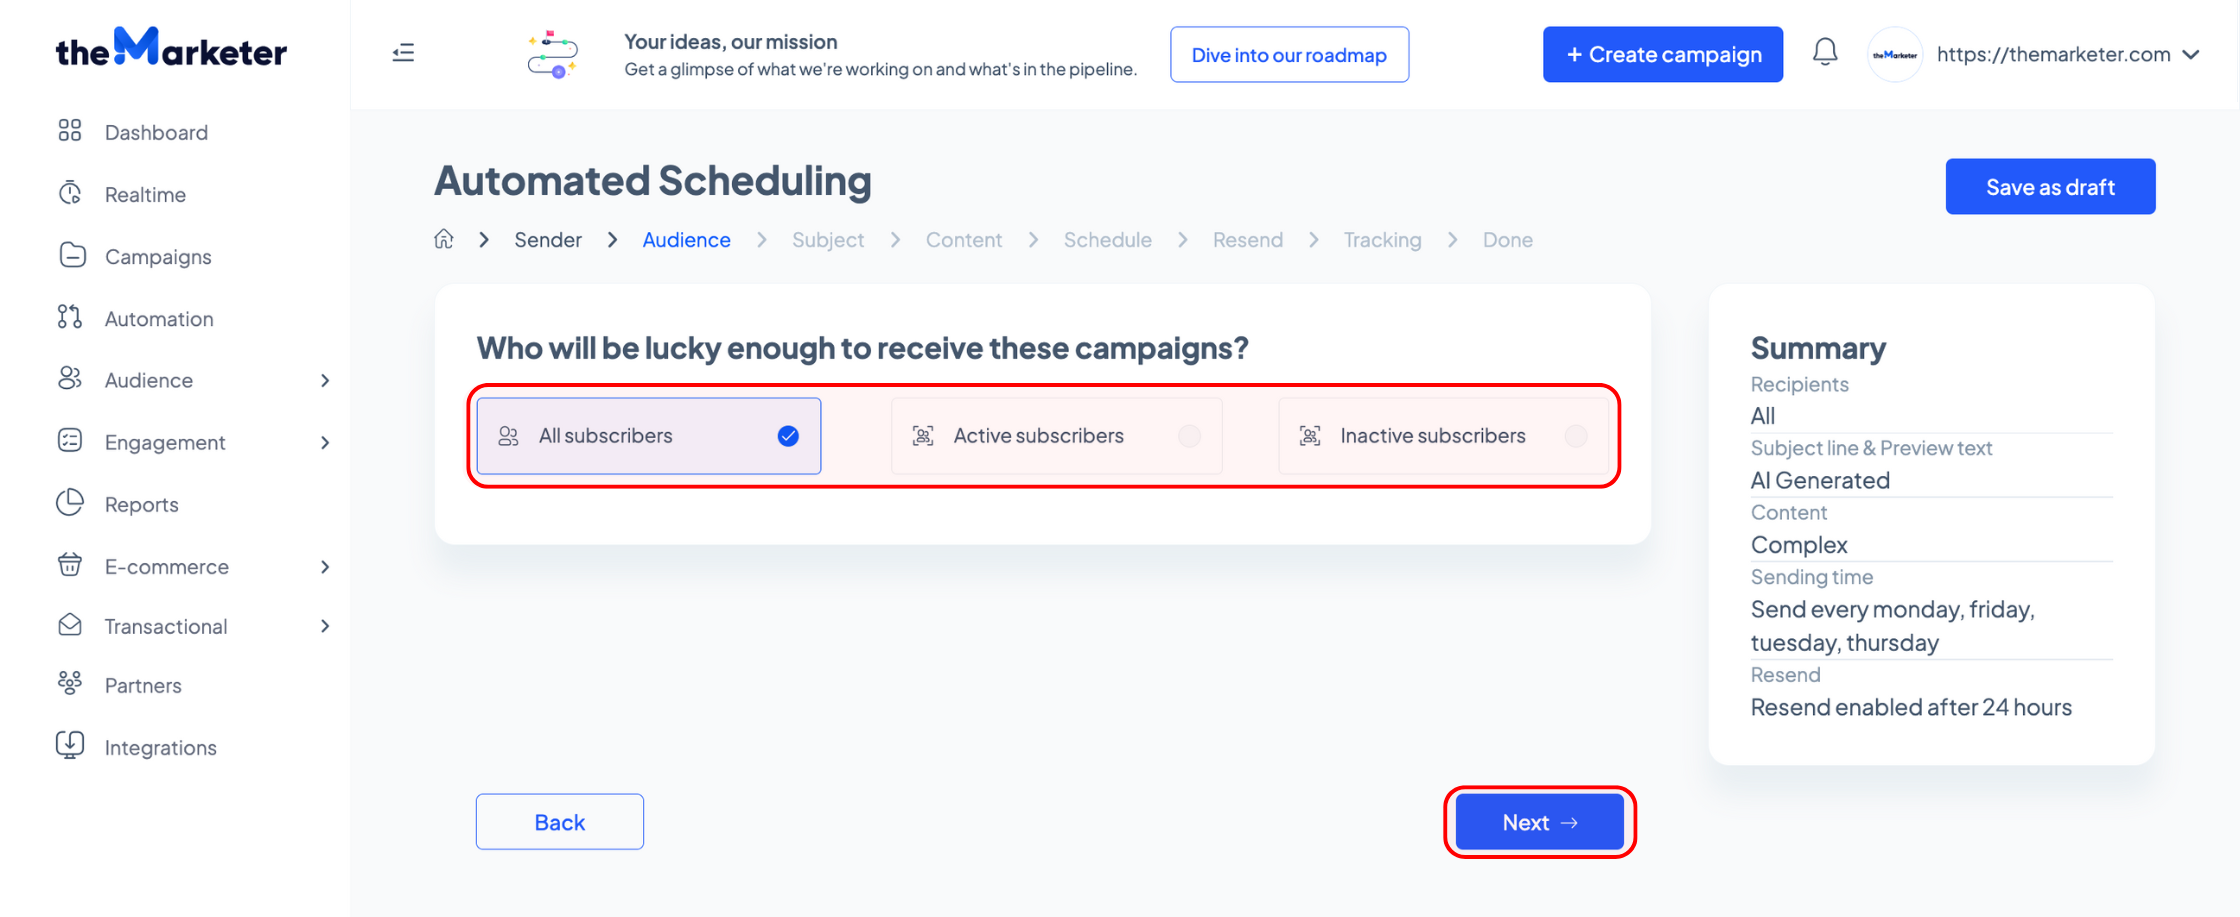
3. Select the target audience for your automated newsletters
You have three options: all subscribers, active subscribers, and inactive subscribers. Choose the audience that aligns with your campaign goals and click ‘Next’.
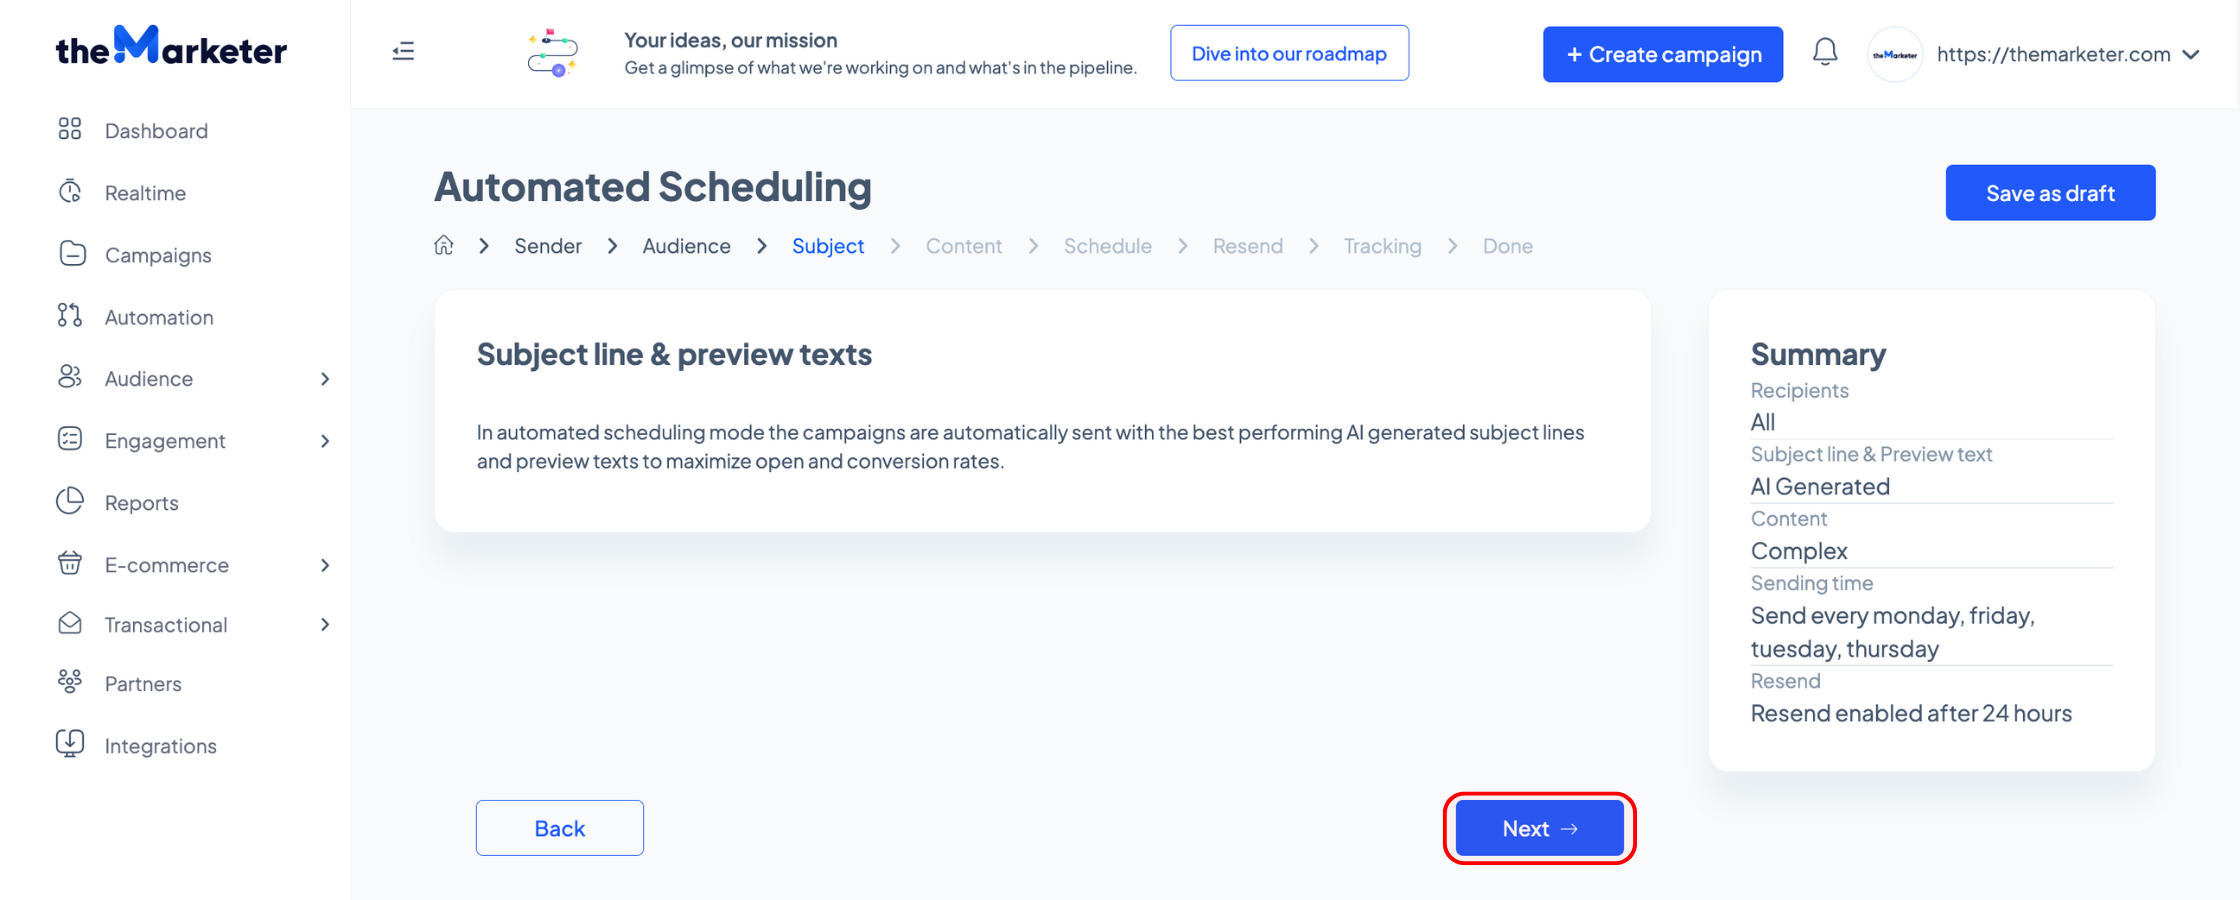
4. AI-generated subject lines and preview texts
theMarketerAssistant automatically selects the best-performing AI-generated subject lines and preview texts to maximize open and conversion rates. No extra input is needed here—simply click ‘Next’ to continue.
5. Choose your newsletter content structure
Decide how lengthy your newsletters should be by selecting one of the following layouts:
- Light: 1 banner + 1 product block
- Normal: 1 banner + 2 product blocks
- Complex: 2 banners + 3 product blocks
For each content section, use the dropdown menus to specify the type of products or product recommendations to feature. For example, you could select either ‘Most discounted’, ‘Bestsellers’, or ‘New arrivals’ for banners to pique attention and ‘Recommended for you’, ‘Frequently bought together’, ‘Others you may like’, or ‘Recently viewed’ for the product blocks to boost conversions.
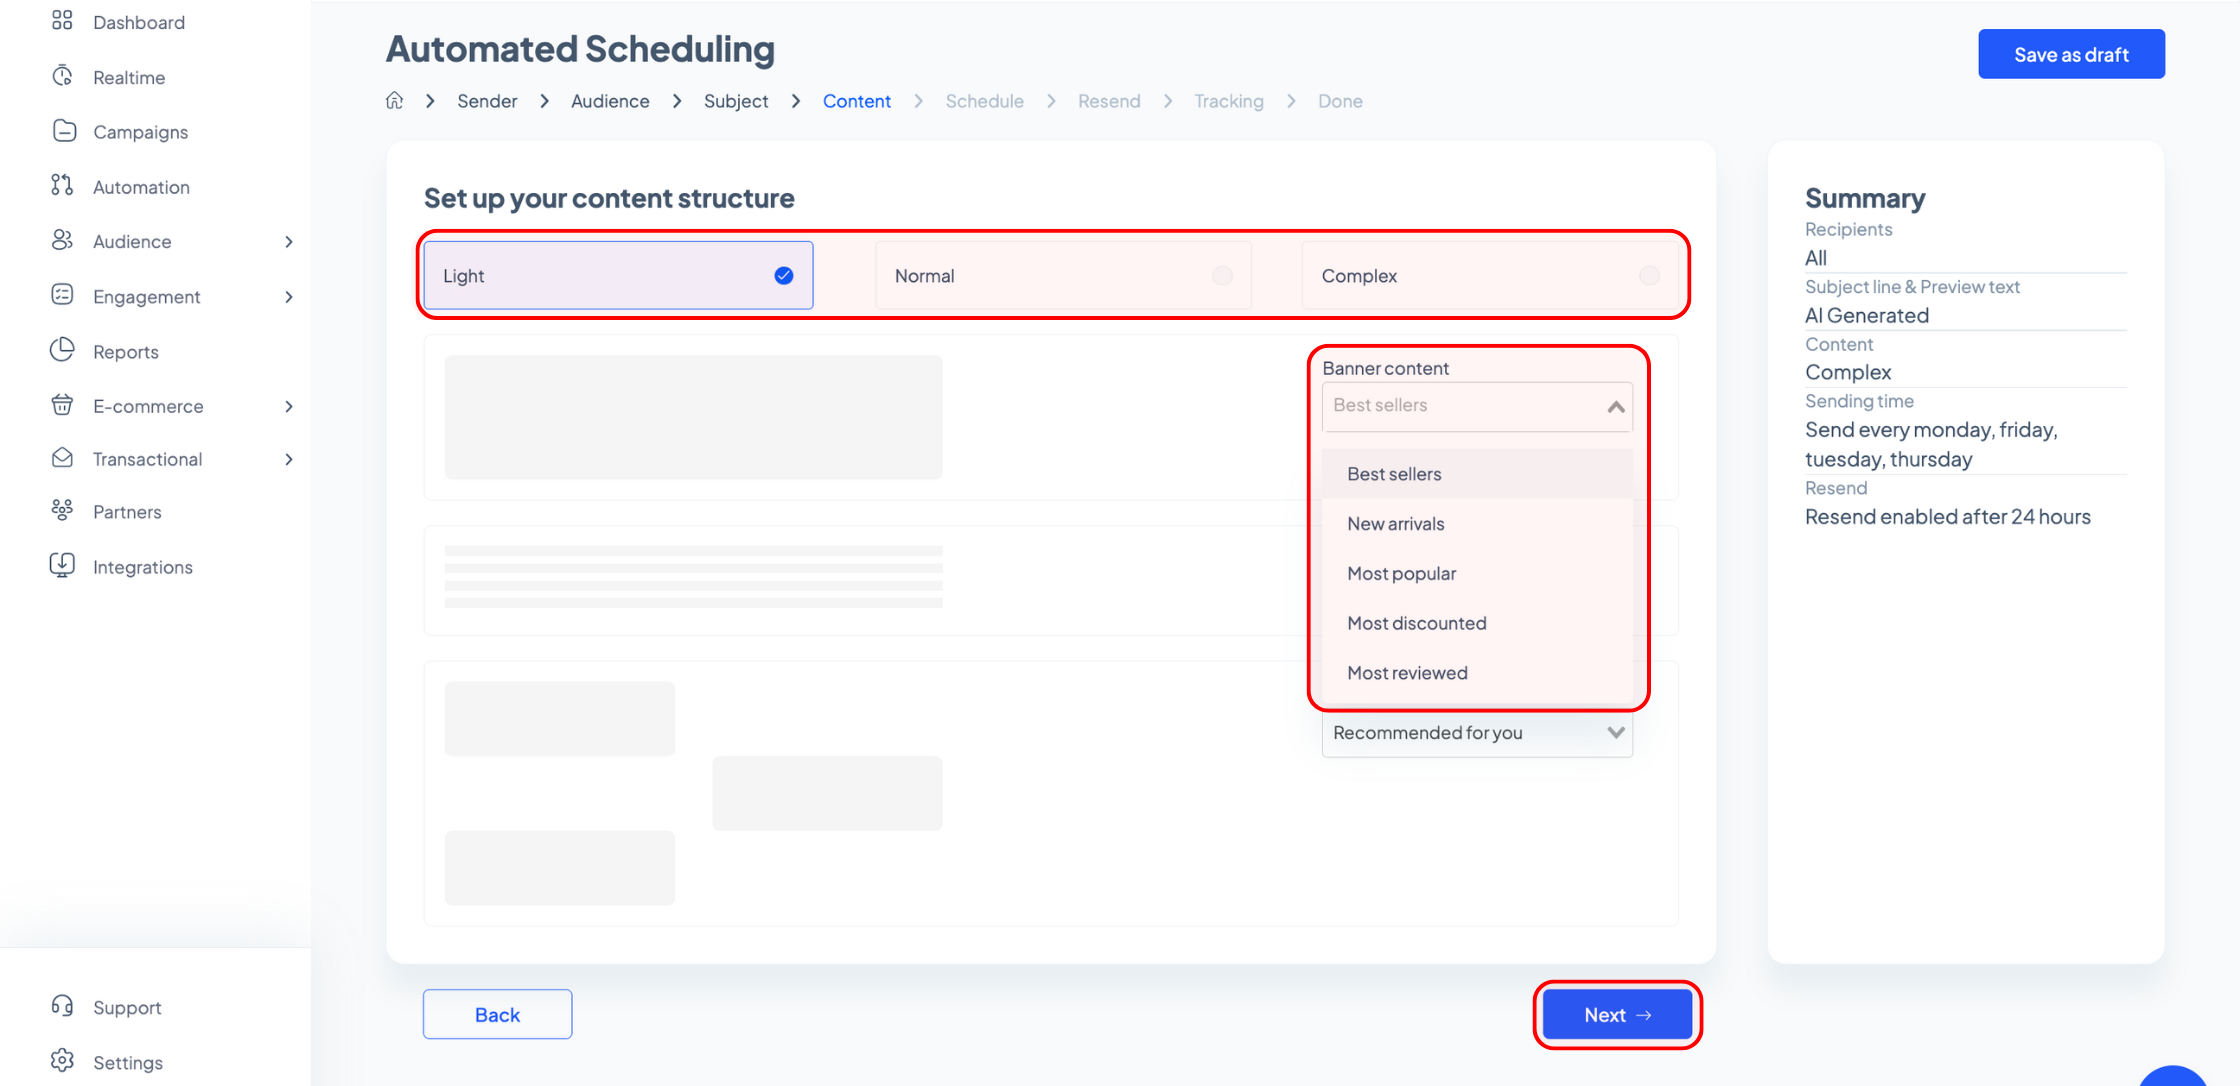
Choose recommendations that align with your eCommerce strategy, discount frequency, or new product launches. Once you’re happy with your selection, click ‘Next’.
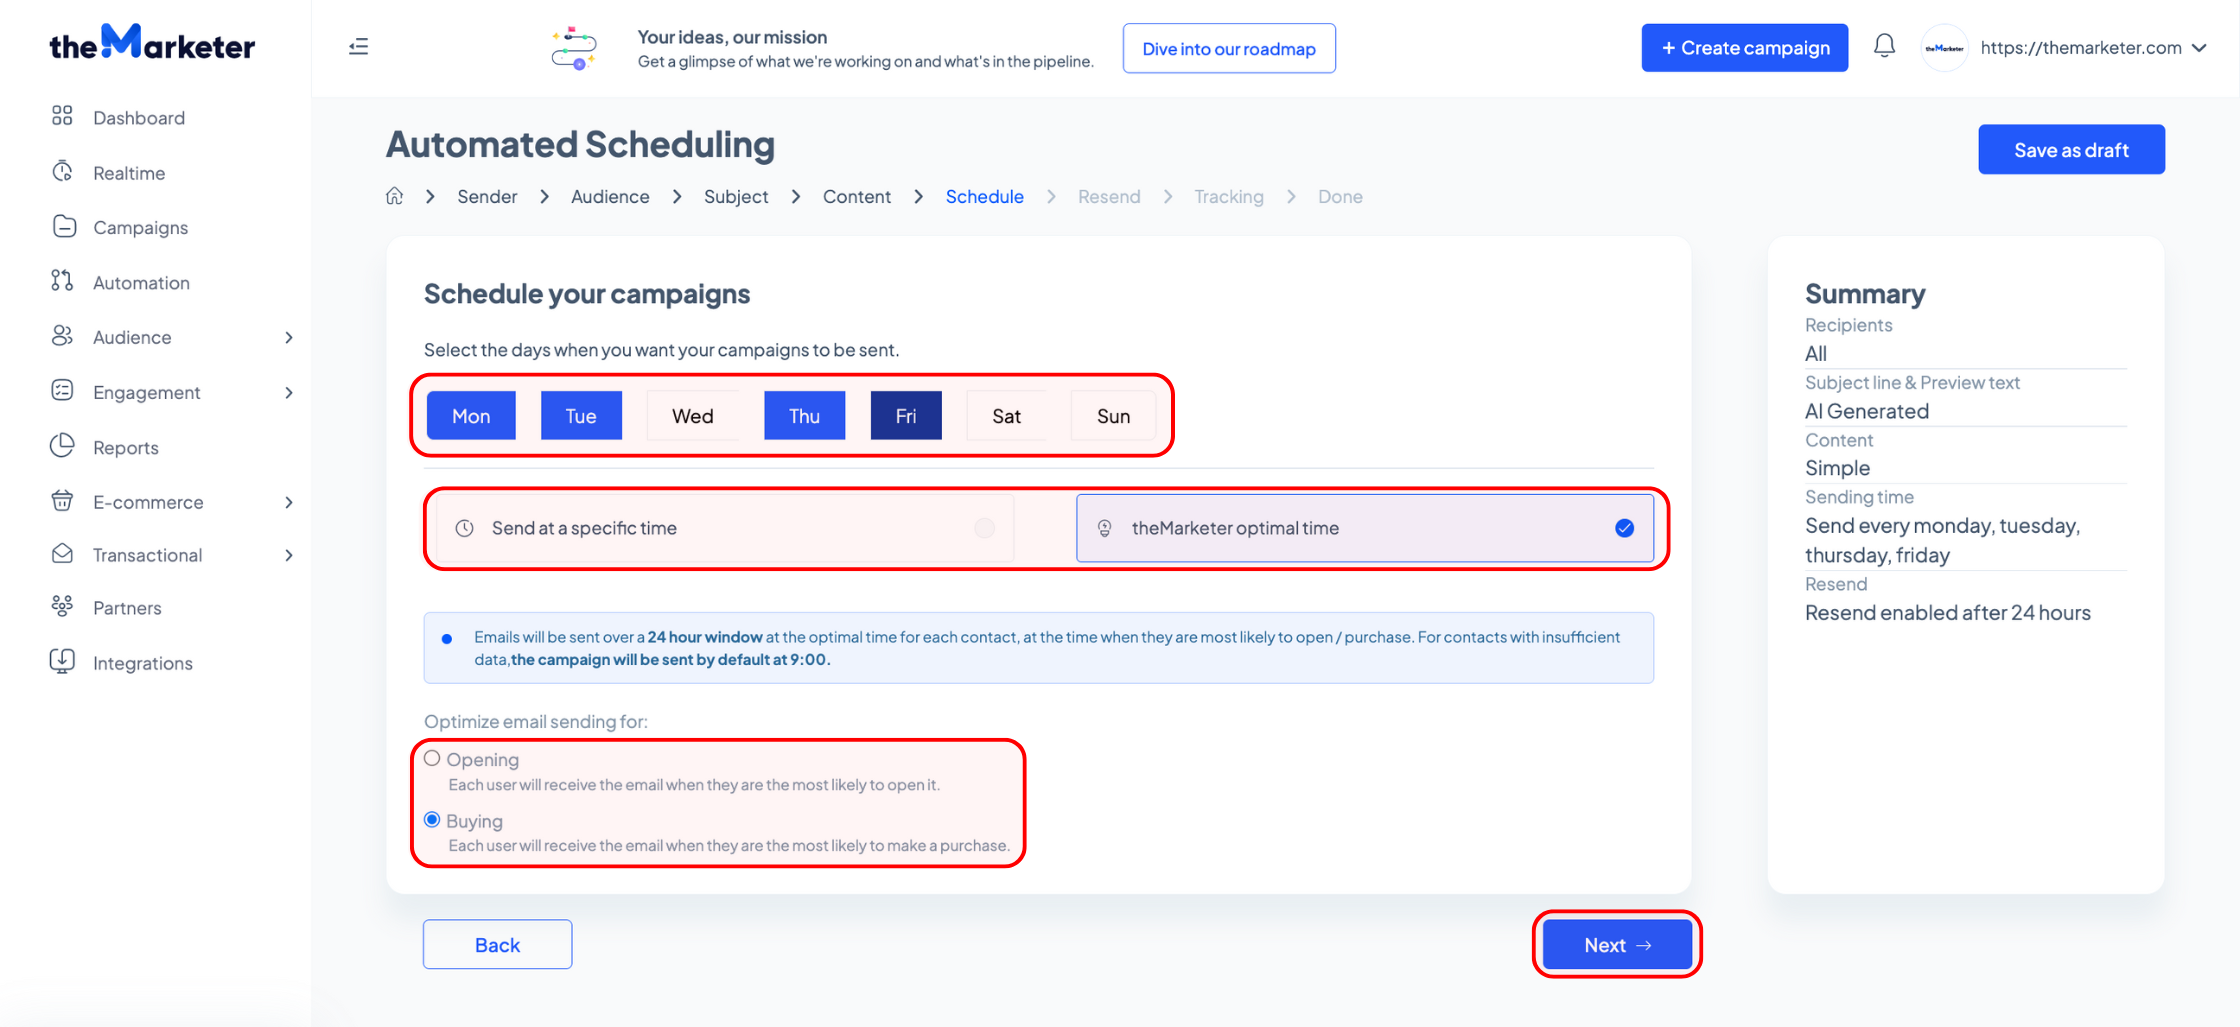
6. Set your sending schedule
Select the days of the week when your automated newsletters should be sent. A blue cell with white text indicates active sending days.
Keep in mind that you can choose between 1 and 7 days per week and the schedule must remain consistent week over week (e.g., every Tuesday).
For sending time, you have three options:
- Specific time: you set the exact time manually.
- theMarketer best specific time: automatically determined based on aggregate audience engagement data.
- theMarketer optimal time: the emails are sent out at the best time for each individual subscriber over 24 hours.
Click ‘Next’ when you’re done setting the schedule.
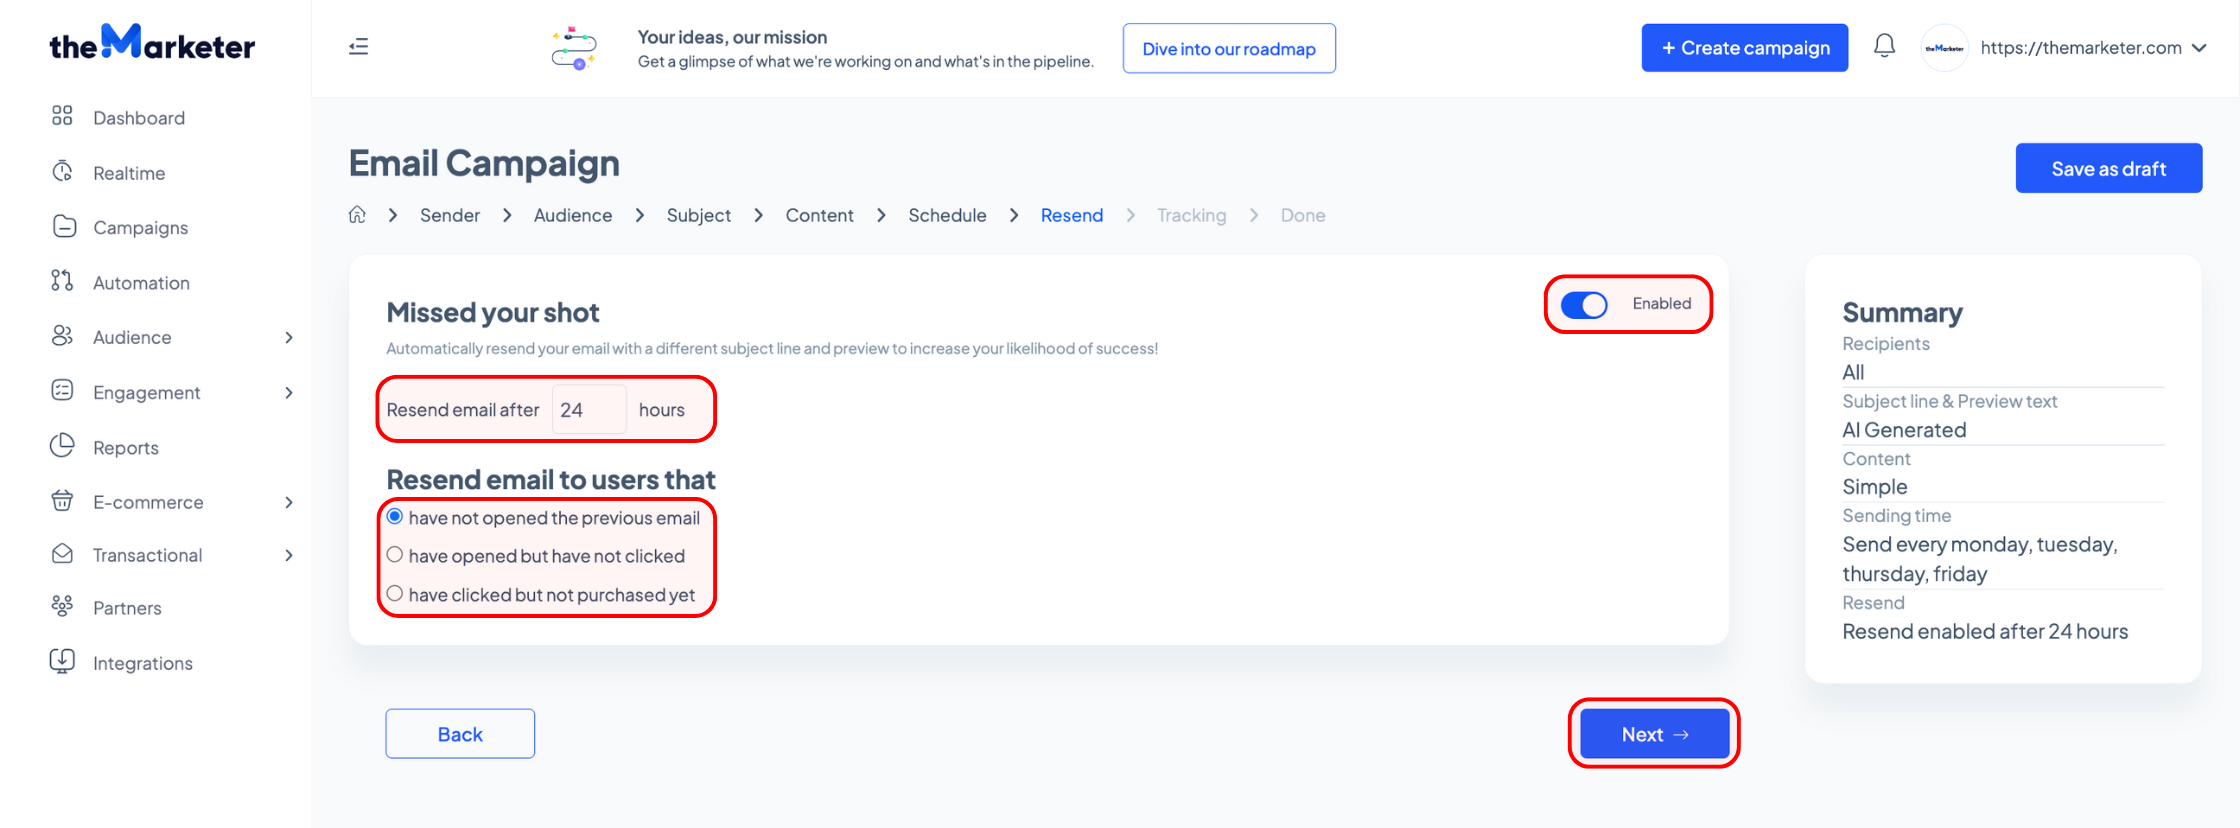
7. Maximize your success by activating the resend feature
Click the ‘Enable’ button and type the time delay in the corresponding ‘Resend email after’ field. Please bear in mind this is expressed in hours.
Next, choose who will receive the resent emails: subscribers who haven’t opened the original newsletters, those who opened but didn’t click it, or those who clicked but didn’t purchase.
To disable resends, click the toggle at the top-right.
Once you’re done, click ‘Next’.
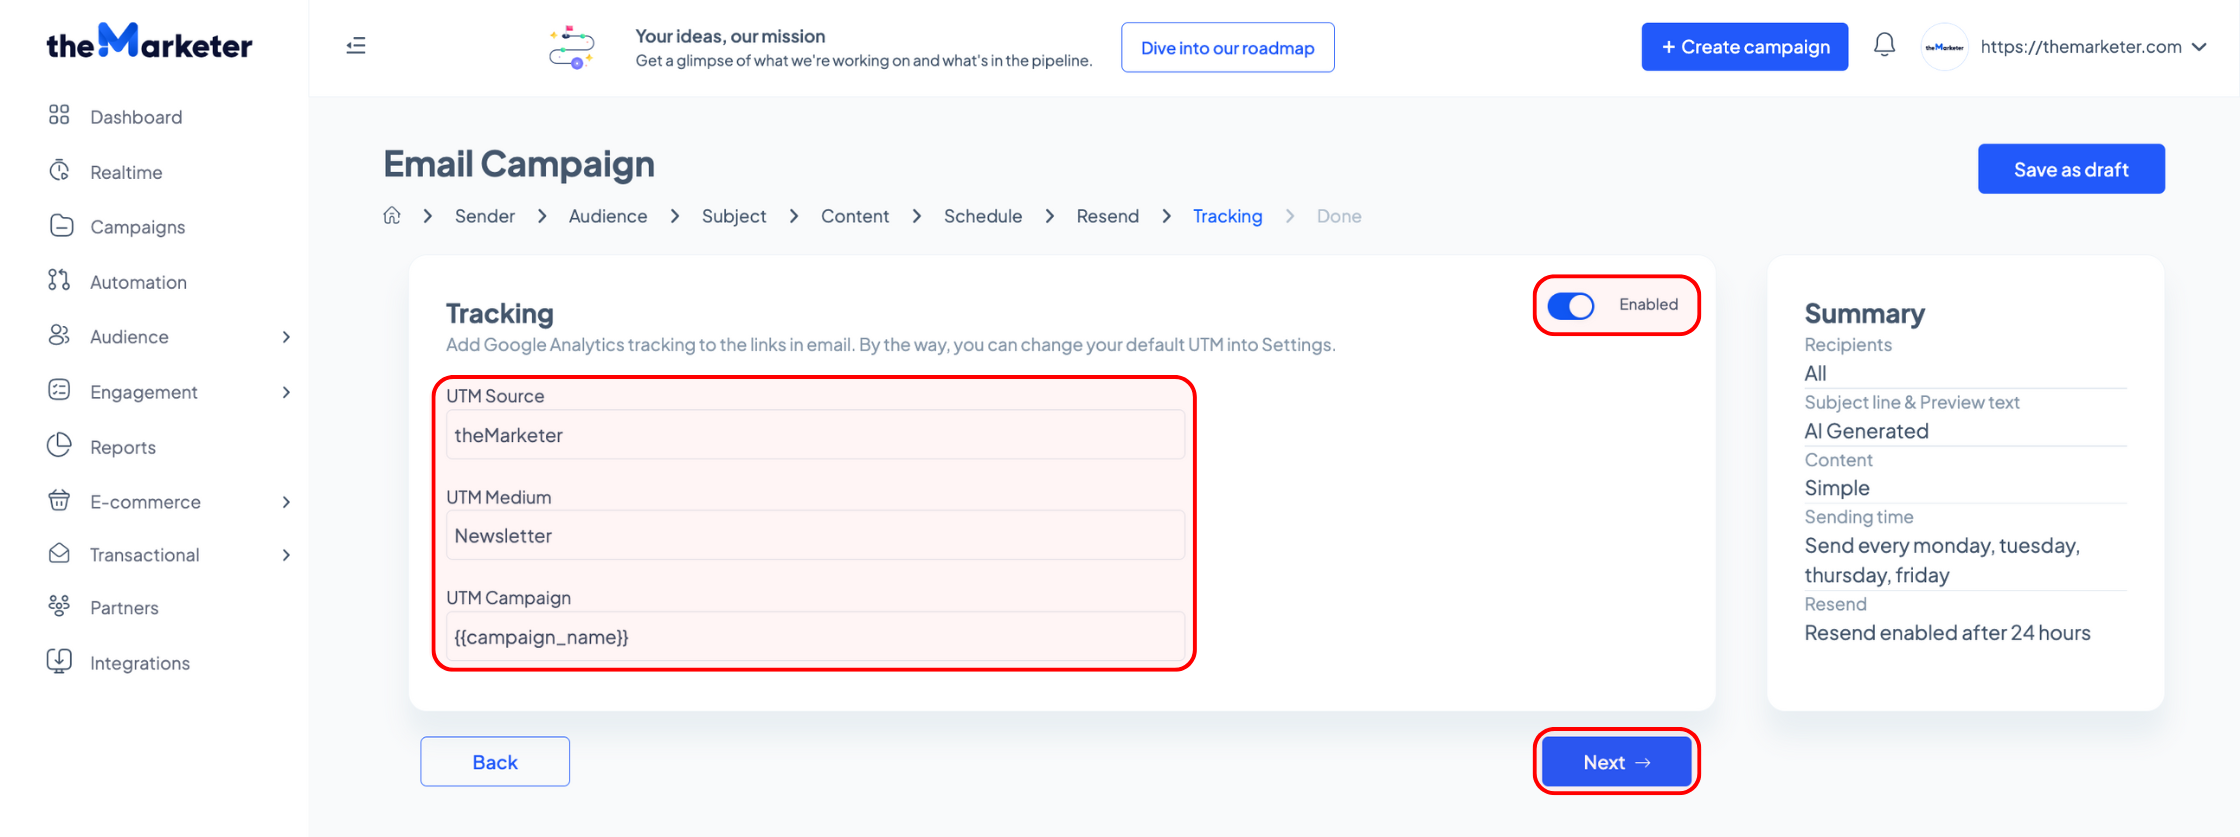
8. Track the success of your newsletters by enabling UTM tracking
To do so, click the ‘Enable’ button and customize the UTM Source, Medium, and Campaign fields according to your needs and preferences.
To disable tracking, click the blue toggle button.
Once finished, click ‘Next’ to activate YourSuperMarketer and have your newsletters generated, personalized, and sent automatically based on your settings.
If you need more time, click ‘Save as draft’.
To edit or disable Automated Scheduling, return to Campaigns, click the ‘Automated Scheduling’ option, and choose ‘Edit’ or ‘Disable’. Disabling the feature will require confirmation to prevent accidental deactivation.

And… you’re done! Automated Scheduling is now working in the background, delivering high-performing email campaigns while you focus on growing your business.
Related articles
STILL HAVE QUESTIONS?